Product Management
Product Listing Page
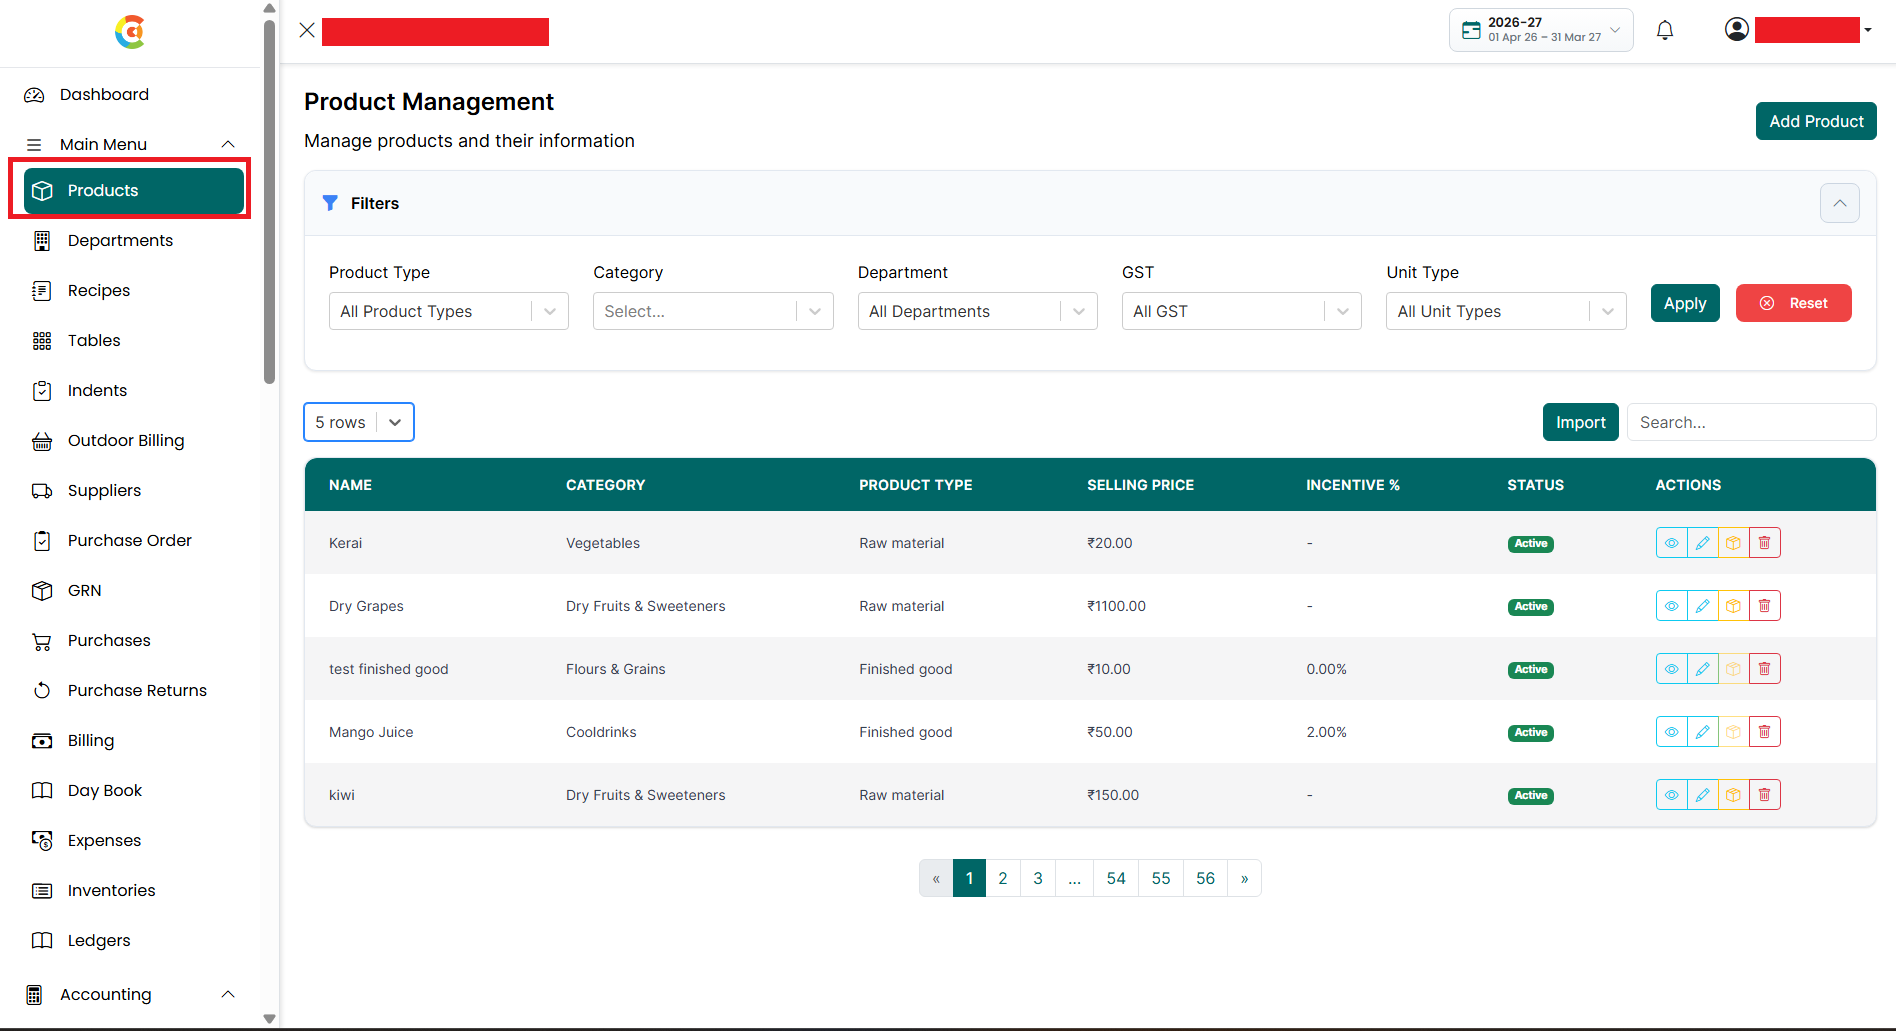
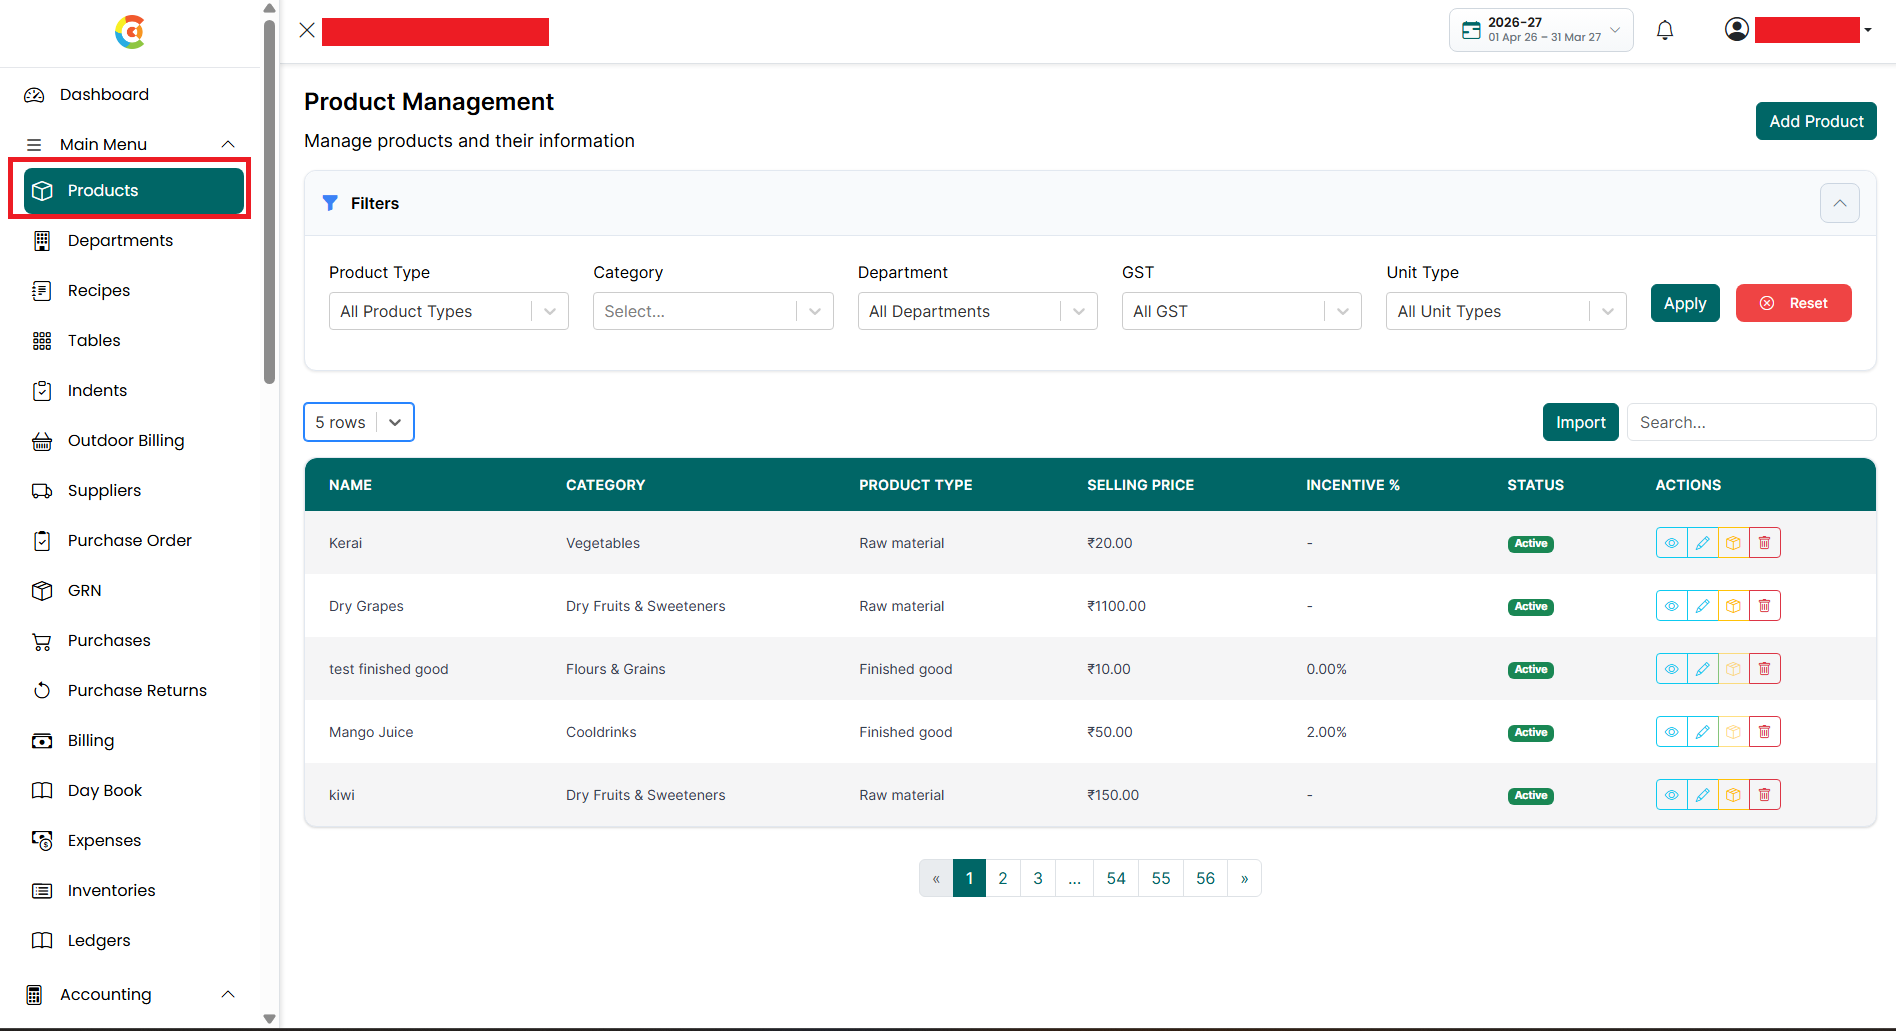
The Product Listing page shows all the products added to the application, along with their category, product type, pricing, and current status.
From this page, you can:
● Add a new product.
● View product details.
● Edit product information.
● Update the opening stock of a product.
● Delete or restore products.
● Import multiple products using an Excel file.
Products added here can be selected while creating:
● Recipes
● Purchase Orders
● Purchases
● Indent Requests
● Other inventory and product-related transactions
The Opening Stock option allows you to record the initial stock quantity and unit cost of a product for each branch before regular inventory transactions begin.
Products can also be classified using:
● Category
● Department
● Product Type
● Unit Type
● GST Percentage
● SAC/HSN Code
This helps organize products, maintain accurate inventory, and ensure the correct pricing and tax information is used throughout the application.
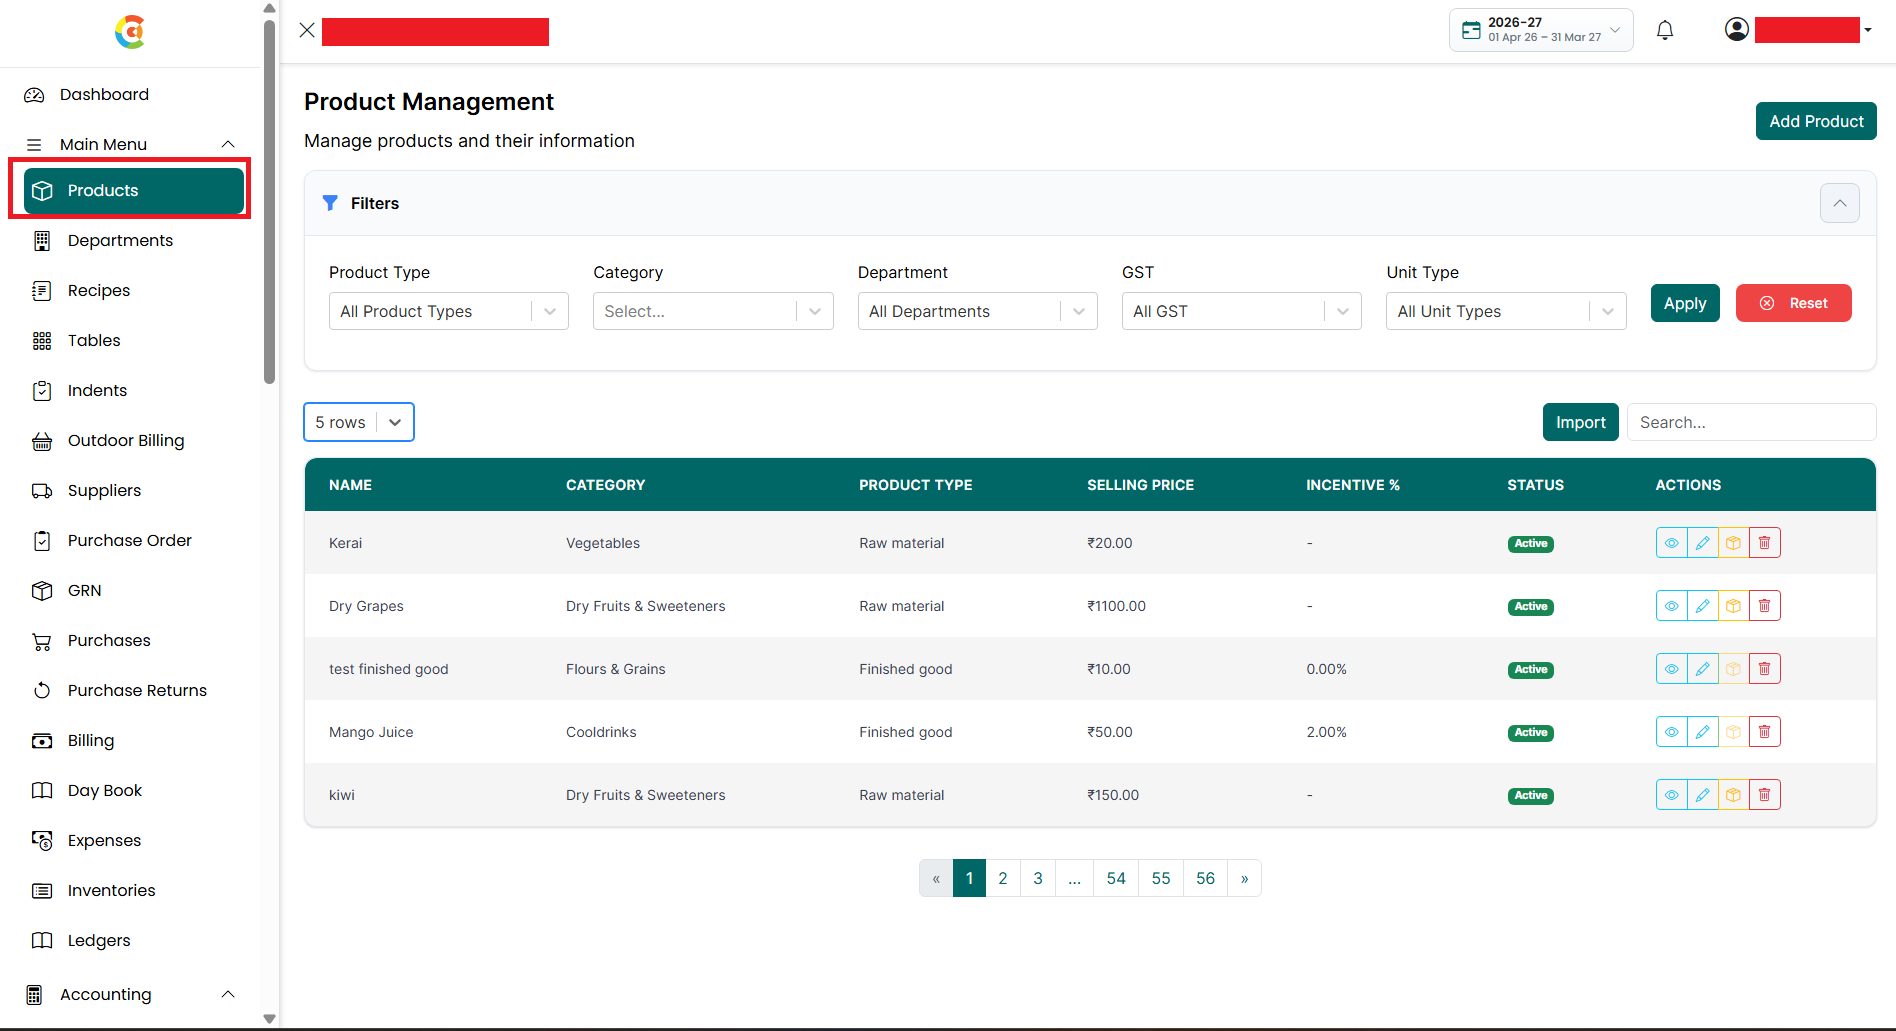
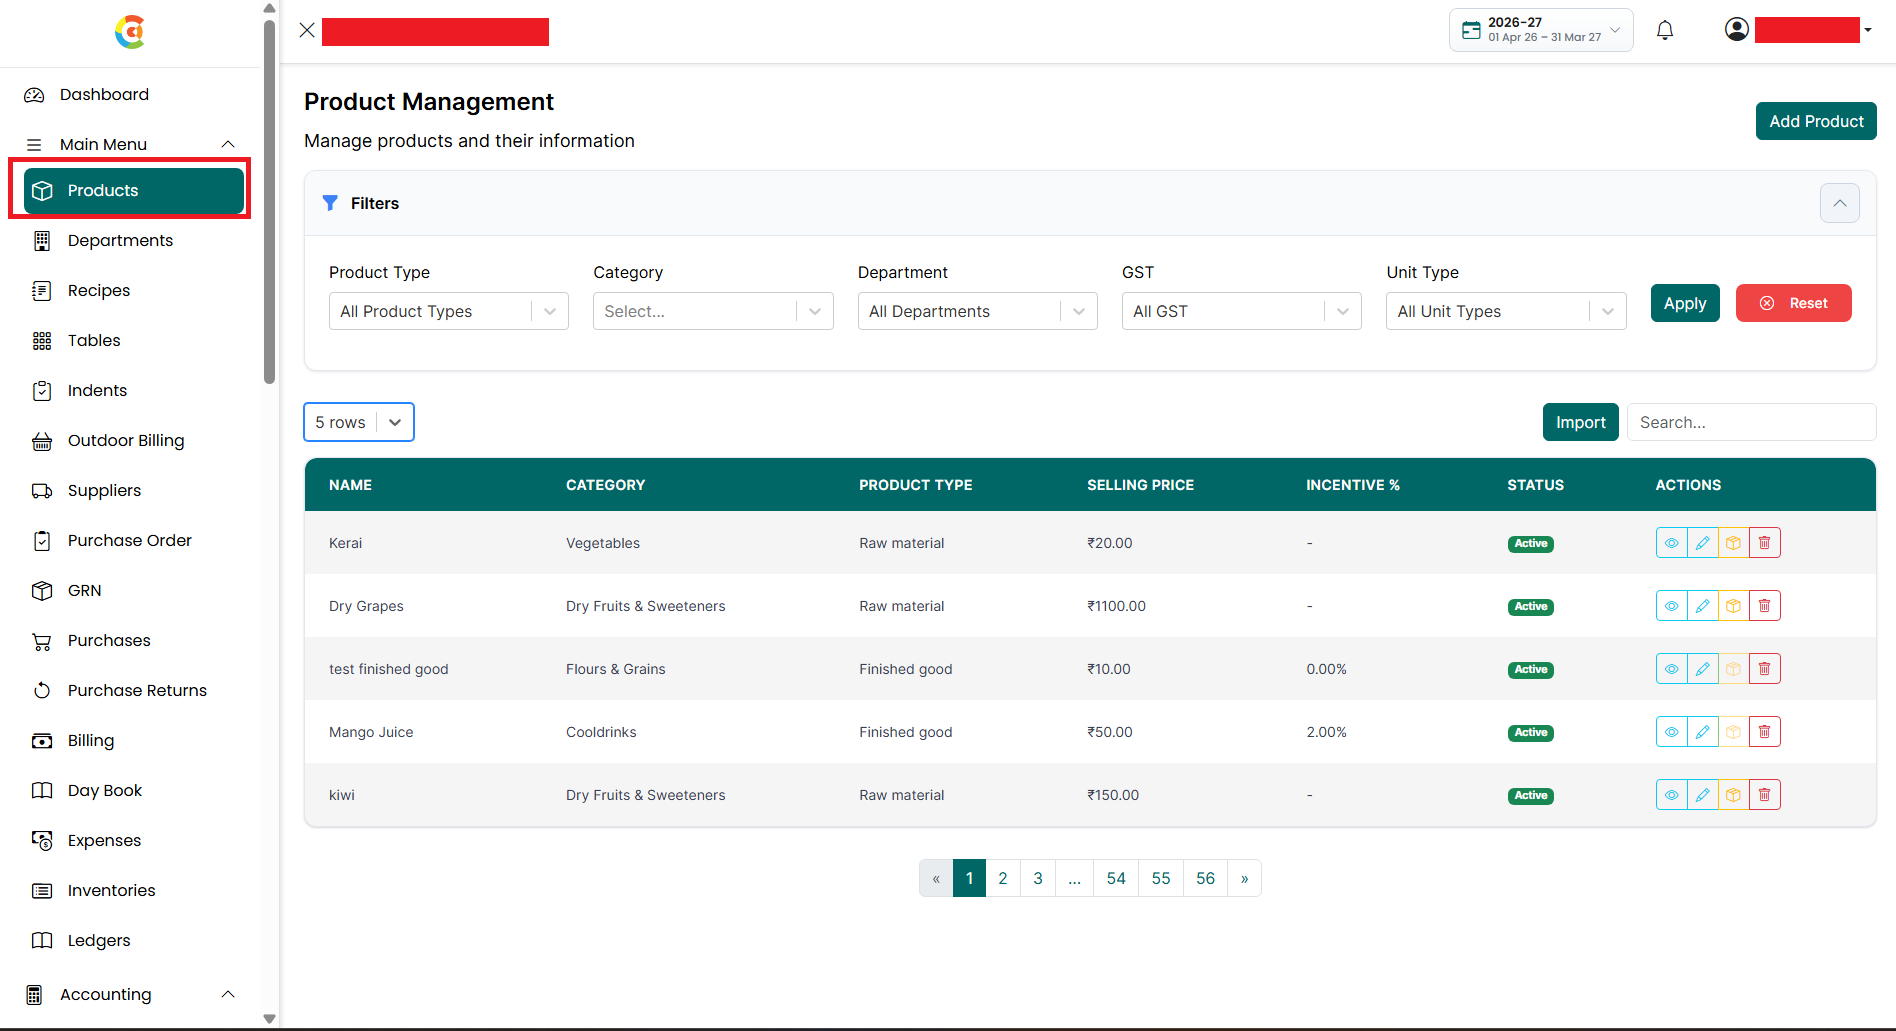
To open the Product Listing page, follow the steps below.
- Go
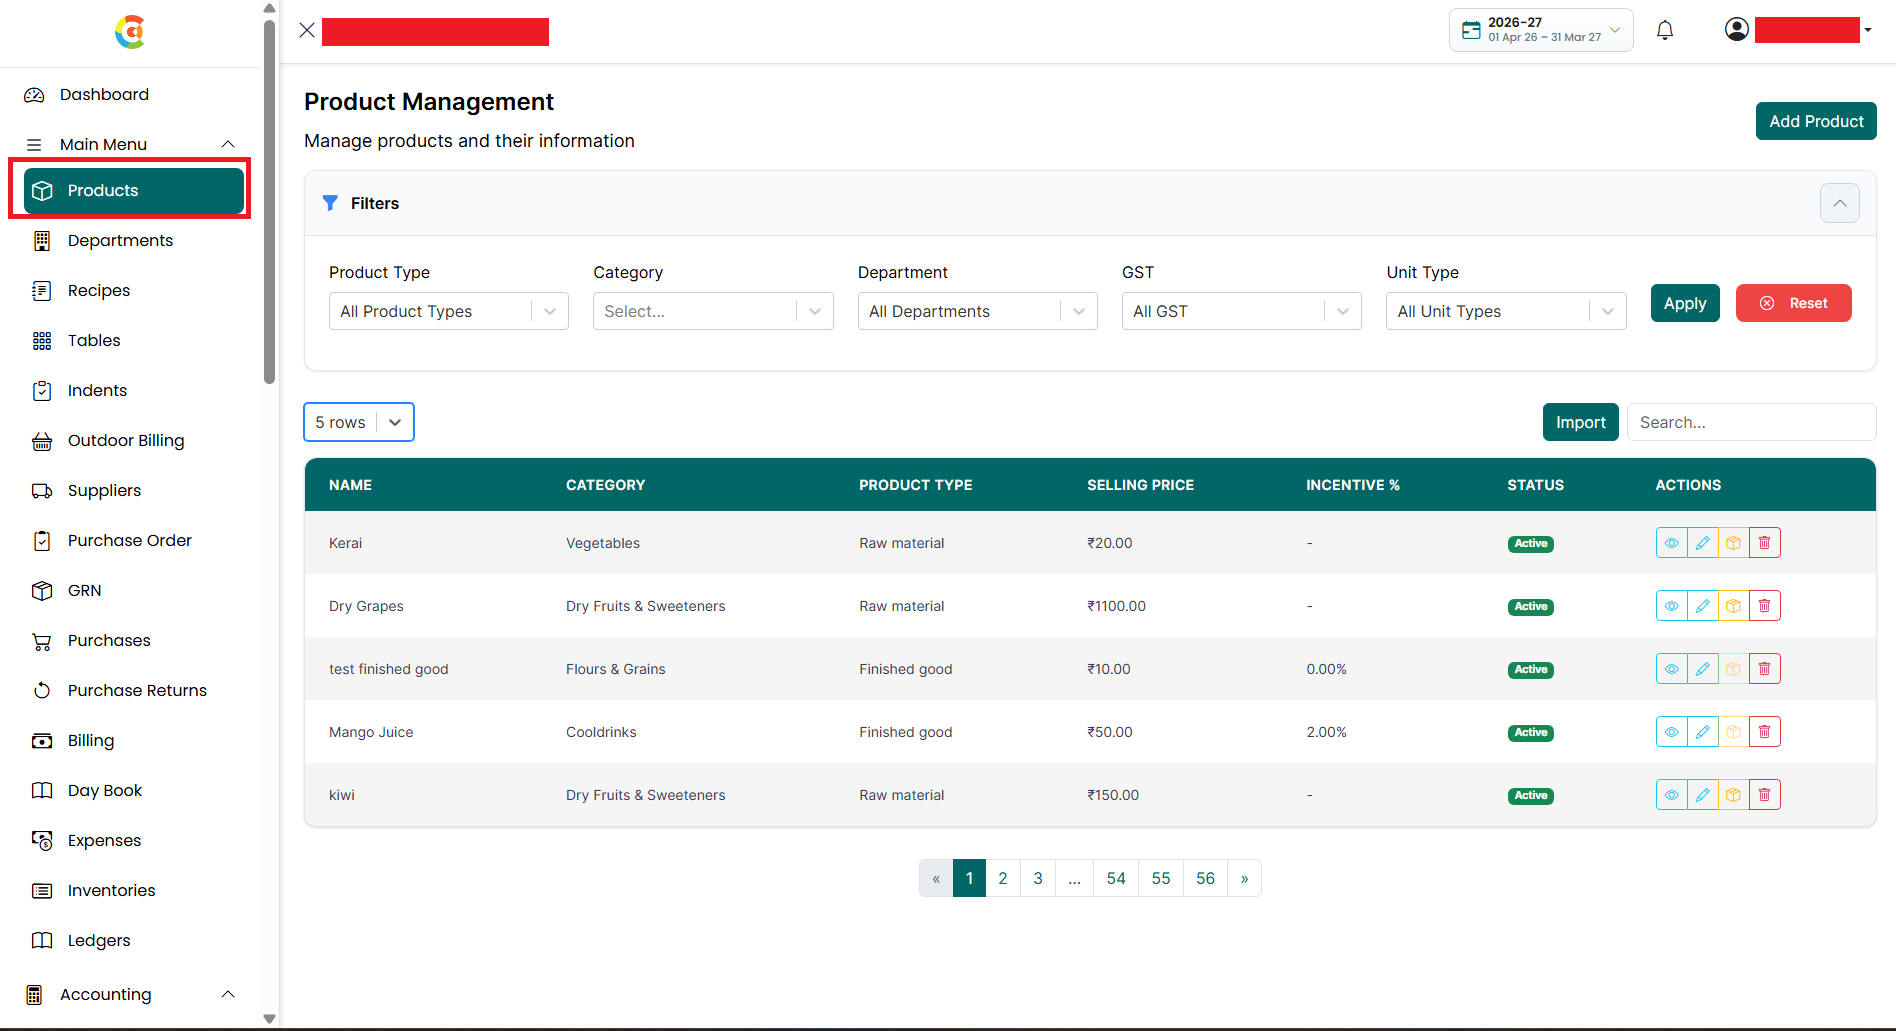
to the Main Menu and click Products. The Product Listing page is
displayed.
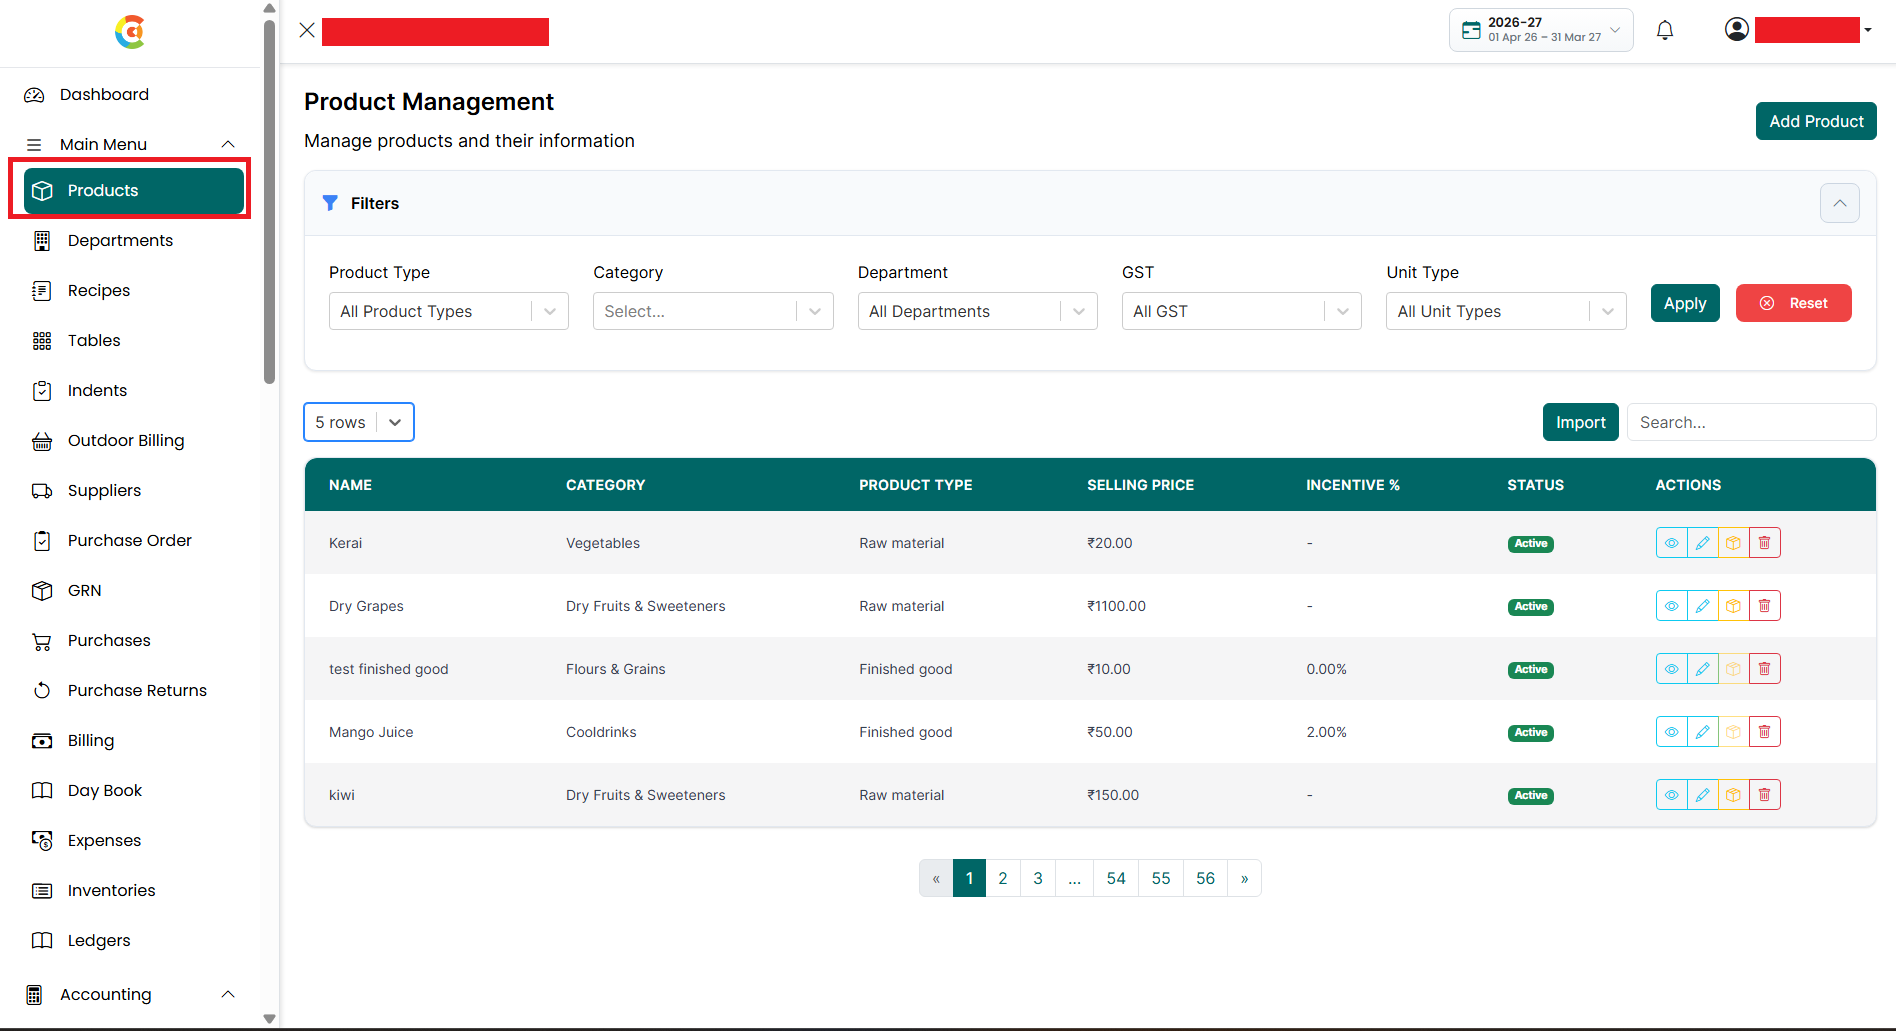
The page includes the following sections:
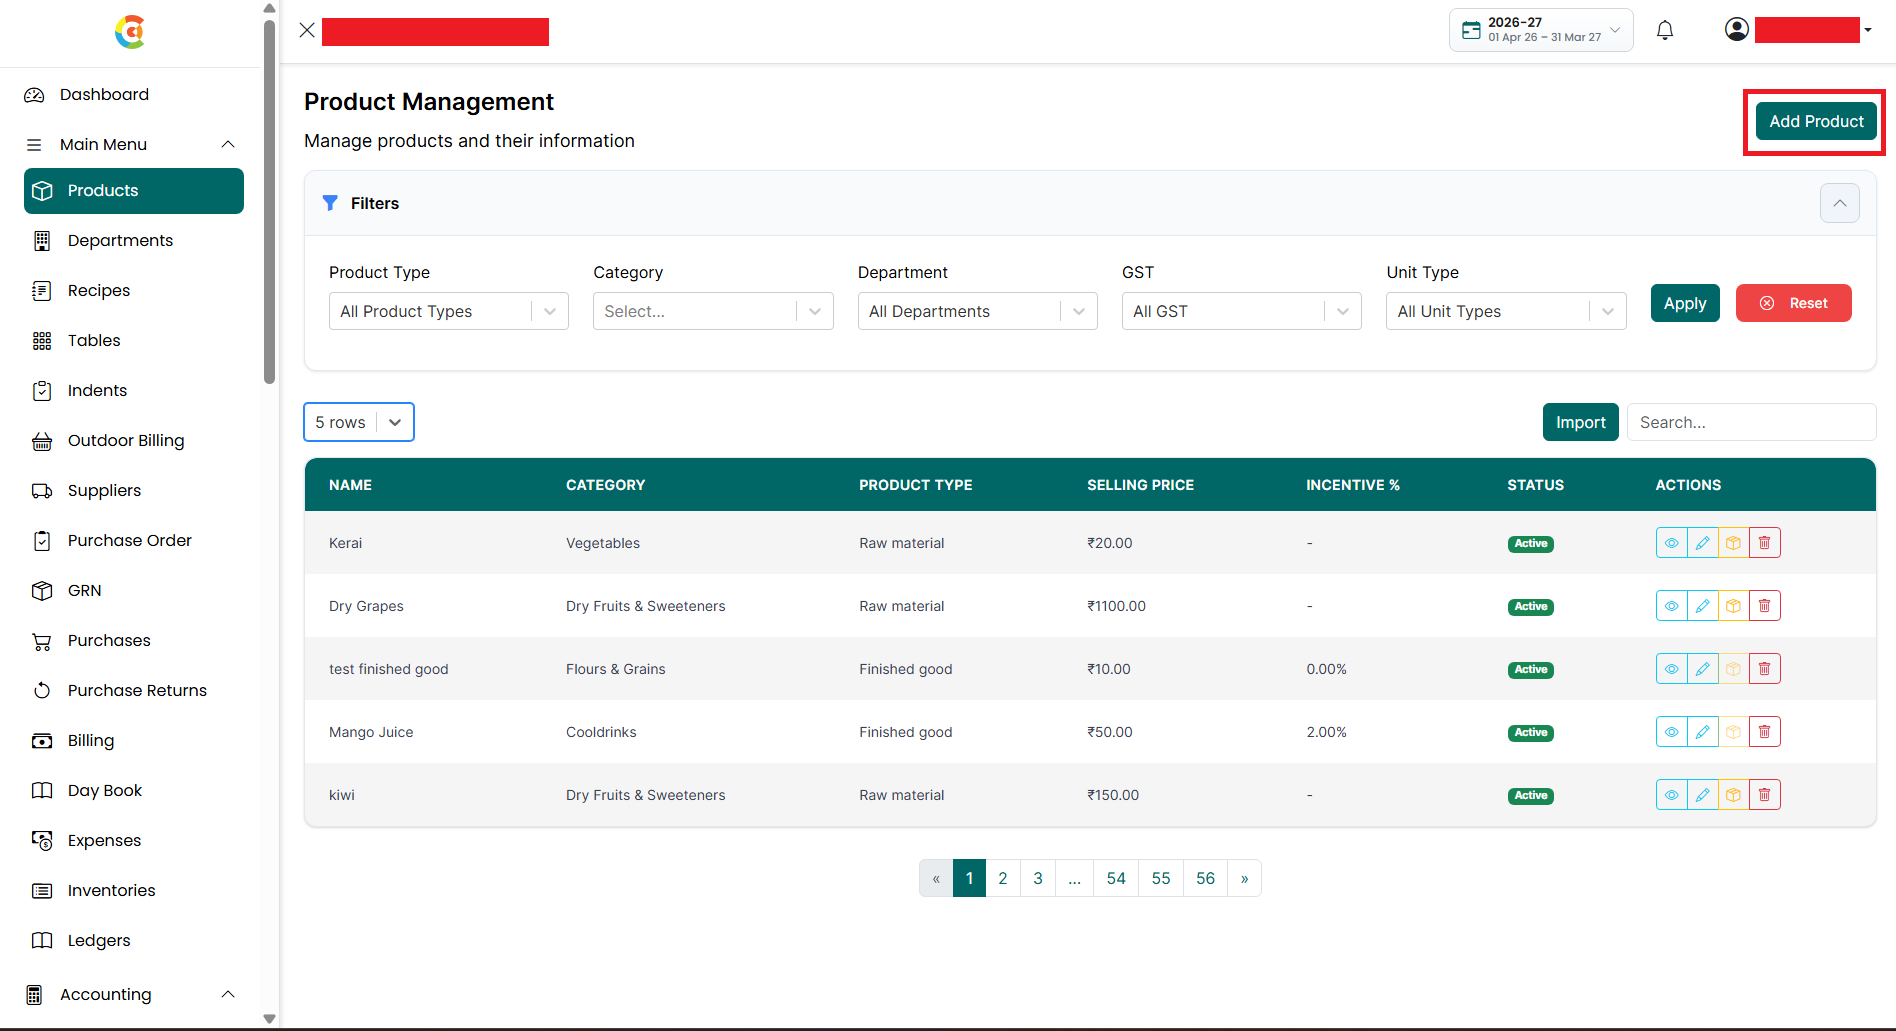
- Add
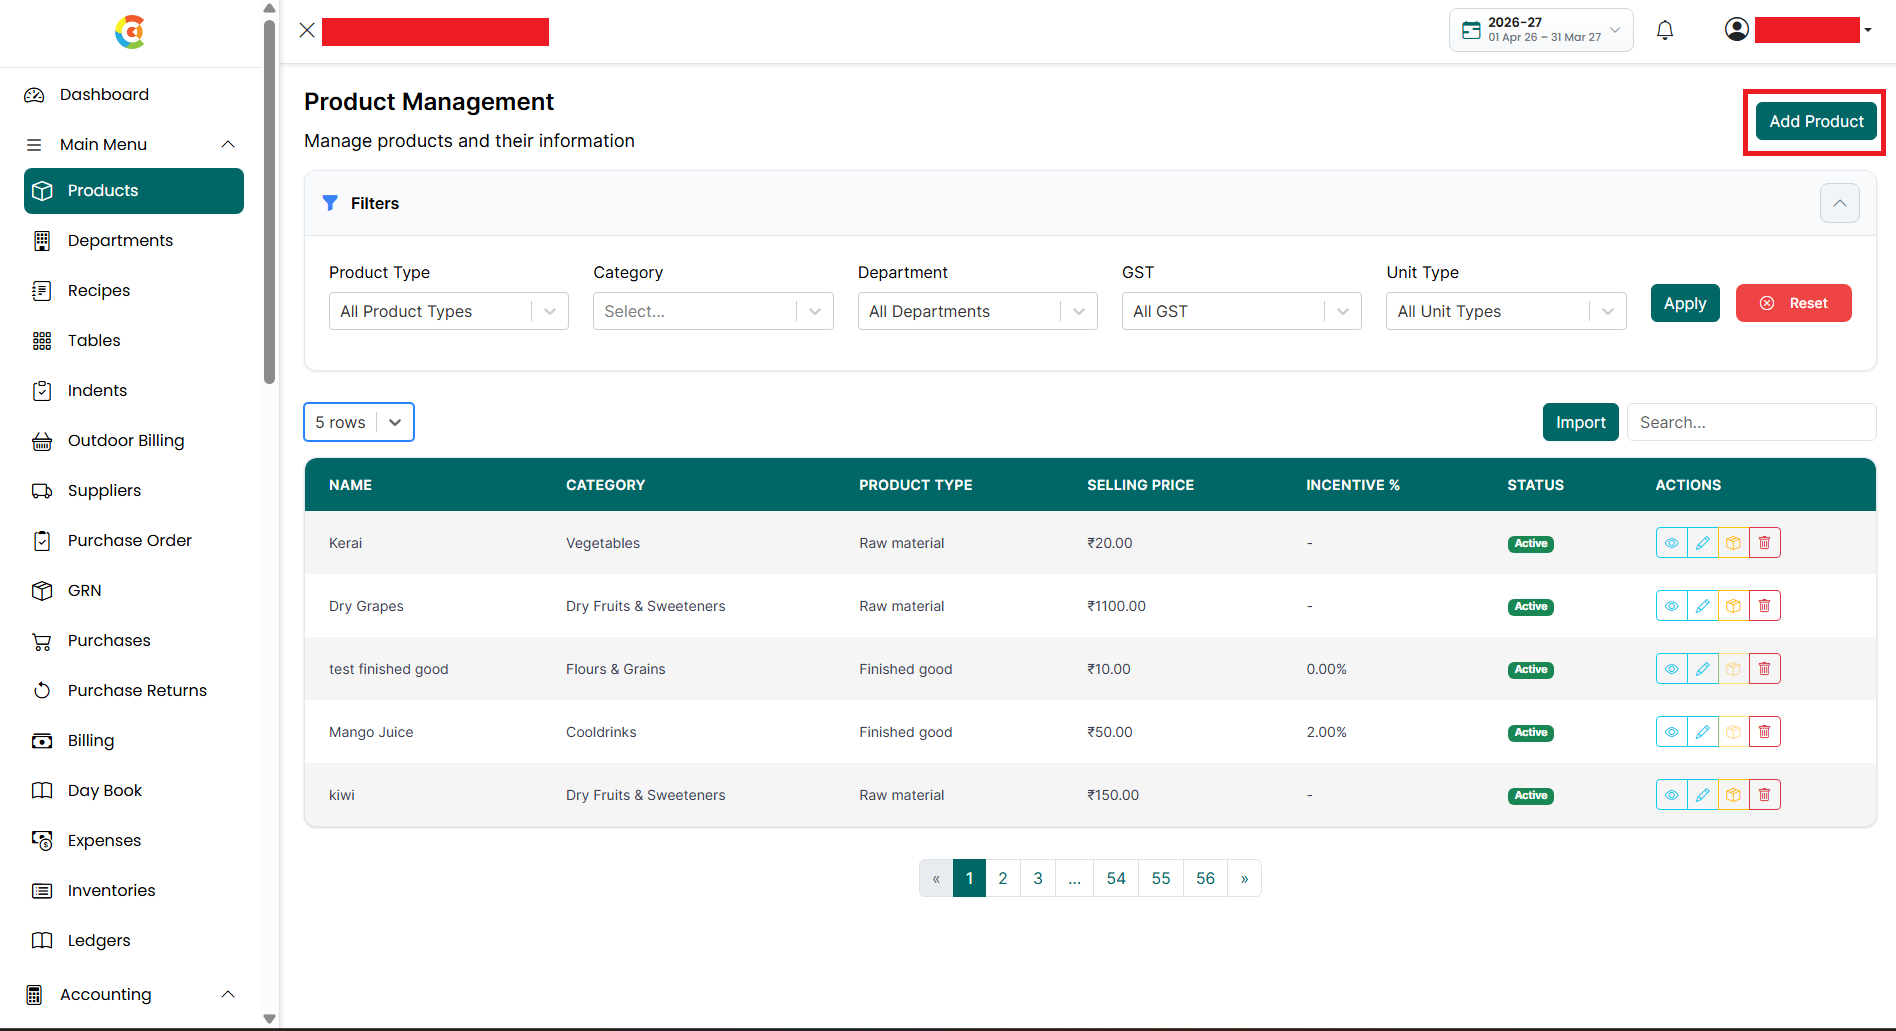
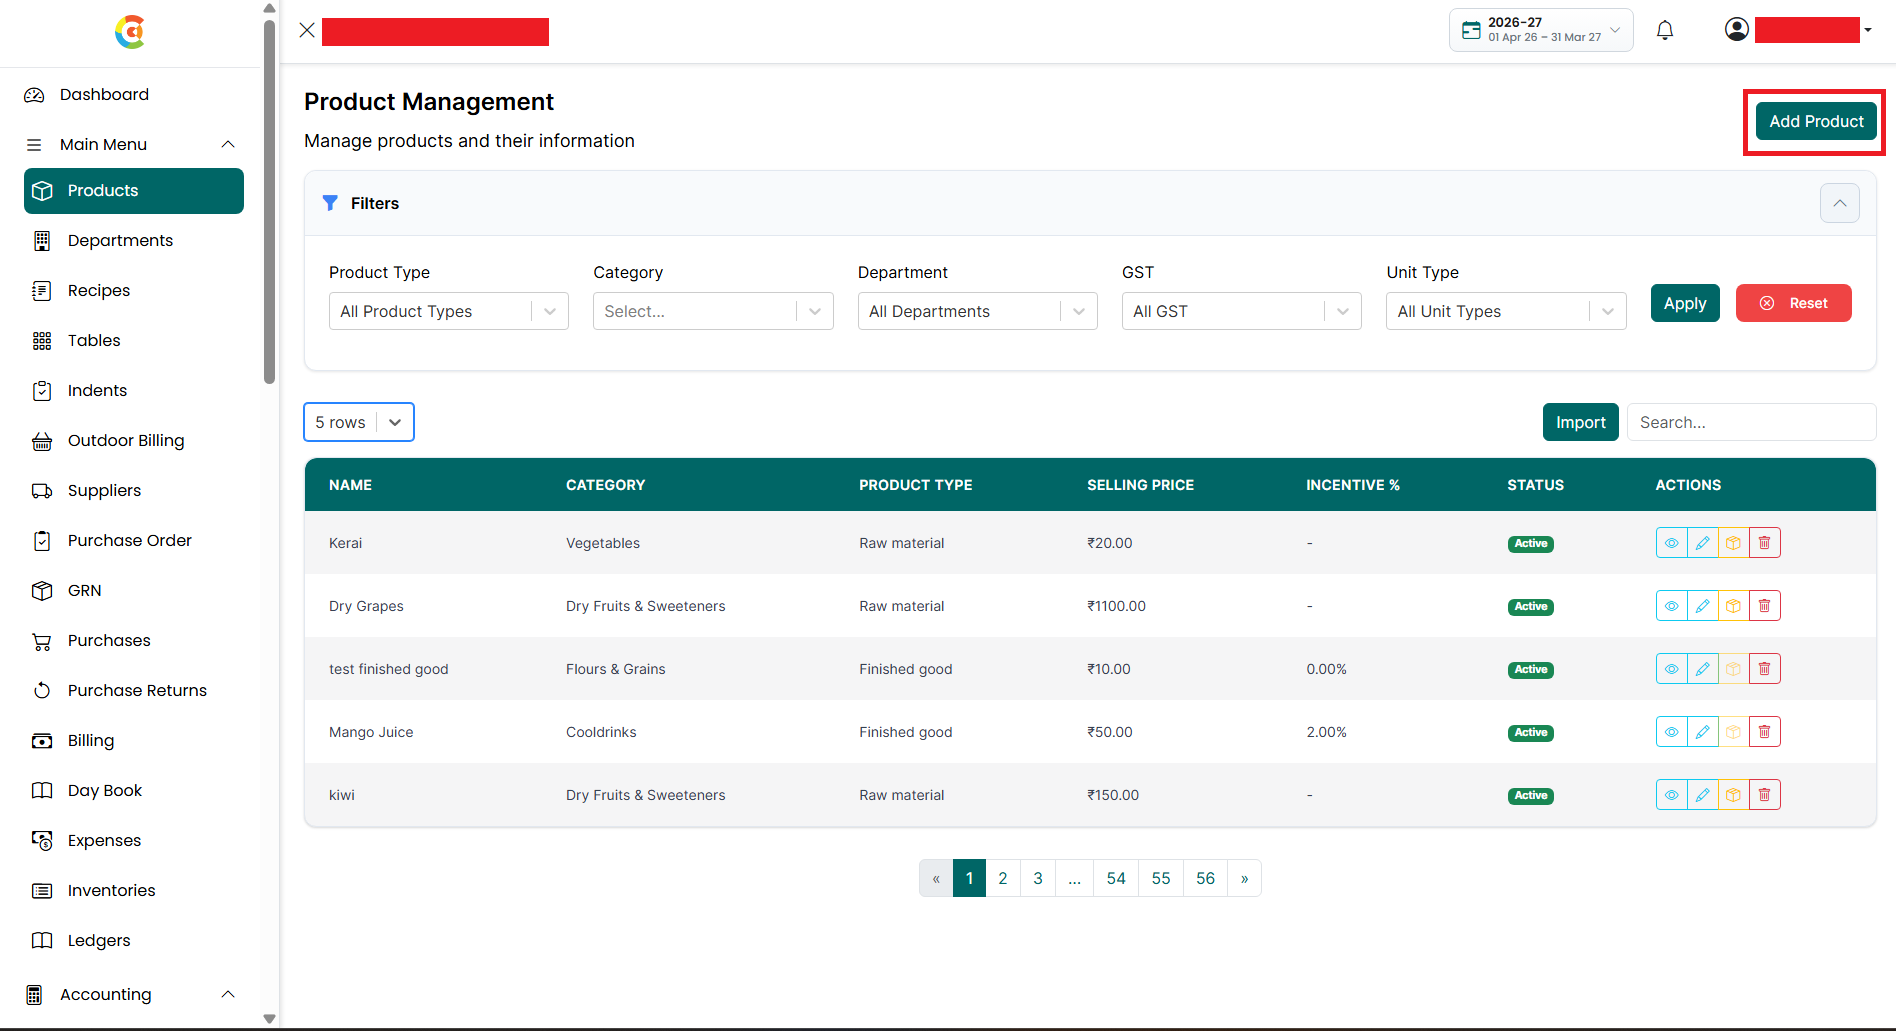
Product – Click the Add Product button to create a new product.
- Filter Options – Click the Filter
Options button to filter the products displayed in the Product Listing
page.
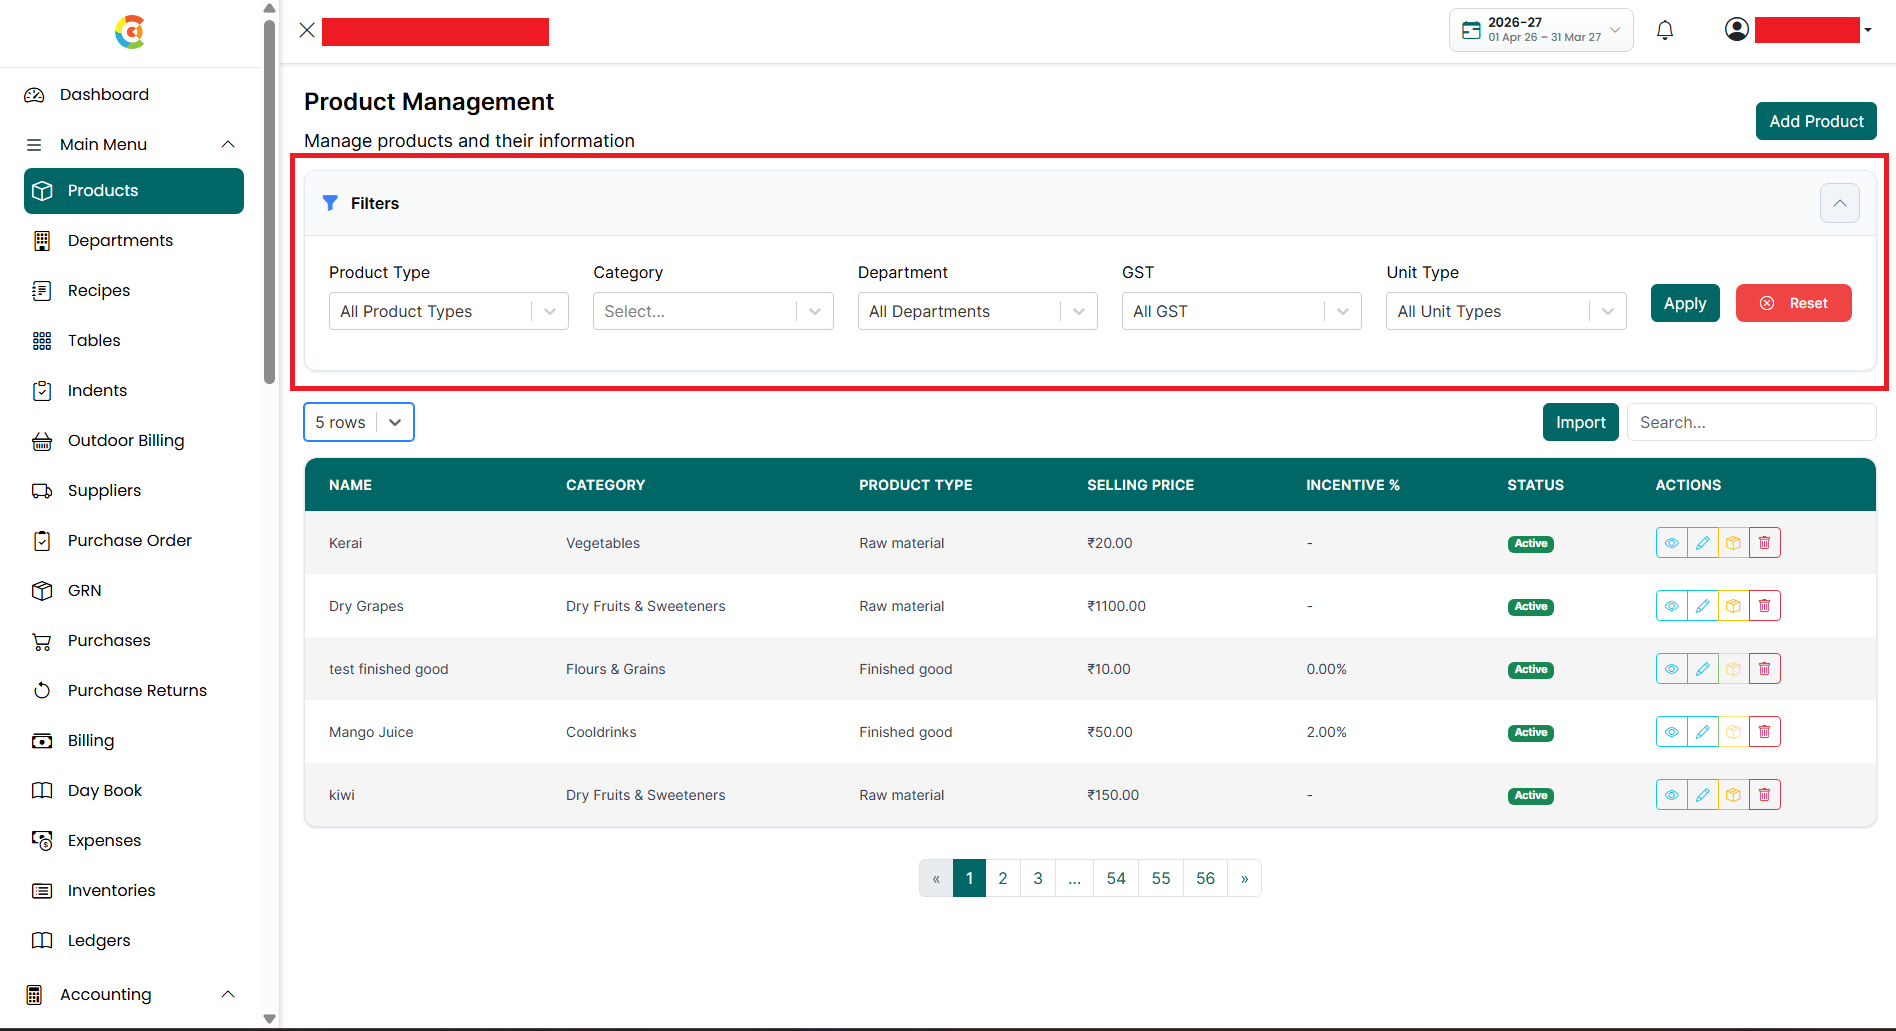
• The following filter options are available:
■ Category
– Select a category to display only the products that belong to the selected
category.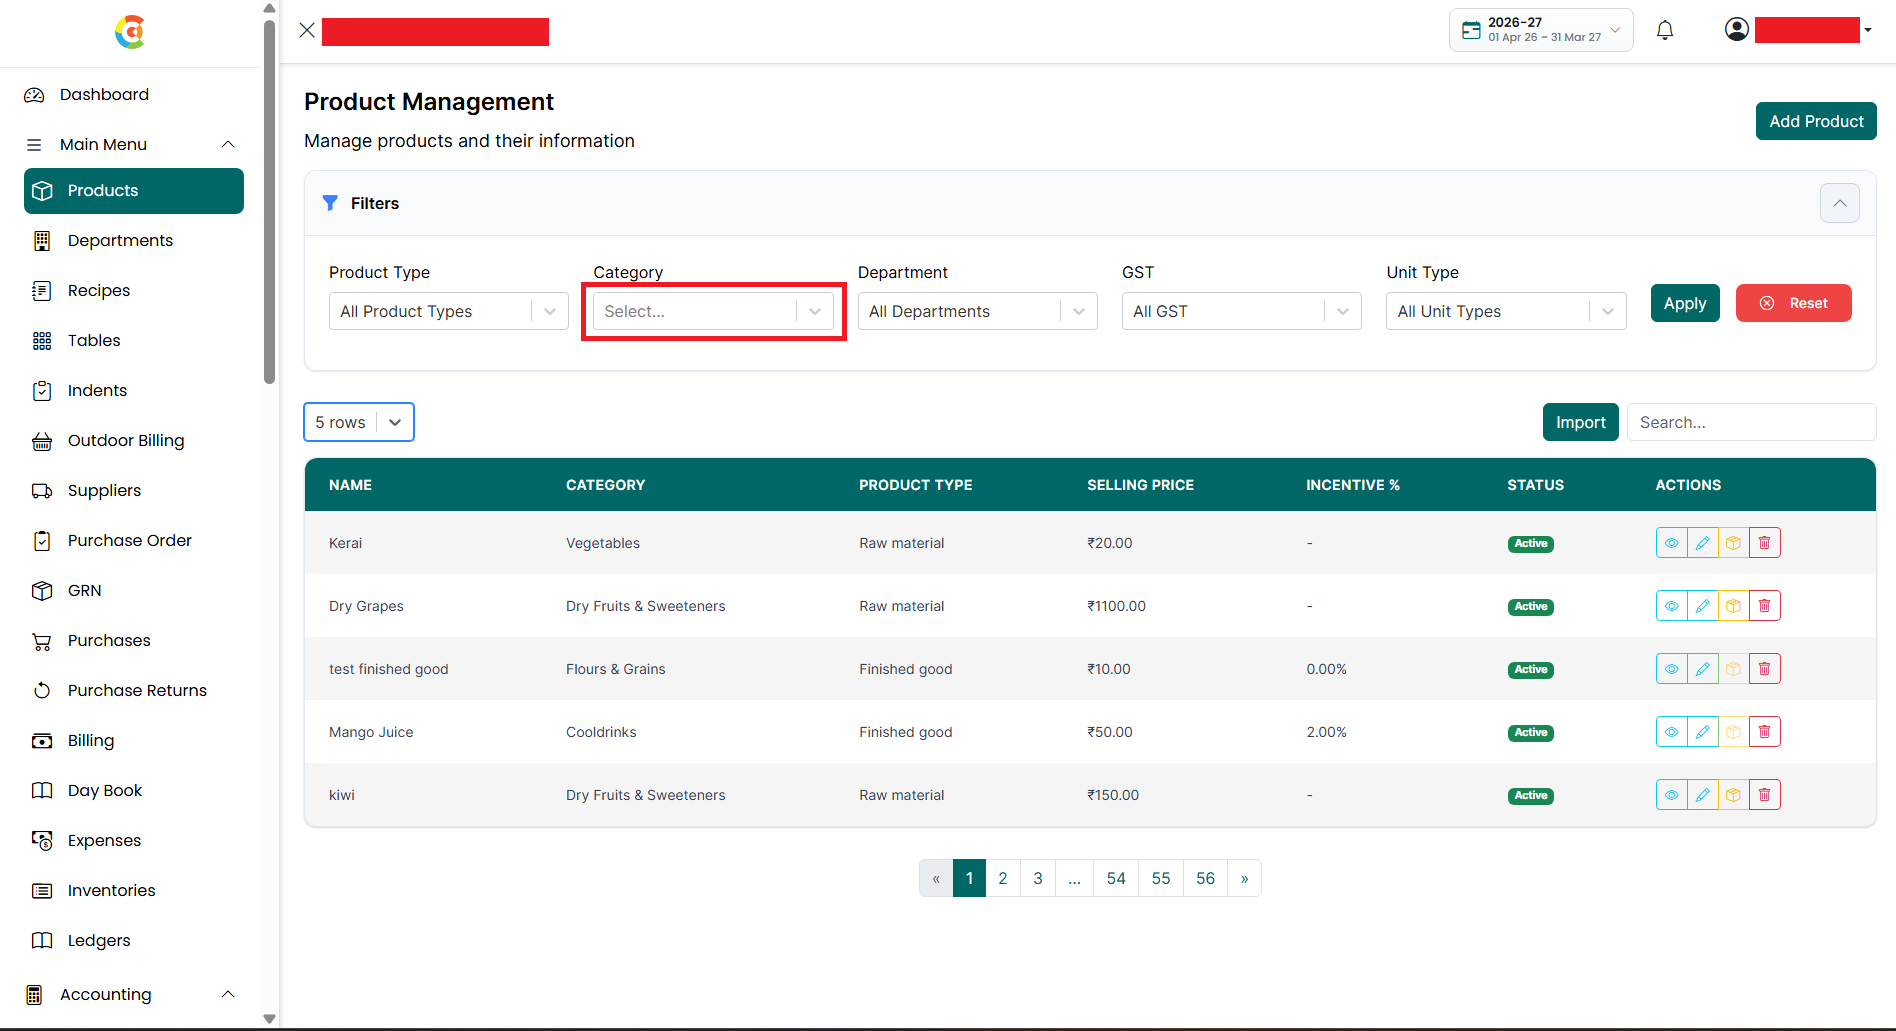
■ Department
– Select a department to display only the products assigned to that department.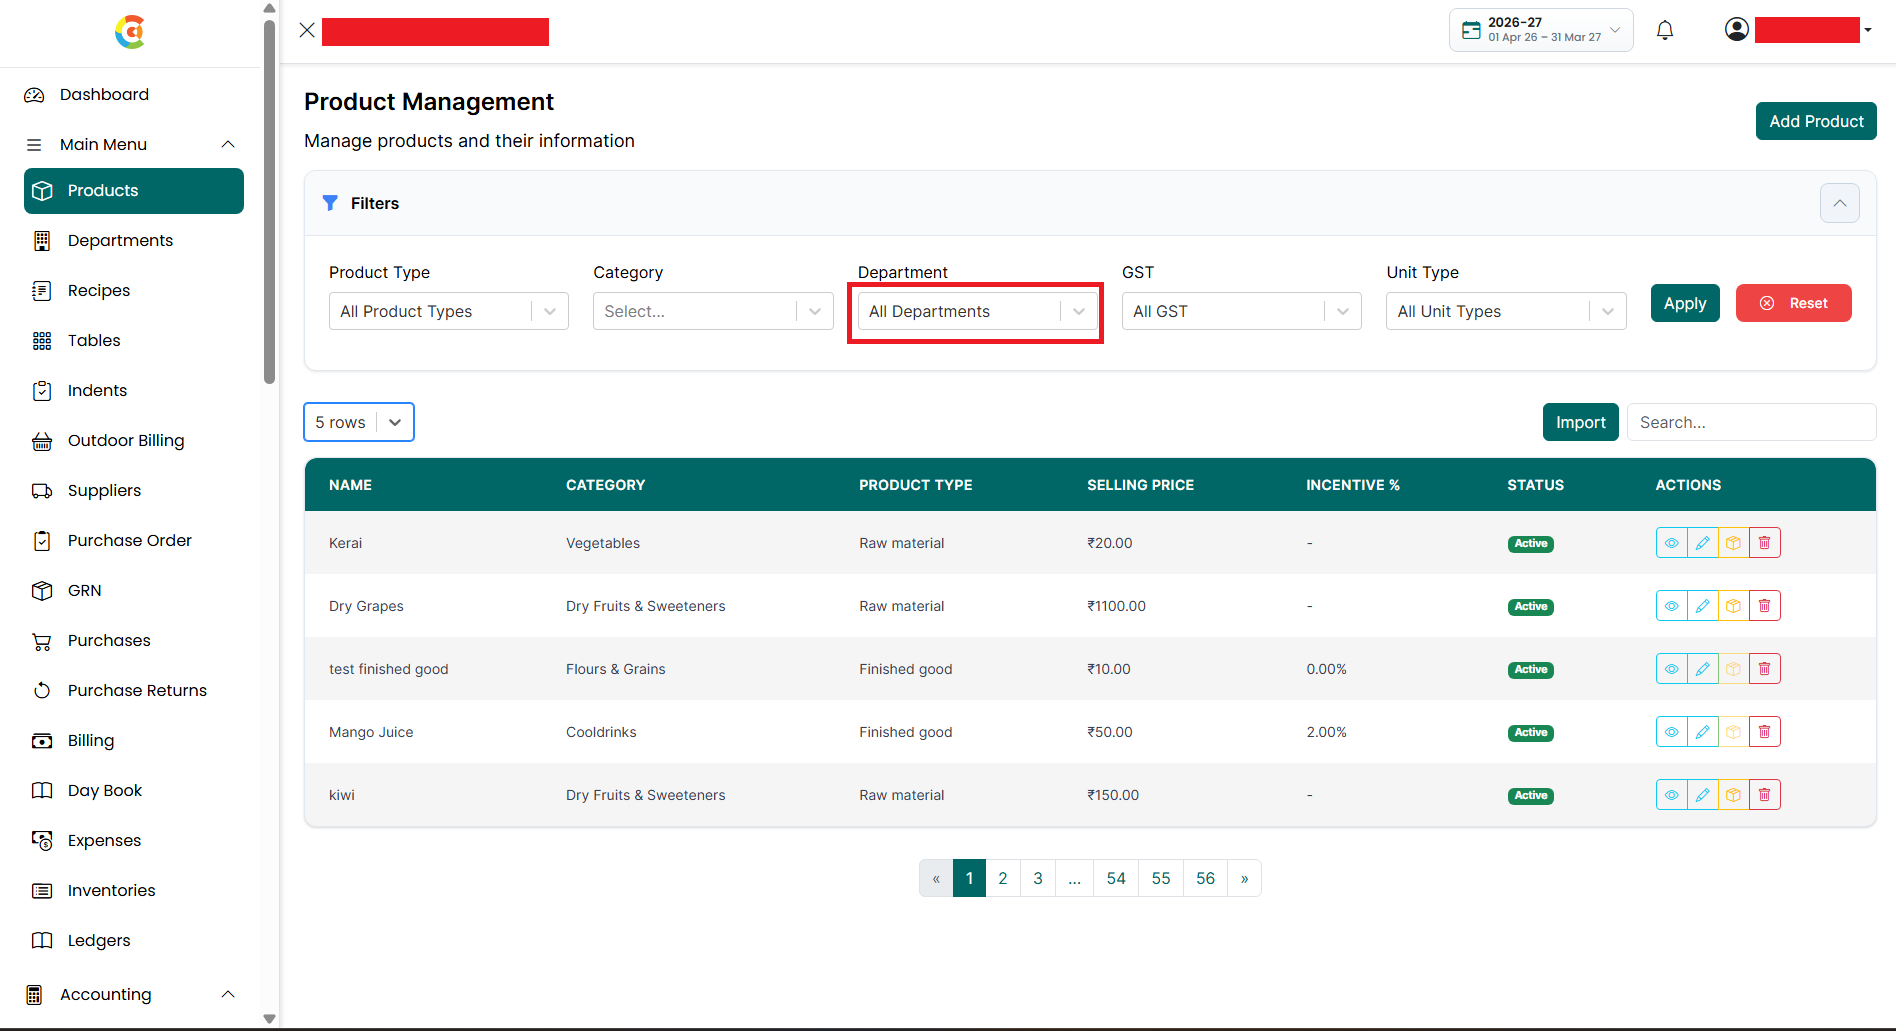
■ GST
Percentage – Select a GST percentage to display only the products with the
selected GST tax rate.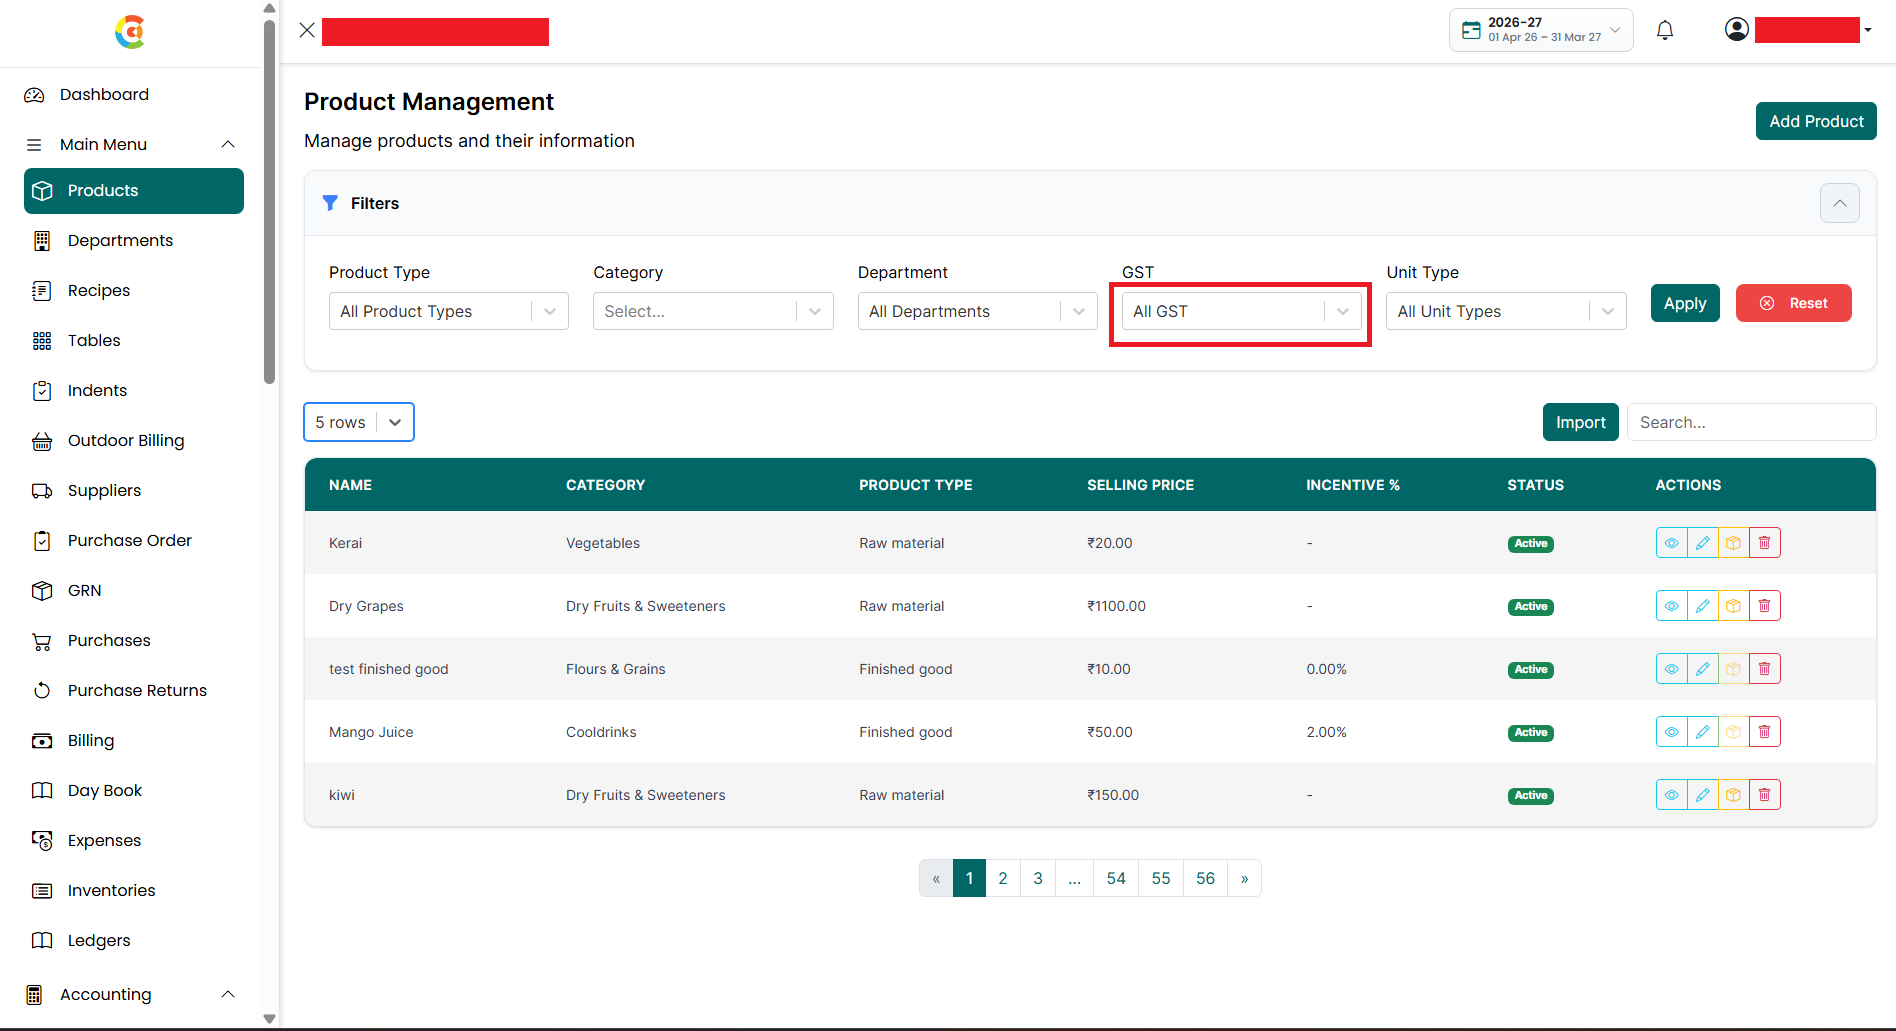
■ Unit
Type – Select a unit type to display only the products that use the selected
unit of measurement.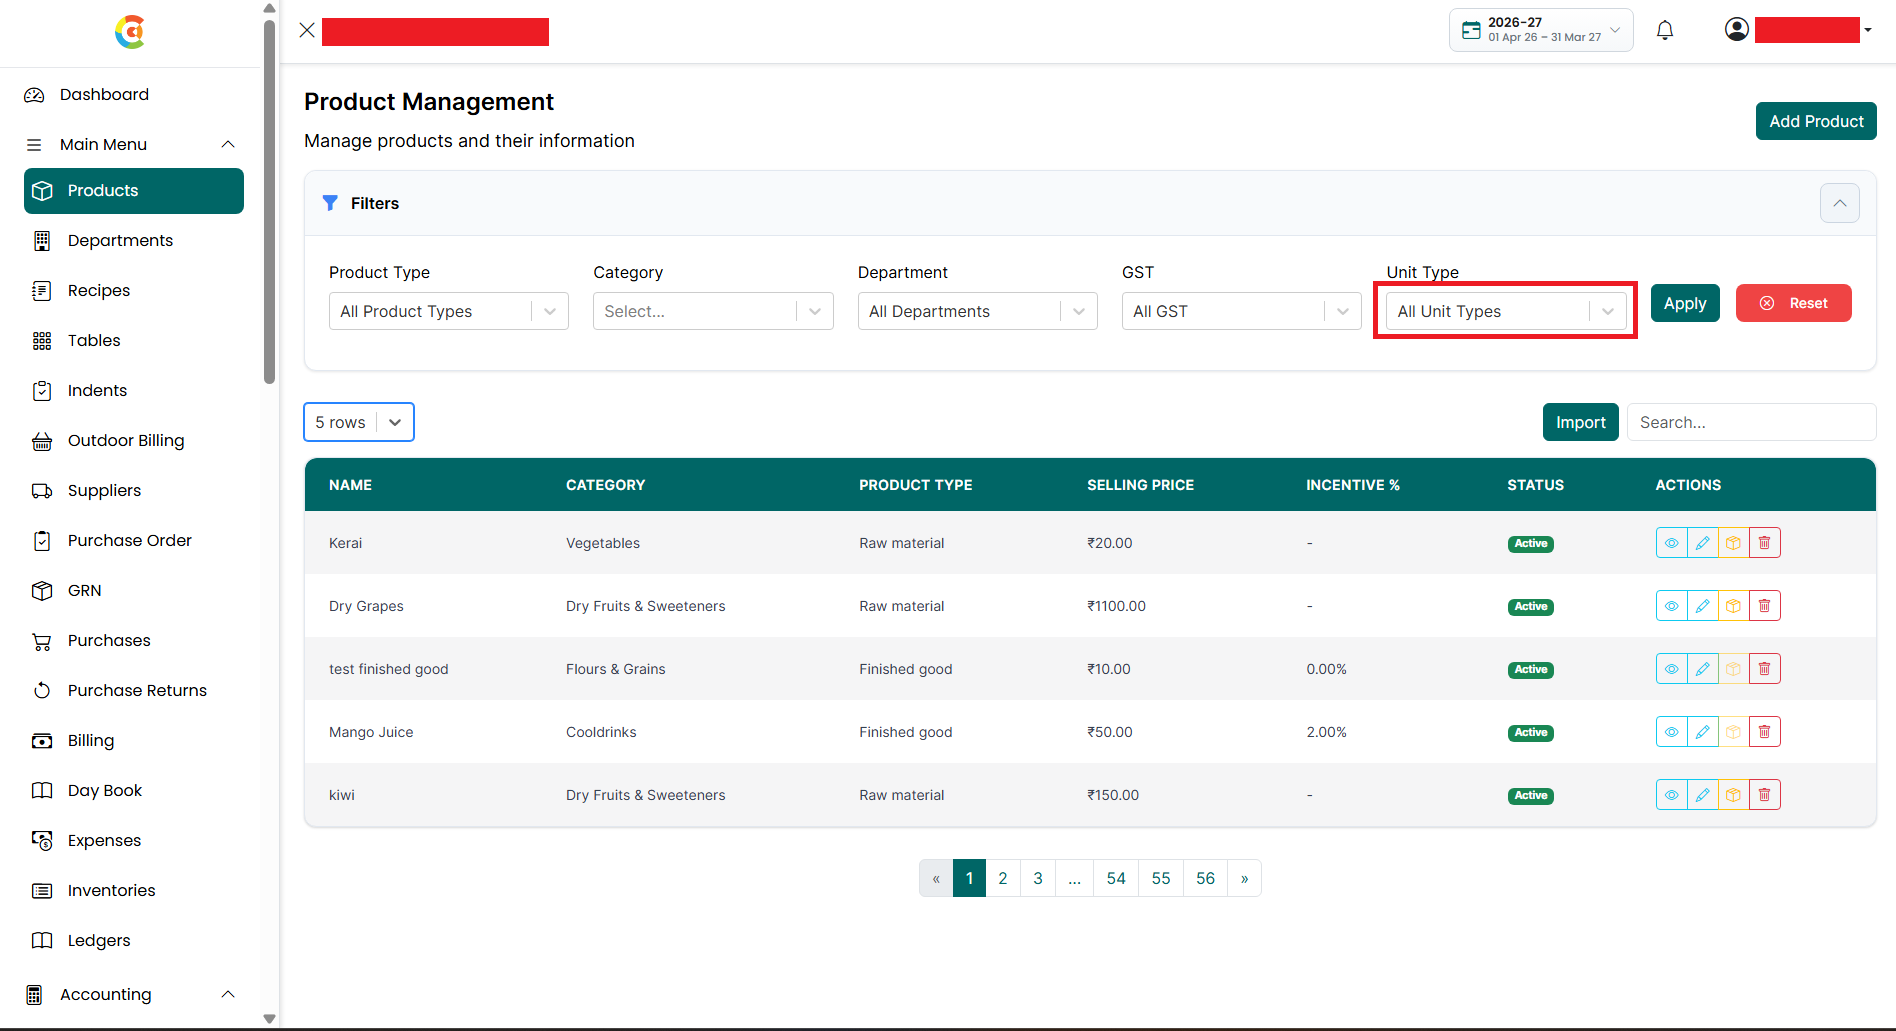
■ Product Type – Select a product type to display only the products of the selected type.
● Finished Goods – Products that are sold directly to customers.
● Raw
Materials – Products that are used as ingredients or inventory items.
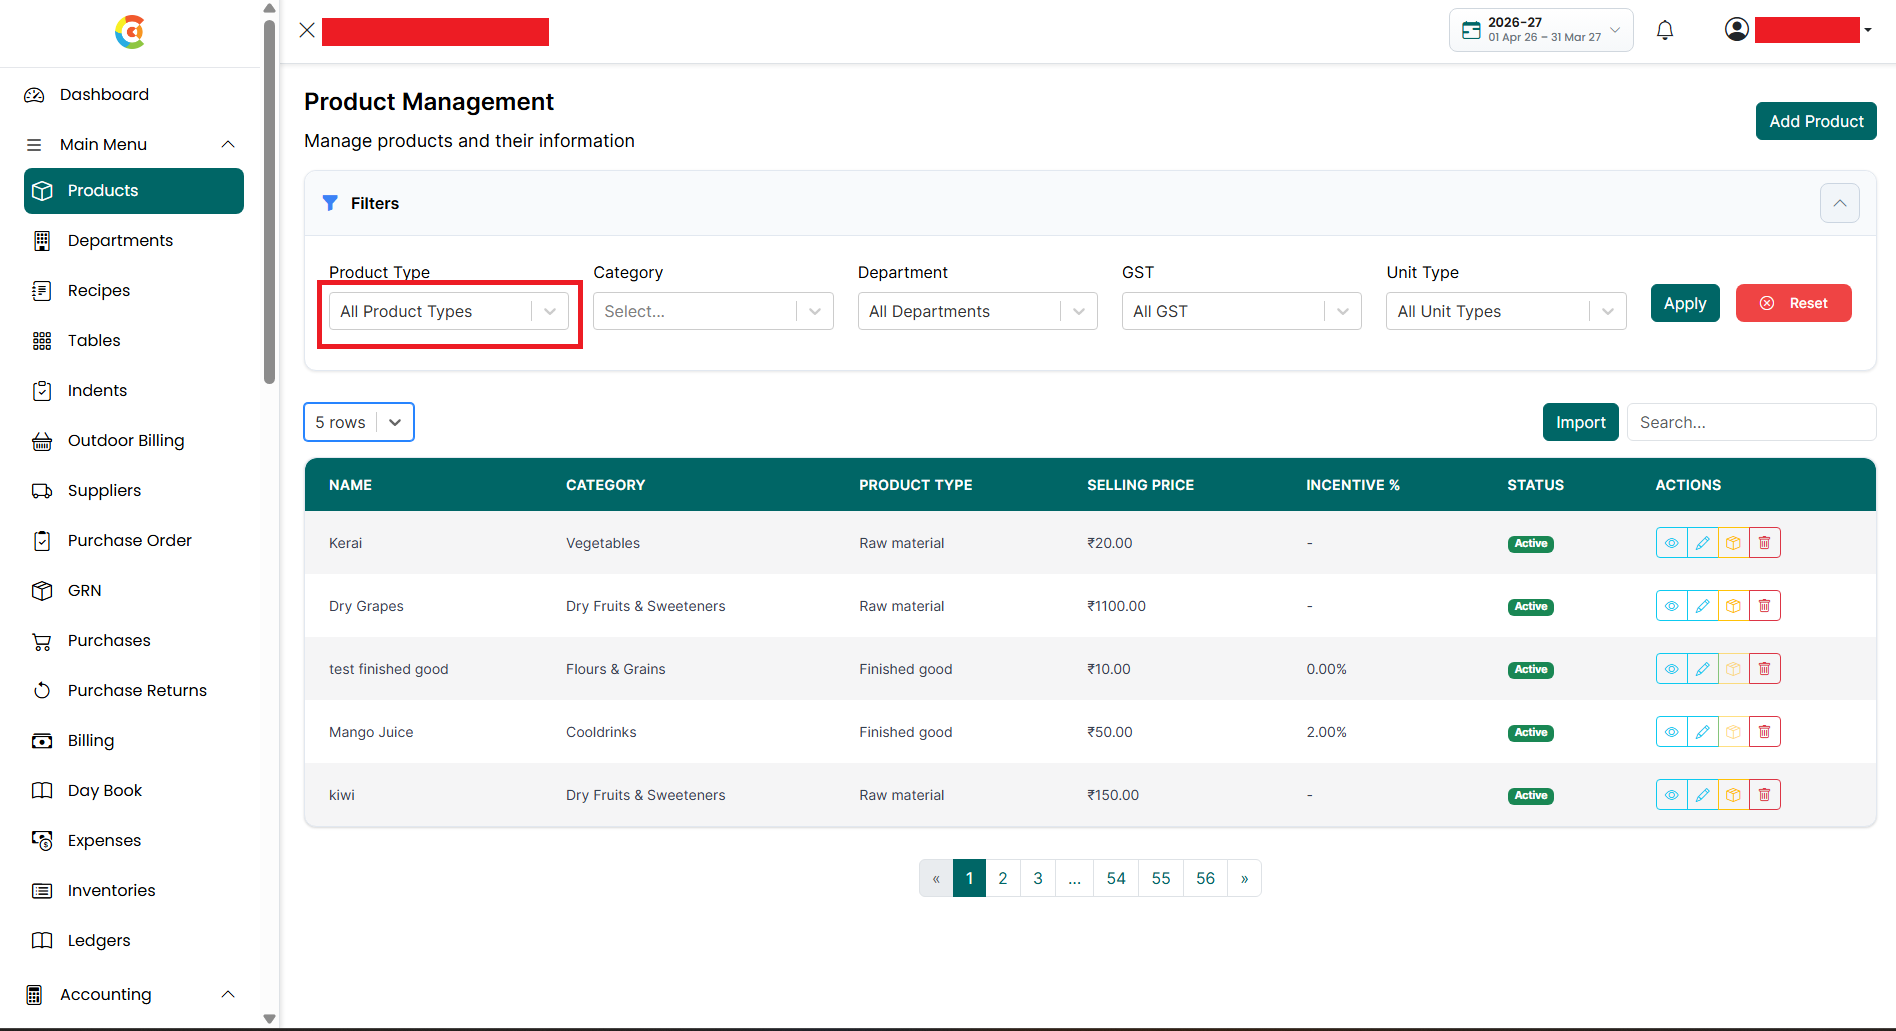
■ Apply
– Click the Apply button to display only the products that match the selected
filter criteria.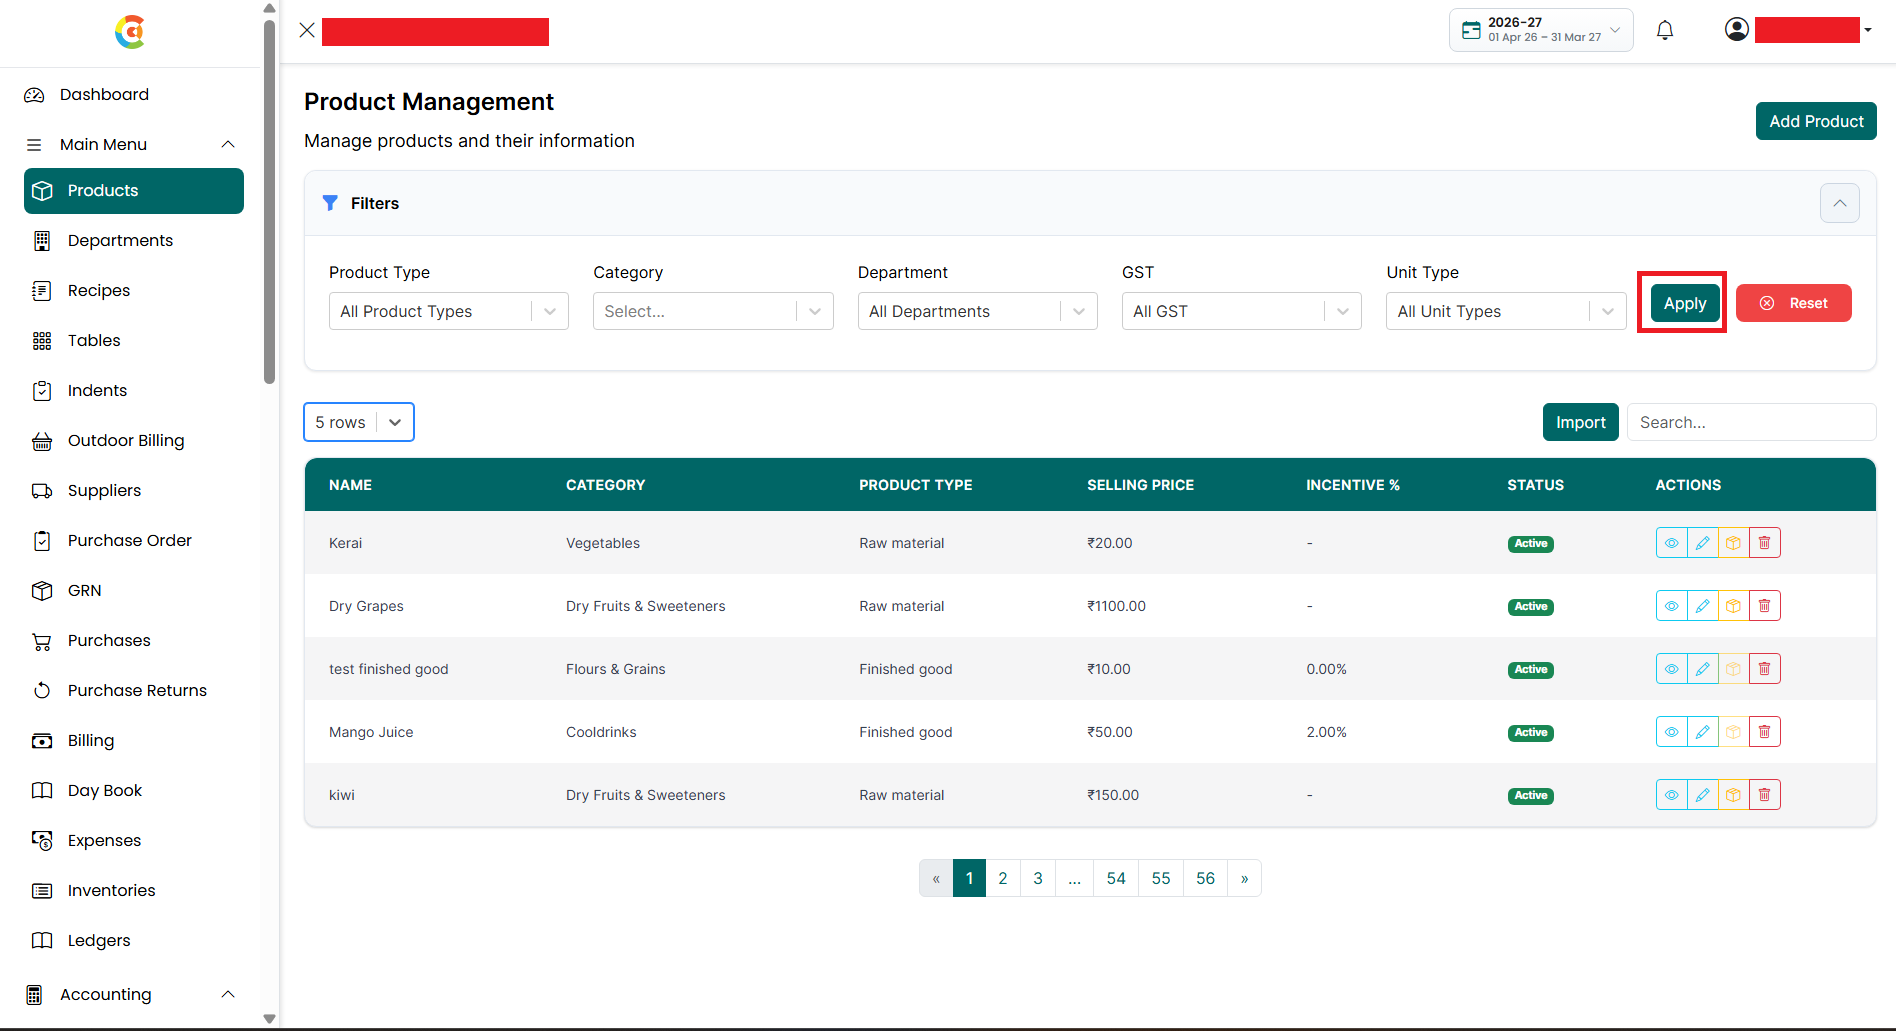
■ Reset
– Click the Reset button to clear all selected filters and display the complete
list of products.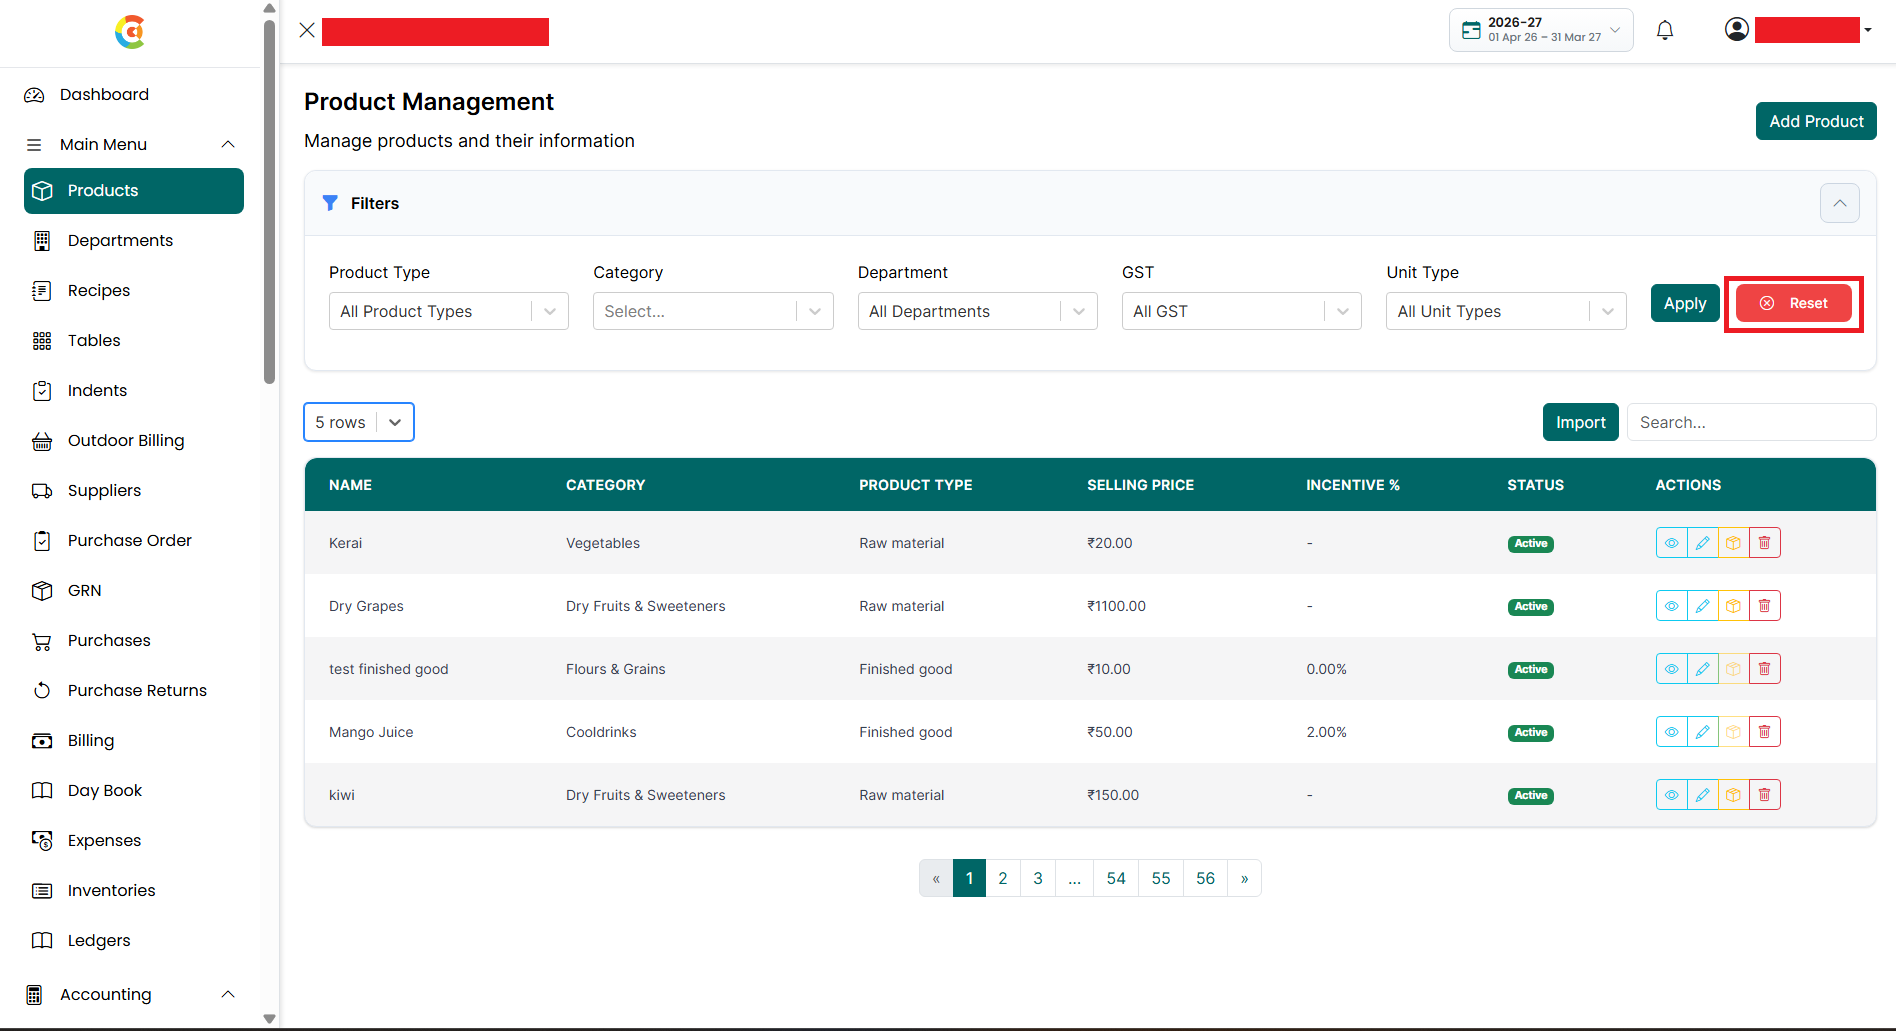
■ You can use one or more filter options together to quickly find the products you are looking for.
- Rows Per Page – Select how many
products you want to display on a single page.
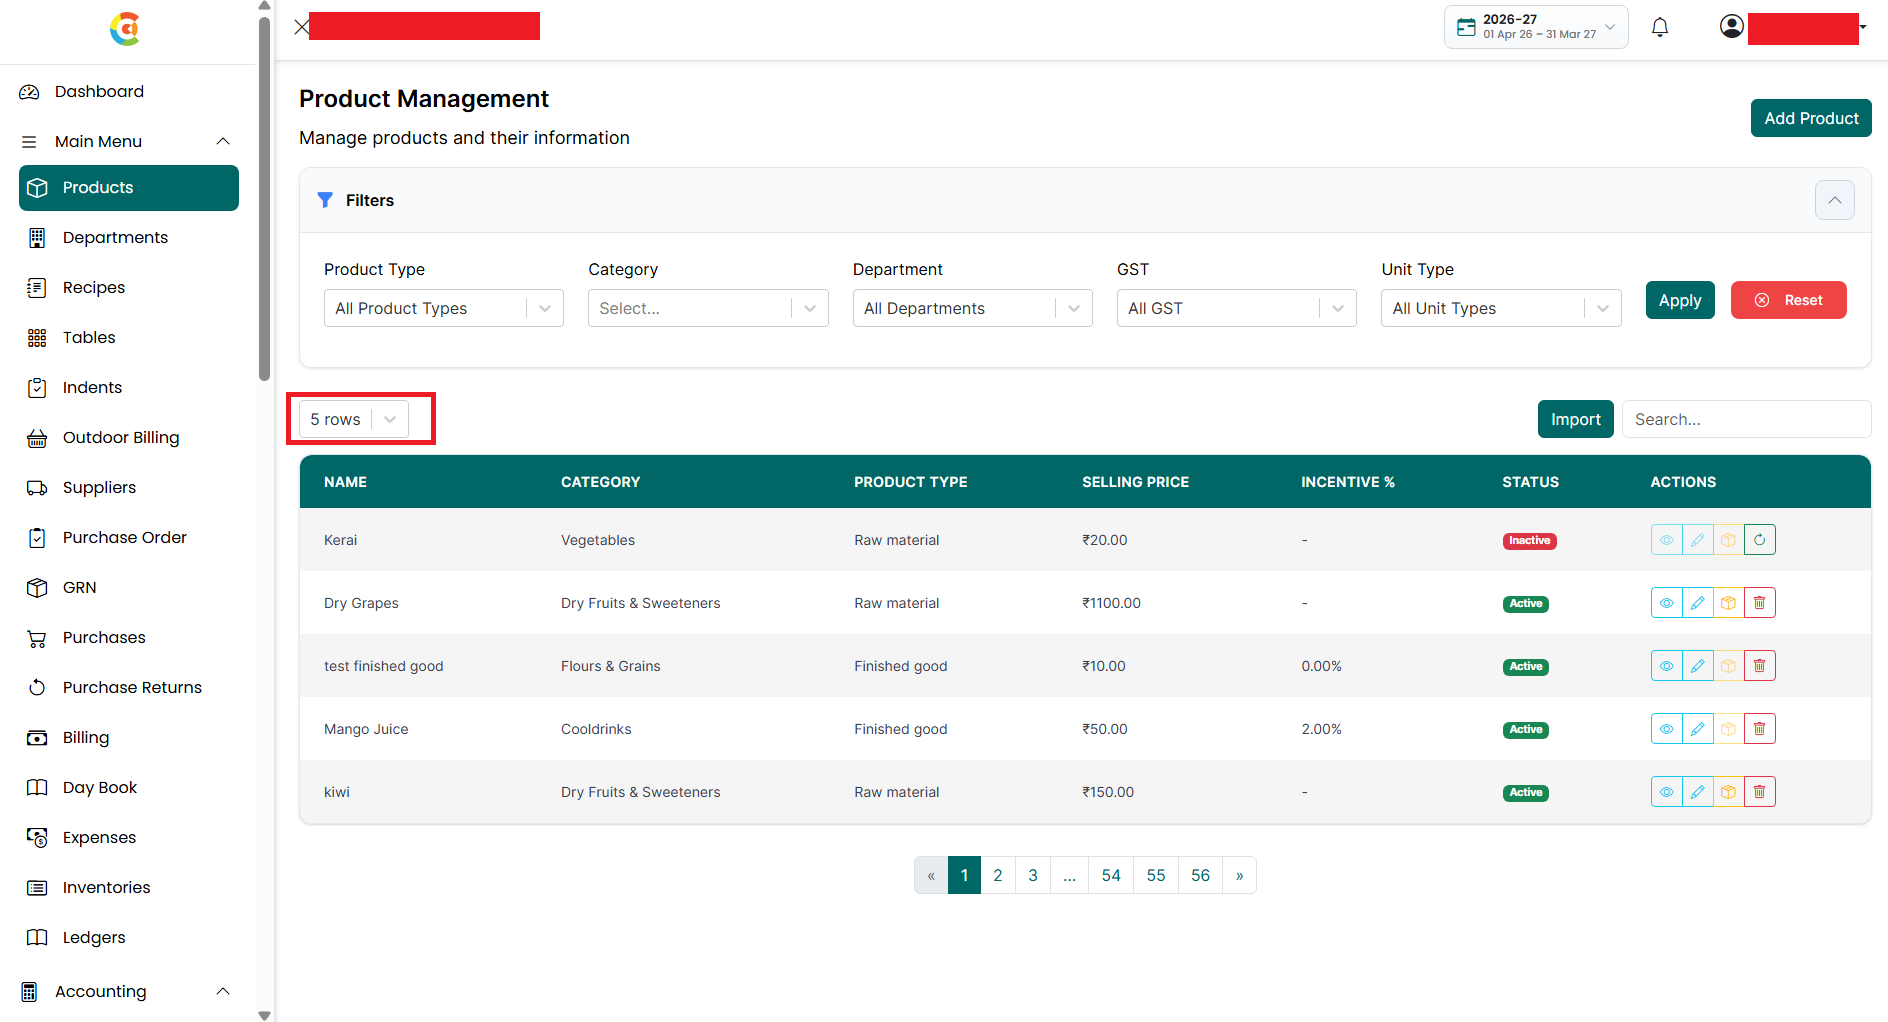
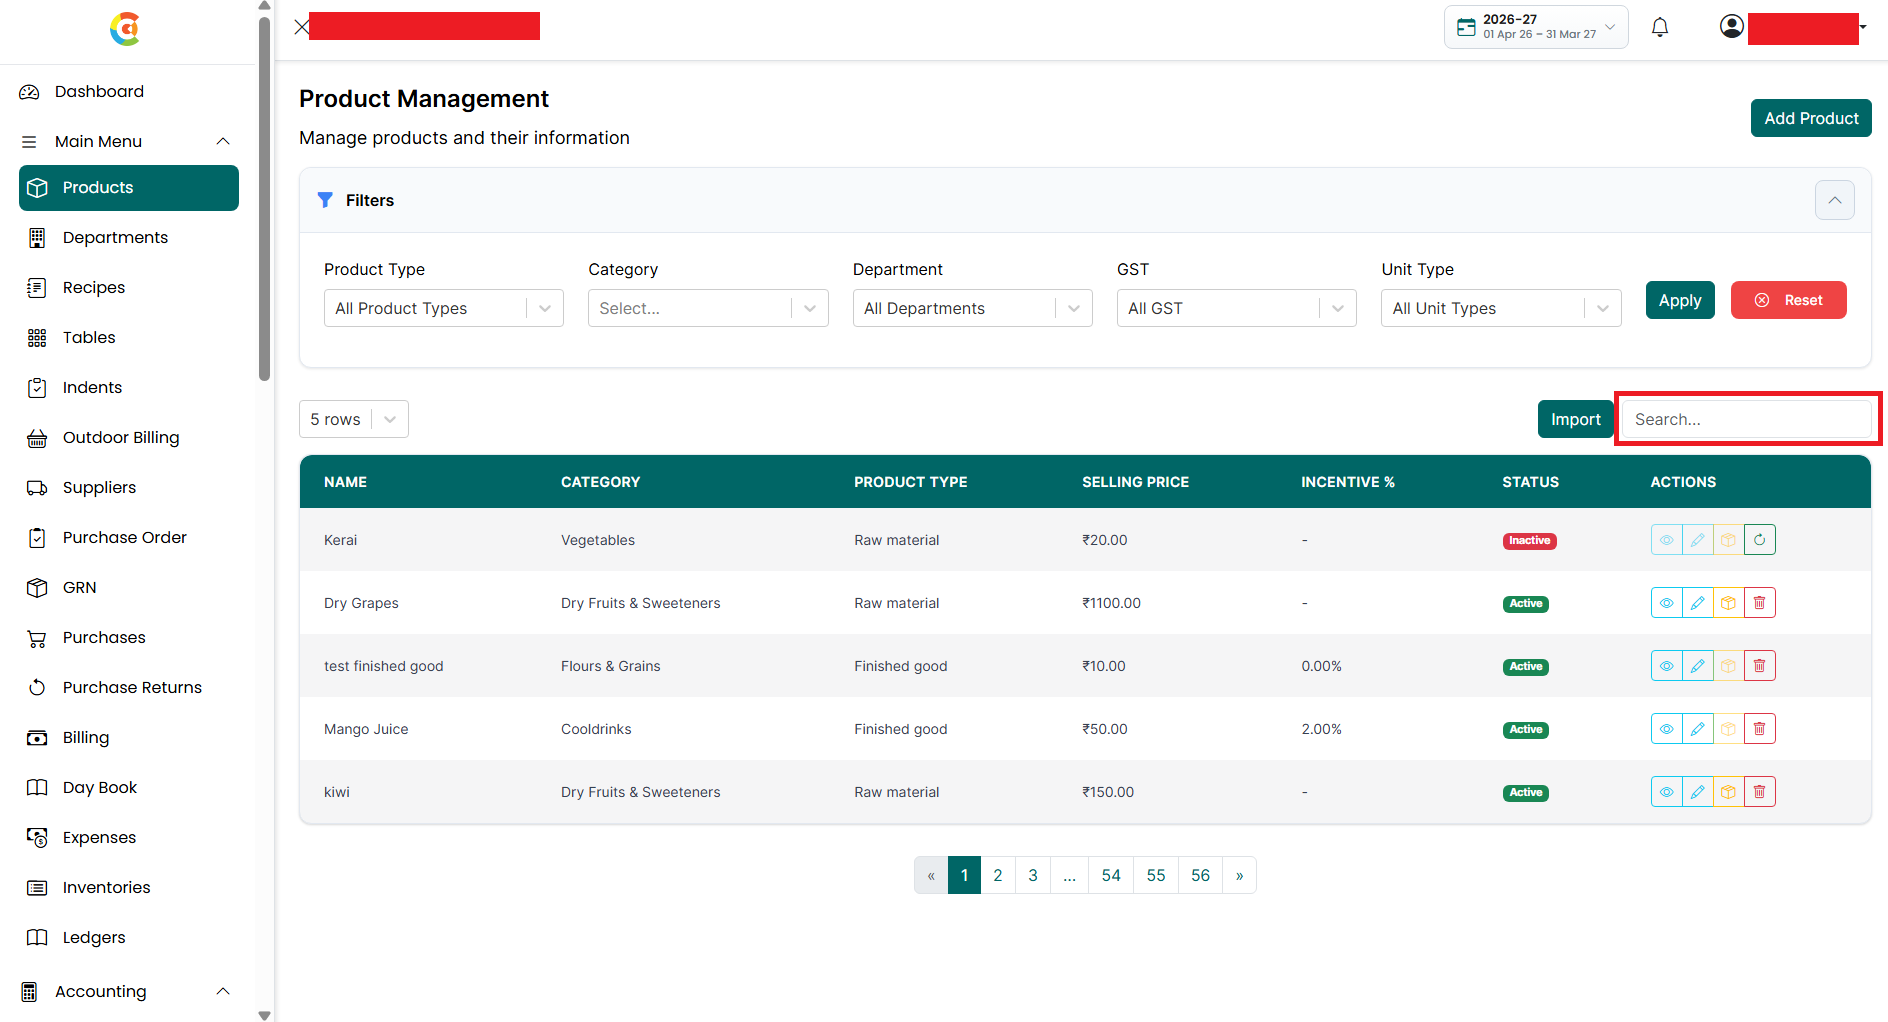
- Search – Enter the product name or
item code in the Search box to quickly find a product.
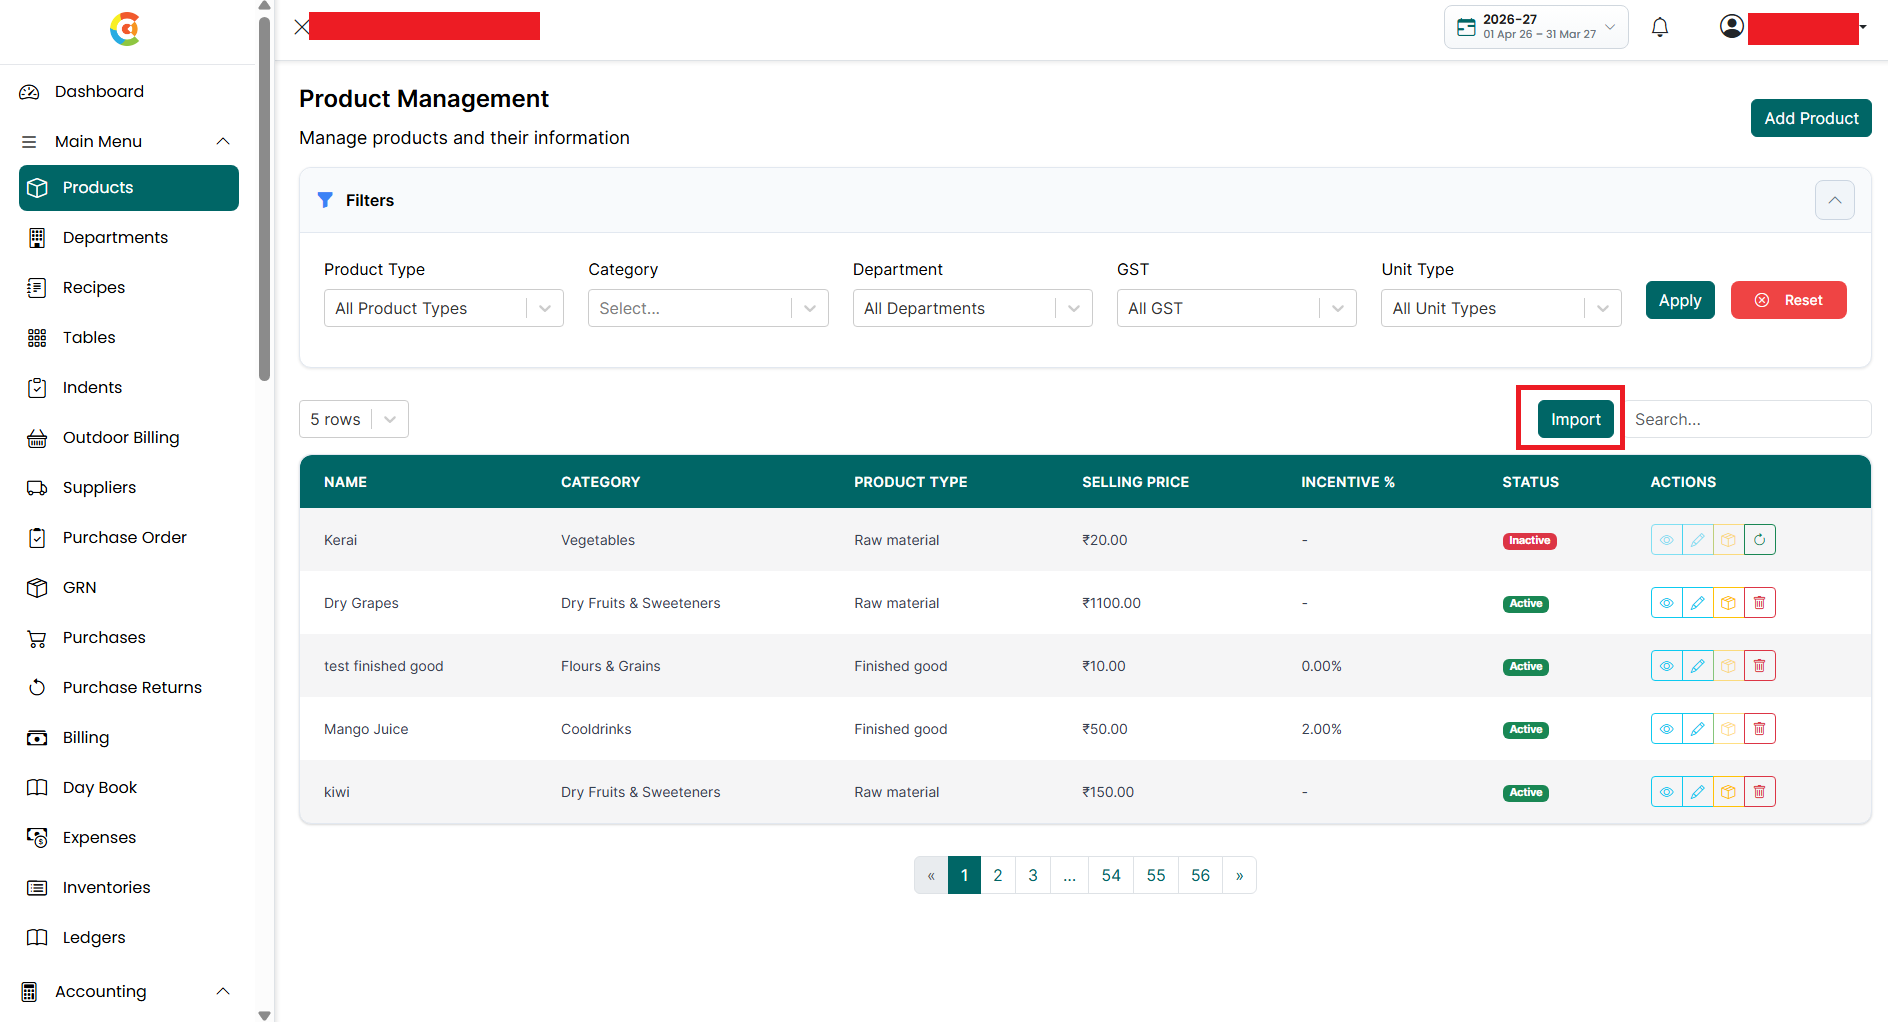
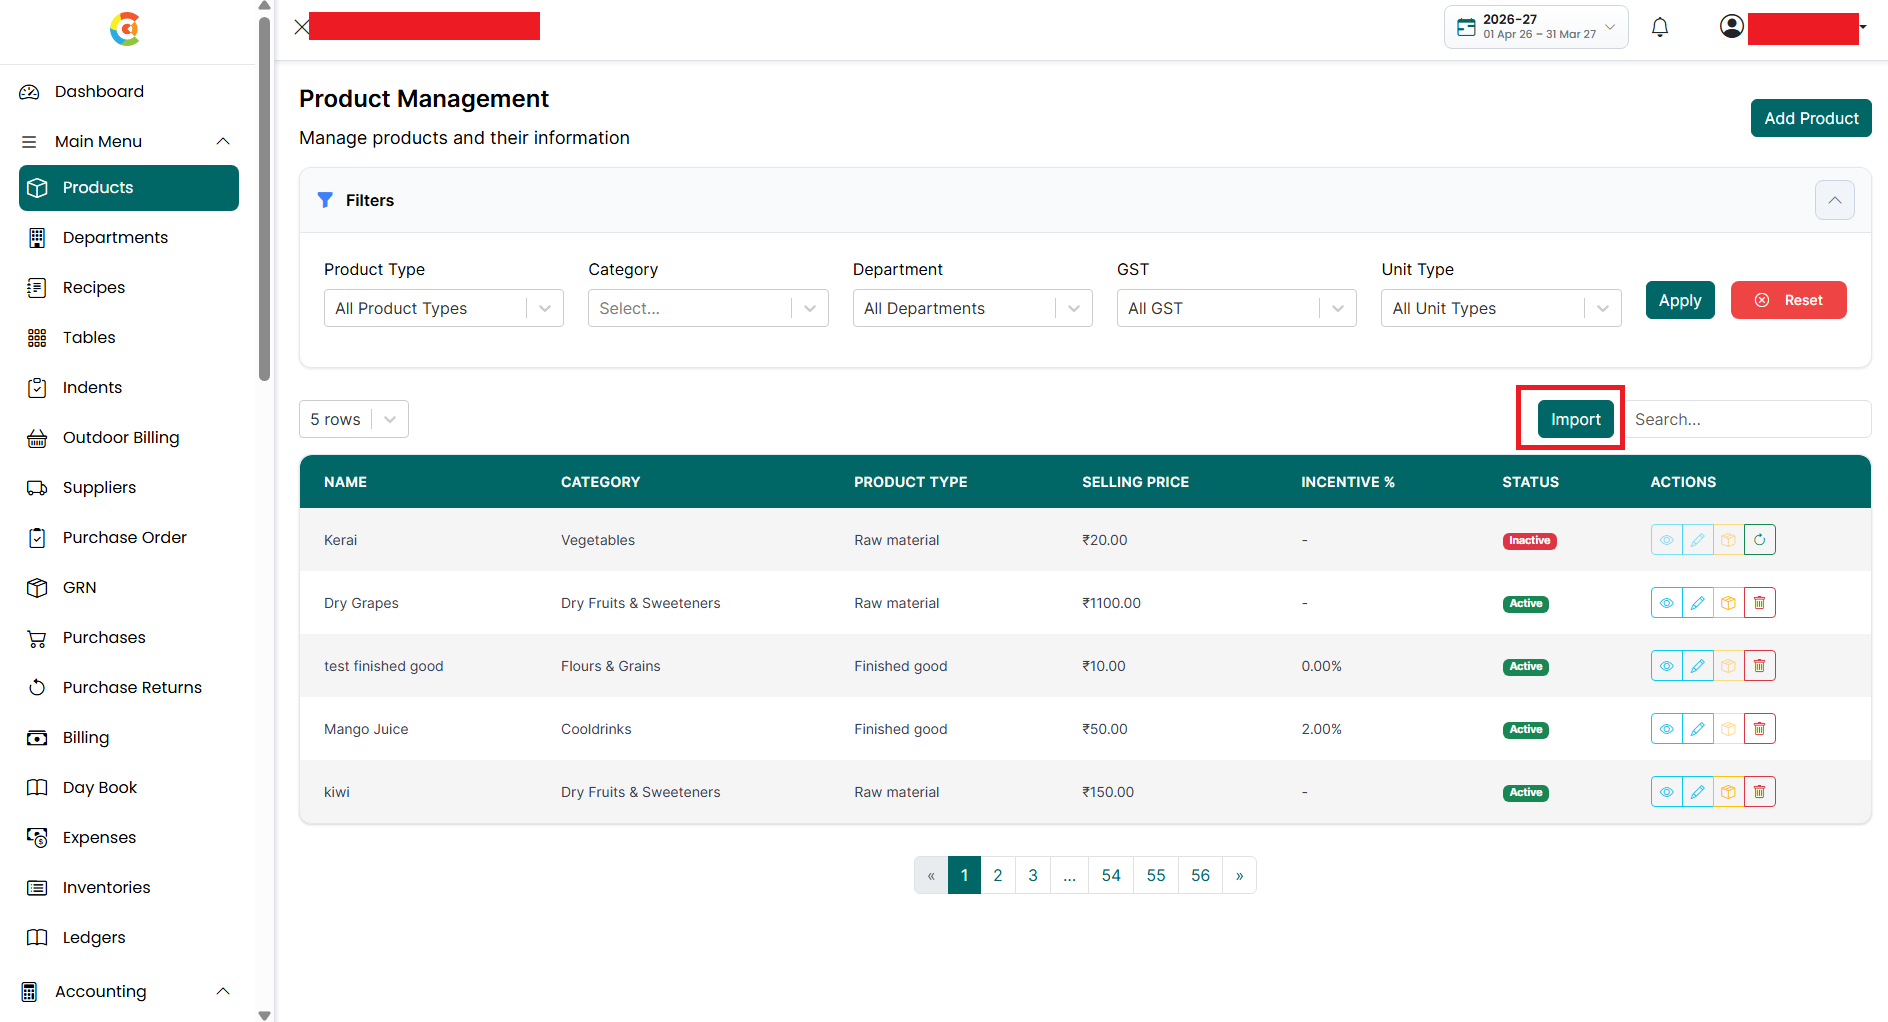
- Import – Click the Import button to
upload products in bulk using an Excel file.
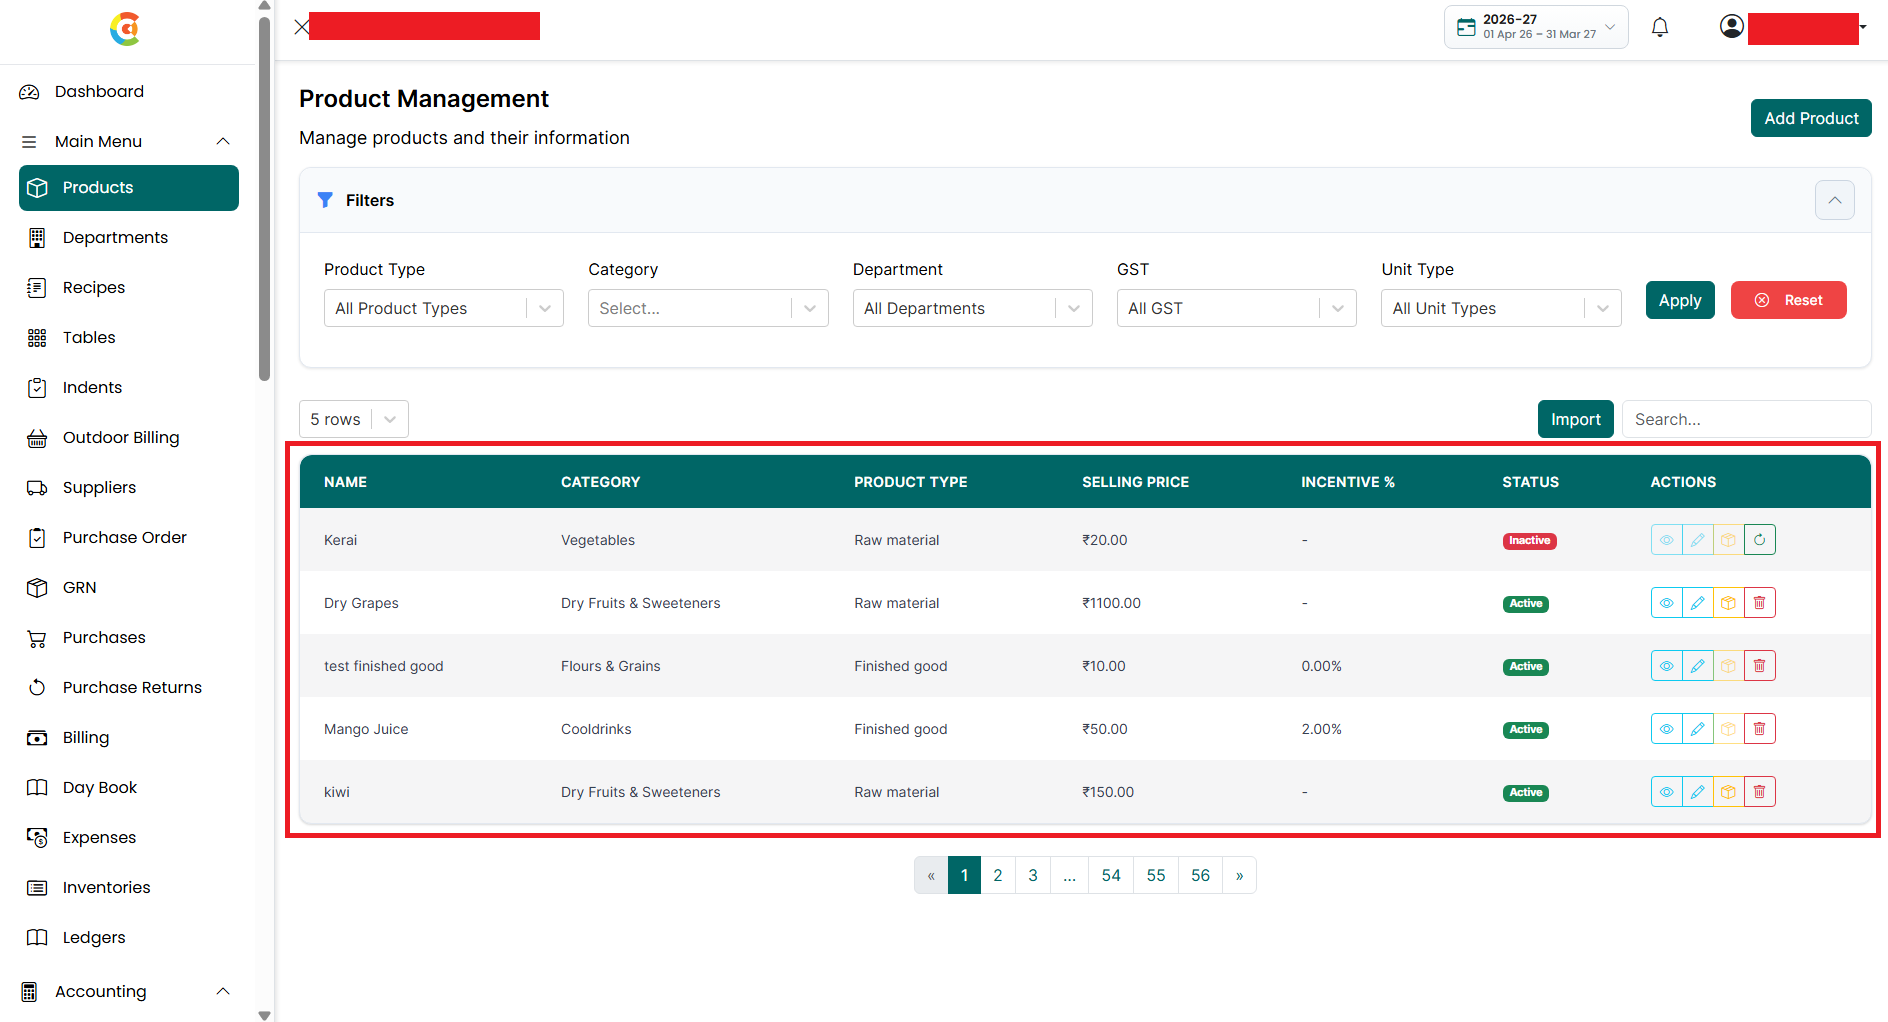
- Product List
• Displays all products with the following information:
■ Product Name – Shows the product or menu item name.
■ Category – Shows the category assigned to the product.
■ Product Type – Shows whether the product is a Finished Goods or Raw Material.
■ Cost Price – Shows the purchase or production cost of the product.
■ Selling Price – Shows the selling price of the product.
■ Status – Shows whether the product is Active or Inactive.
■ Actions
– Shows the actions available for each product.
- View – Click the View icon to see the
complete product details.
- Edit – Click the Edit icon to update
the product information.
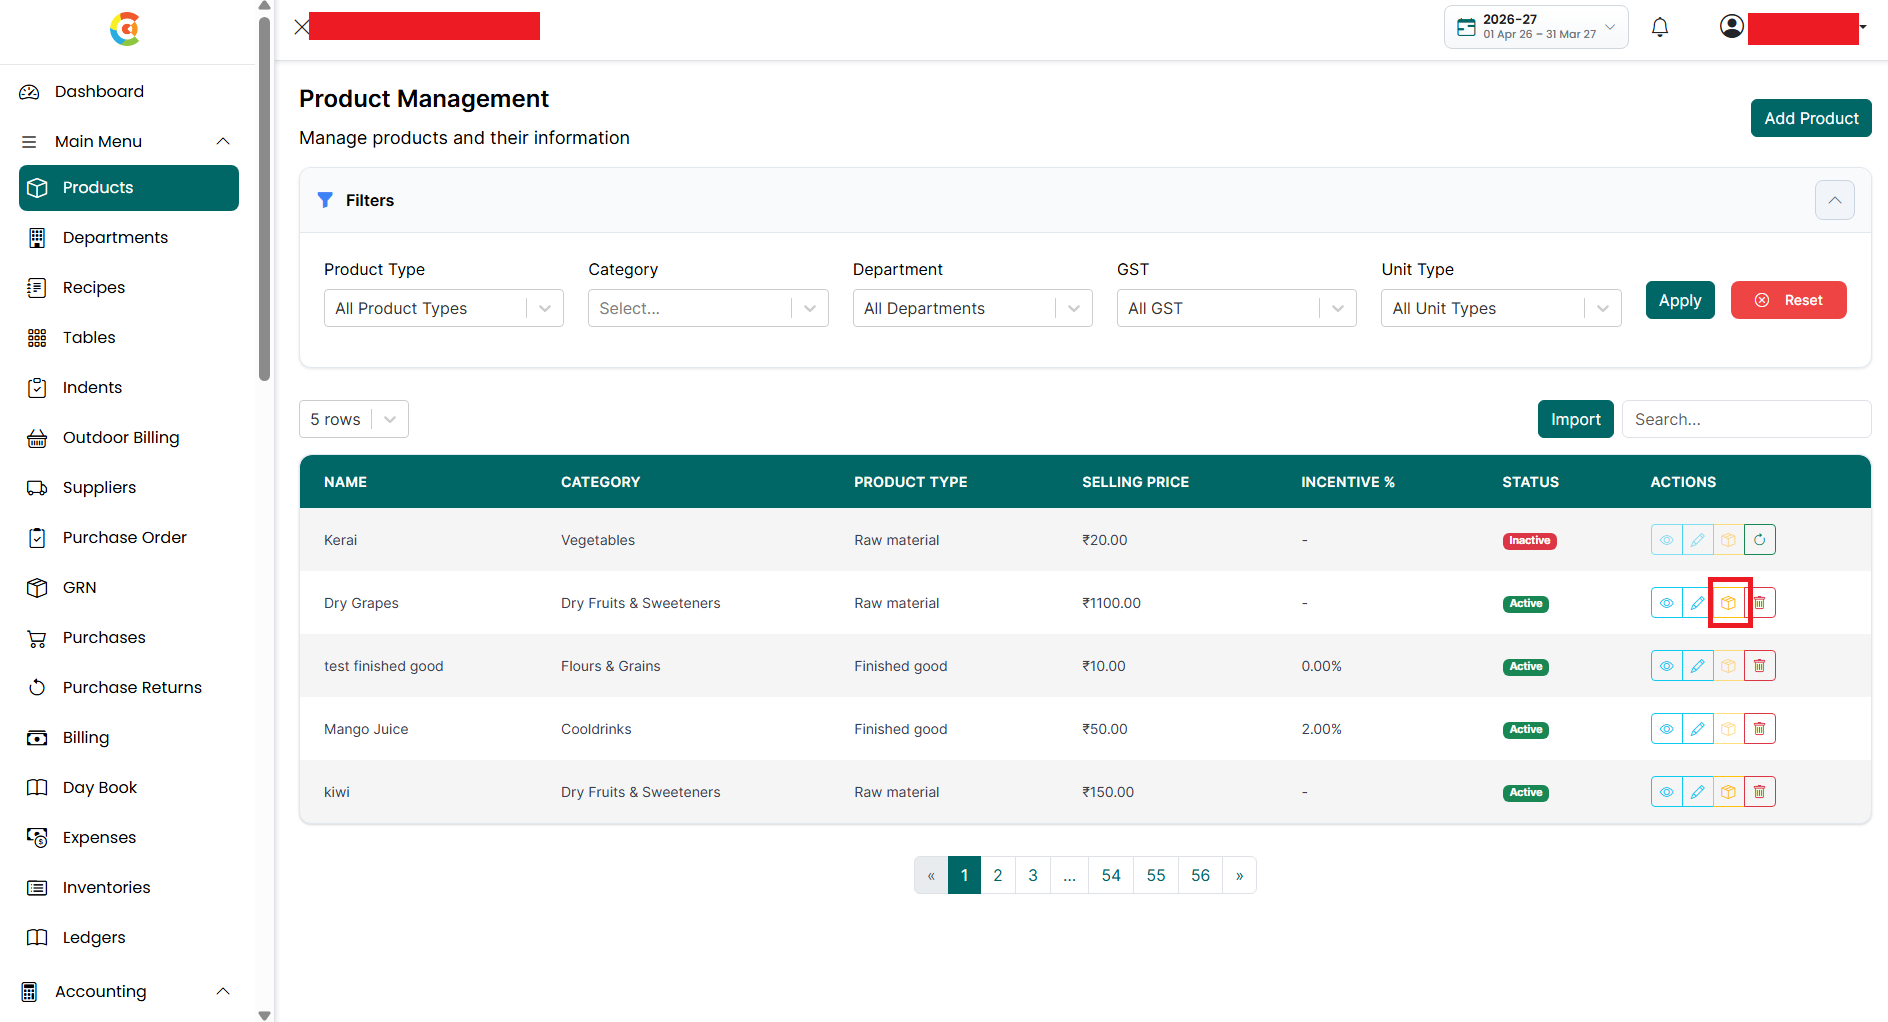
- Opening Stock – Click the Opening
Stock icon to add or update the opening stock details for the selected
product.
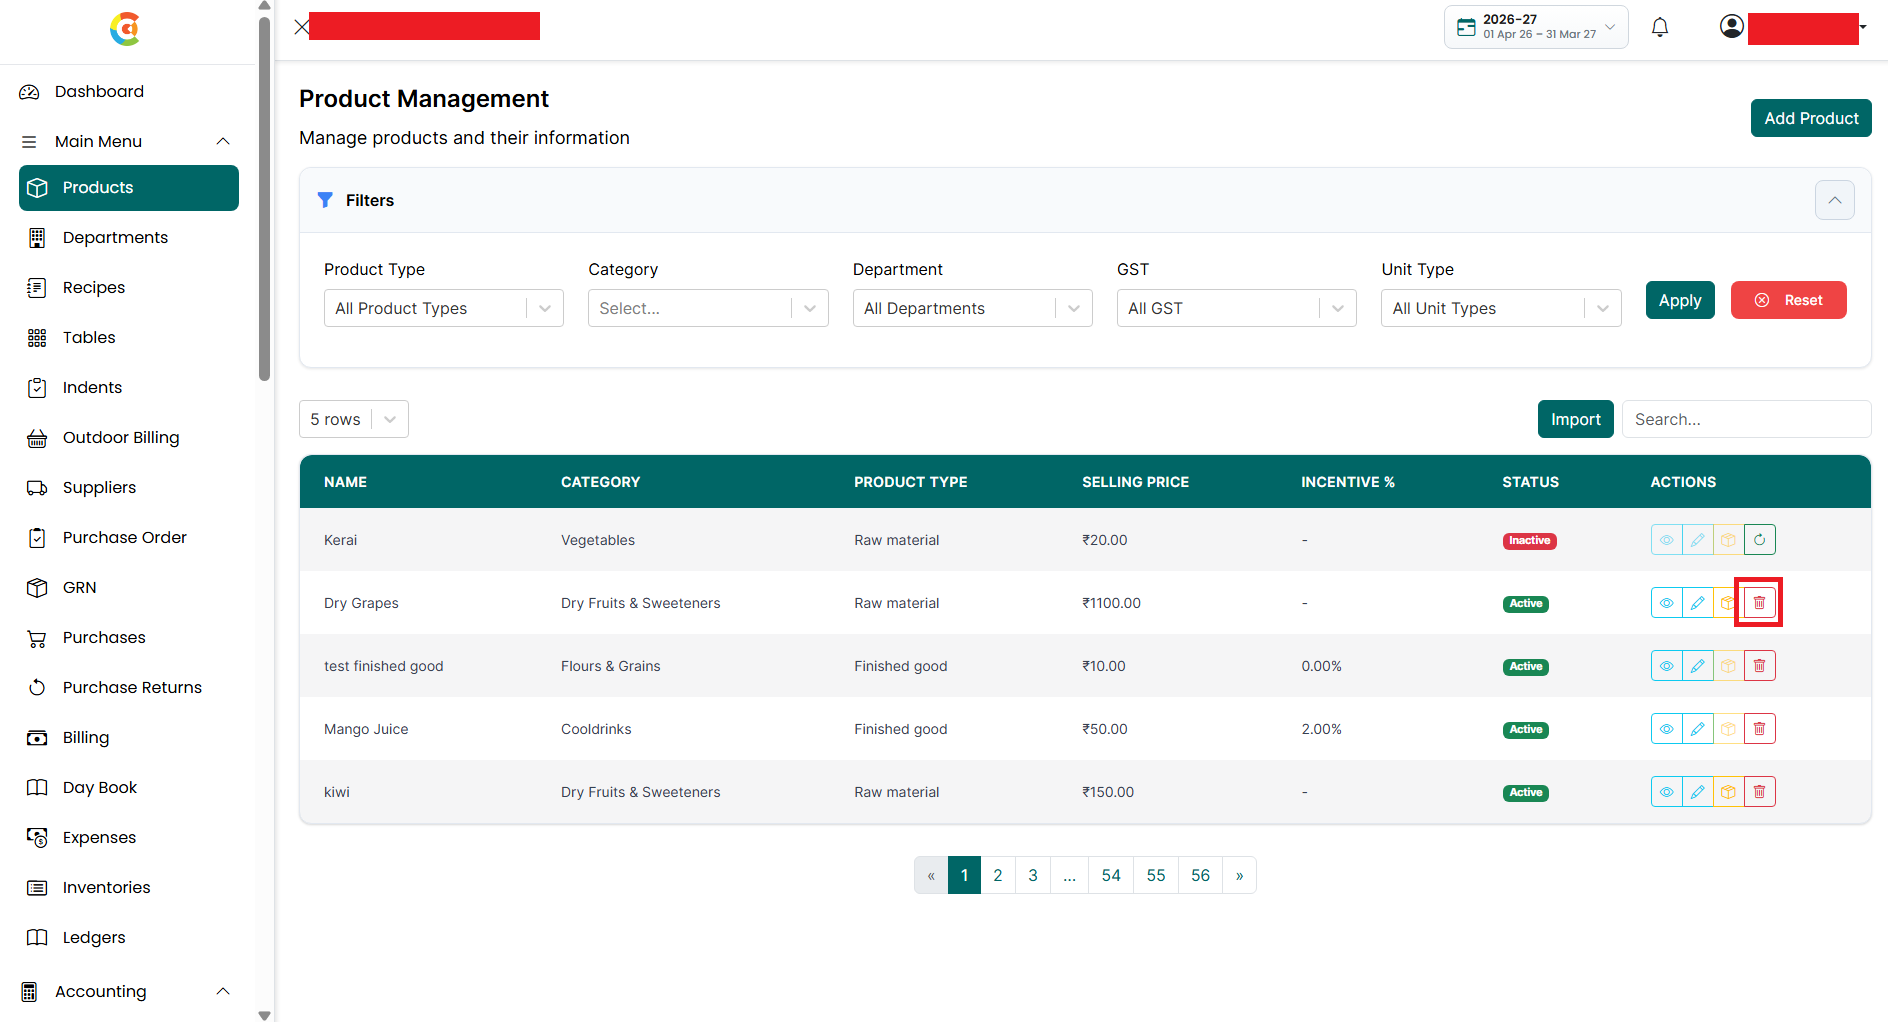
- Delete – Click the Delete icon to
remove the product from active use. Deleted products remain visible in the
Product Listing page and can be restored later if required.
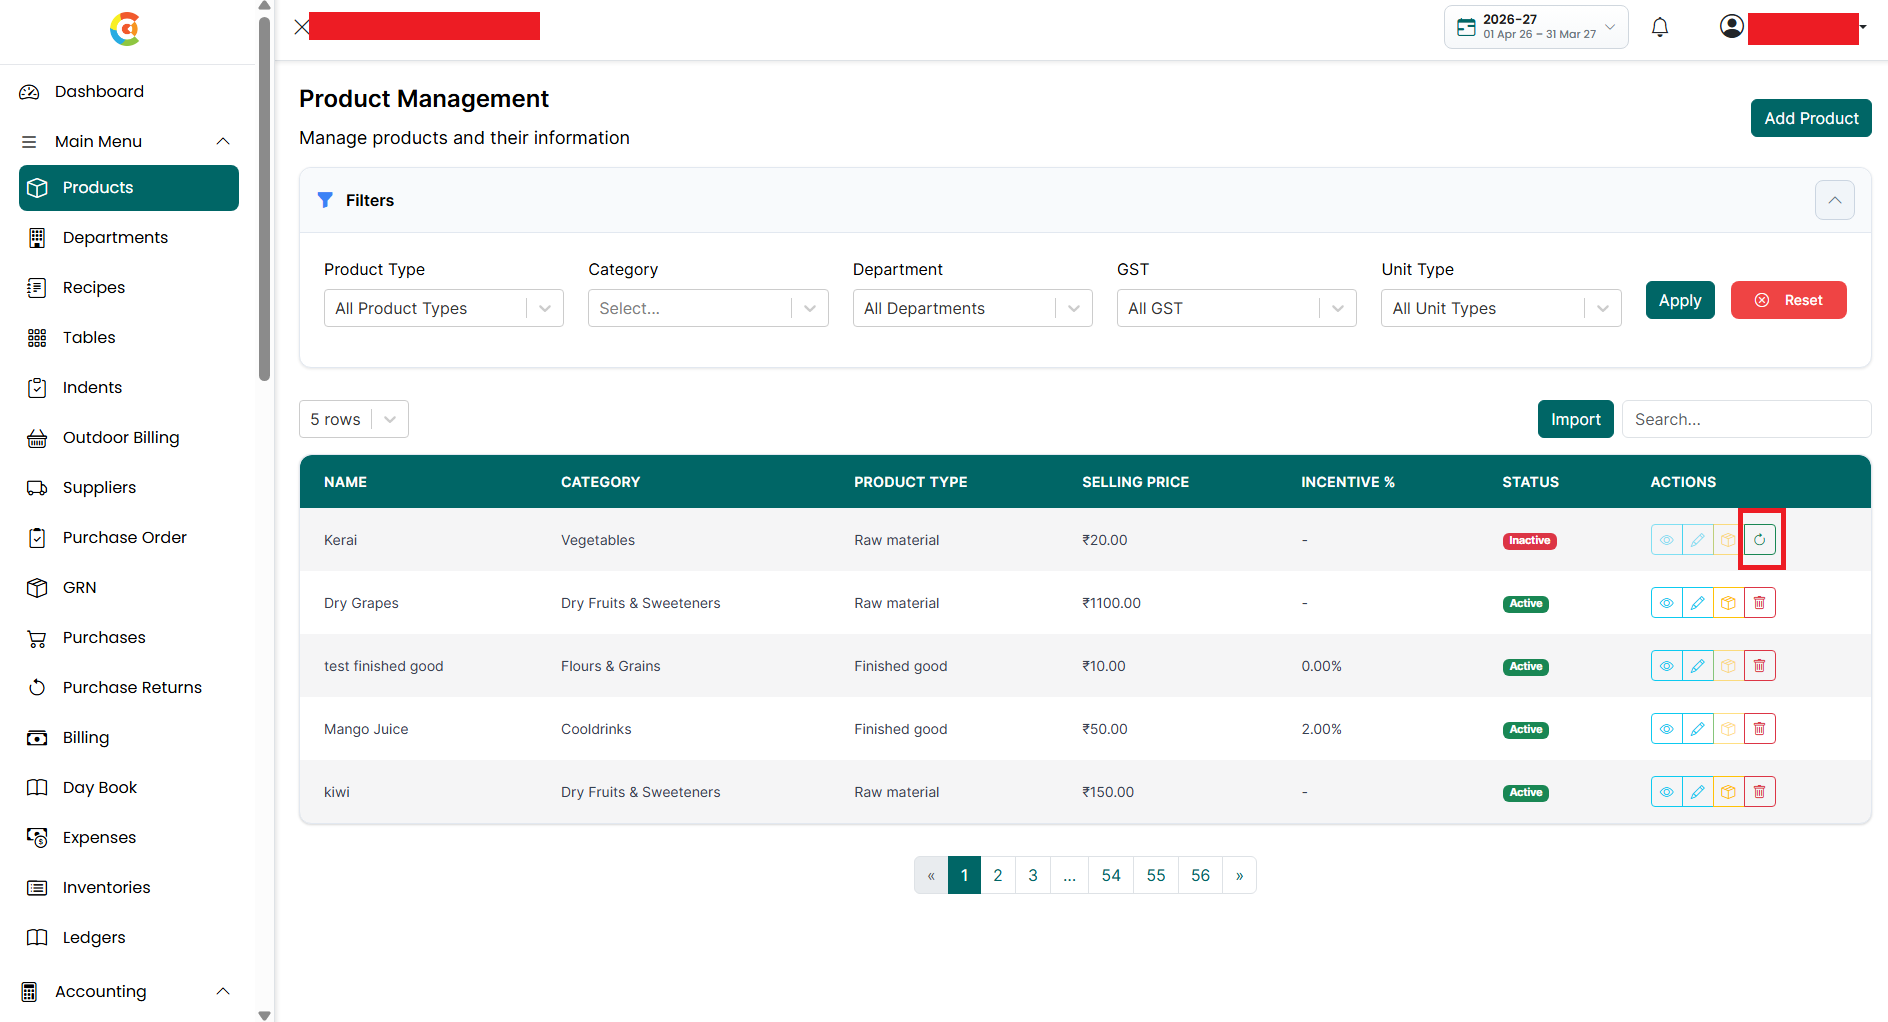
- Retrieve – If a product has been
deleted, the Retrieve icon is displayed instead of the Delete icon. Click
it to restore the product.
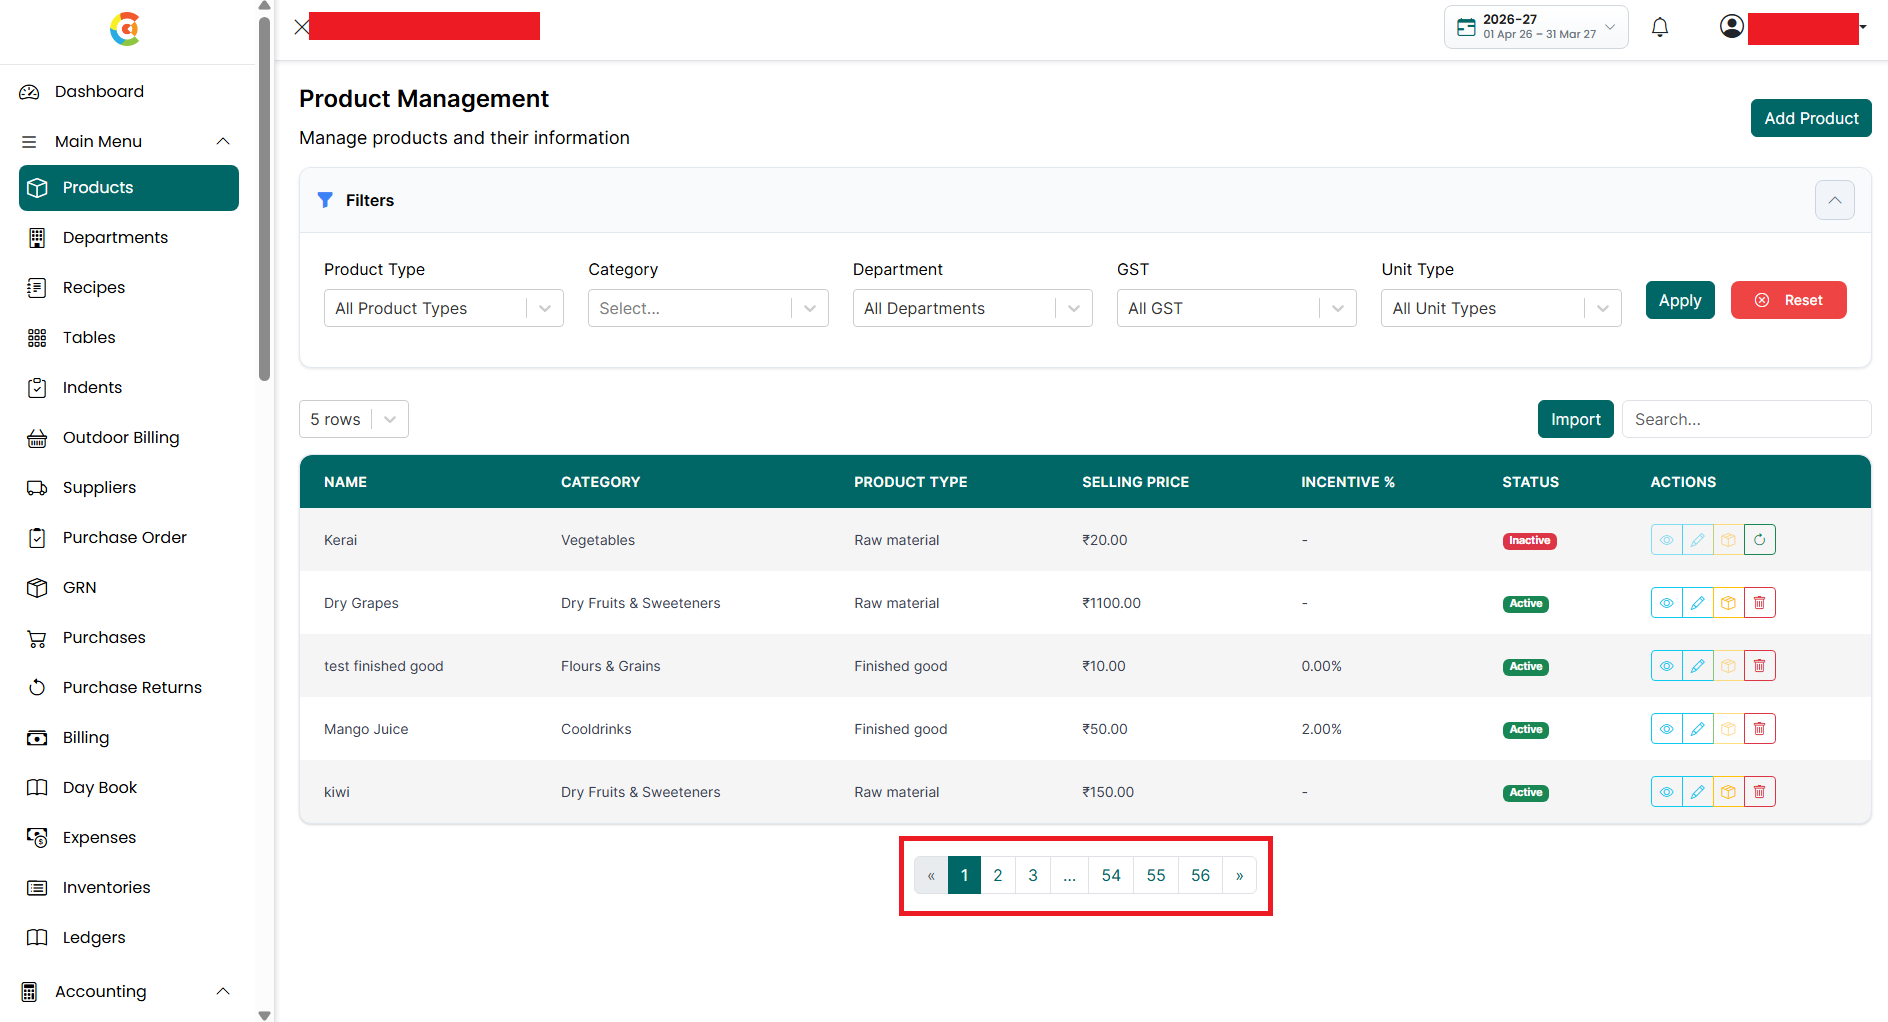
- Pagination
– Use the page numbers or the Previous and Next buttons at the bottom of
the page to move between different pages.
Note: Products are displayed with the most recently created product shown first.
Add Product (Finished Goods)
To create a new Finished Goods product, follow the steps below.
- Go
to the Main Menu and click Products. The Product Listing page is
displayed.
- Click Add Product.
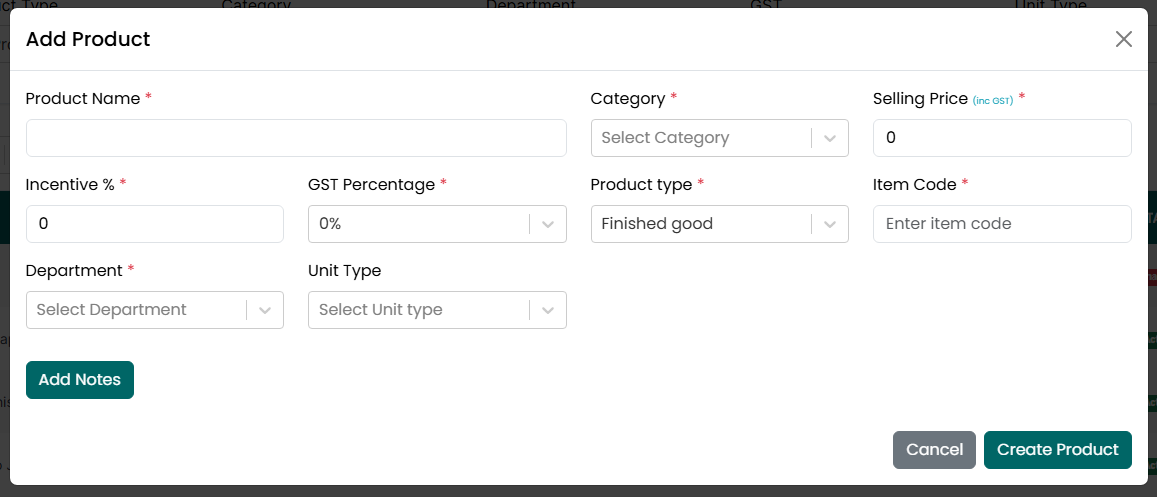
- The Add Product window is displayed.
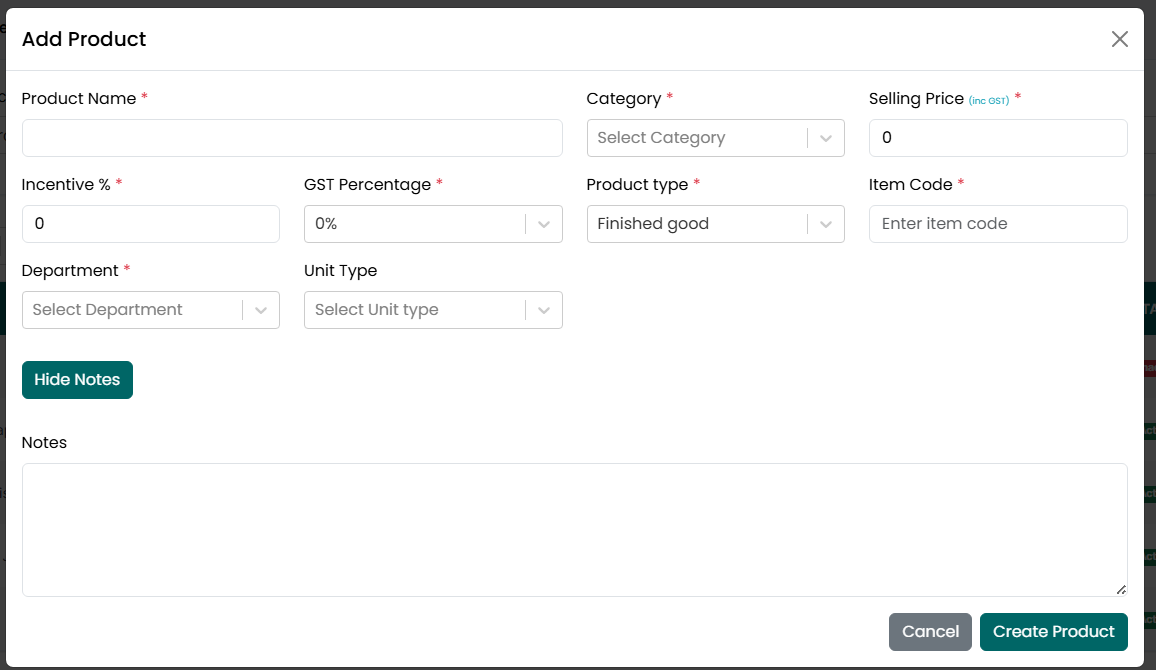
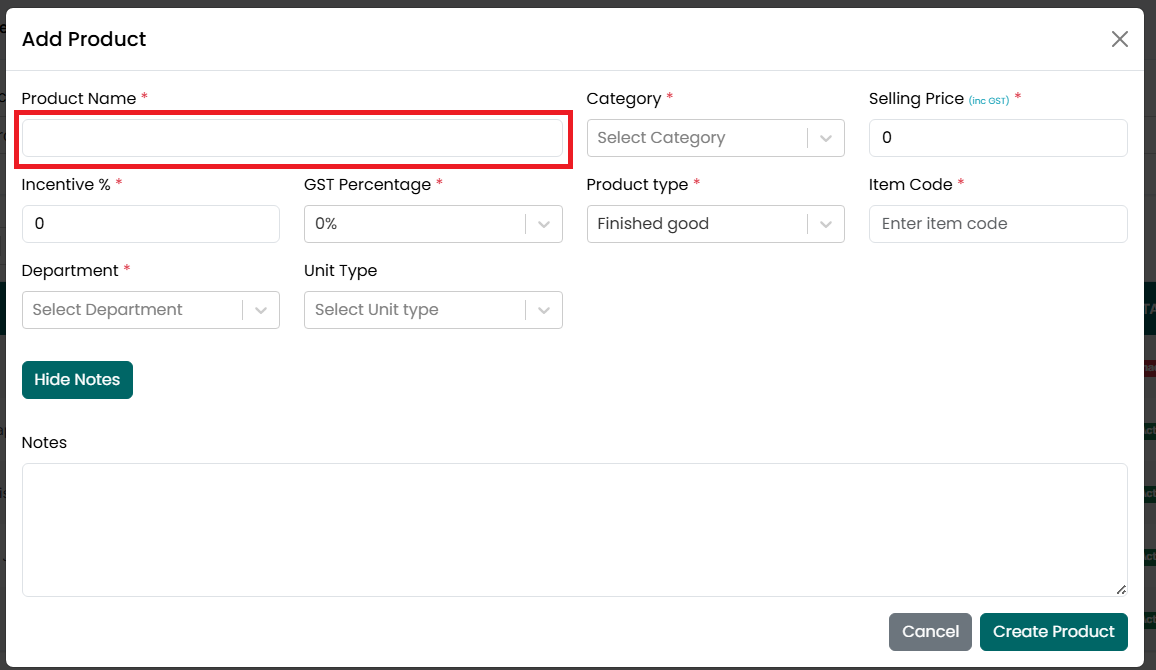
- Enter the Product Name. This field is
required. Each product must have a unique Product Name. Duplicate product
names are not allowed.
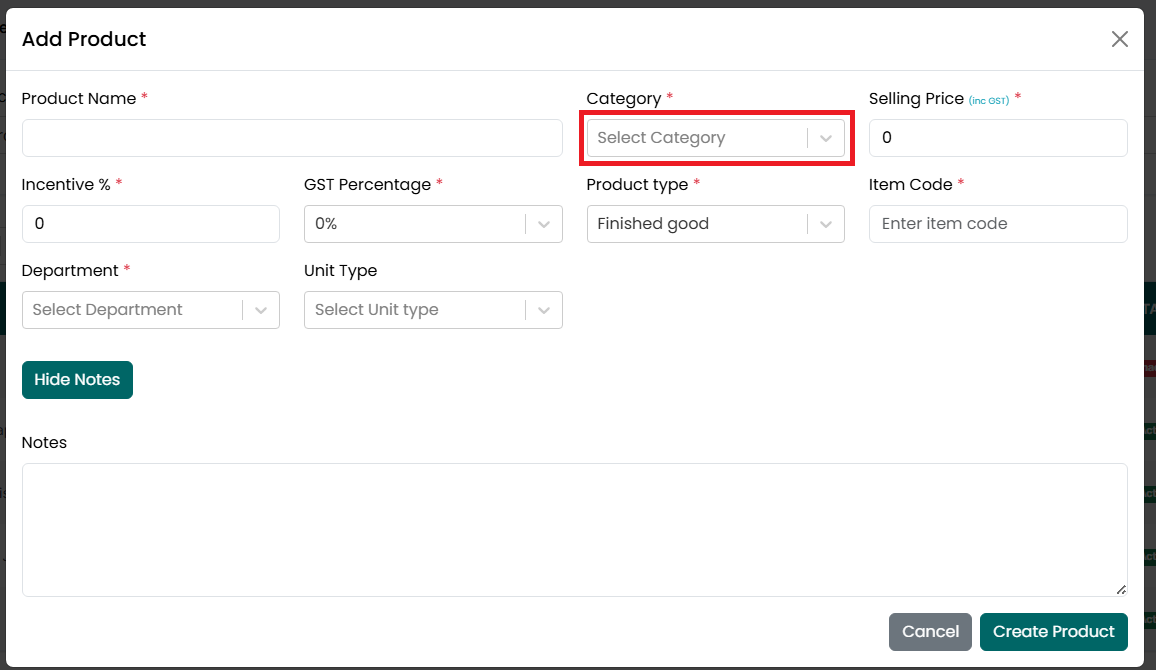
- Select the Category. This field is
required.
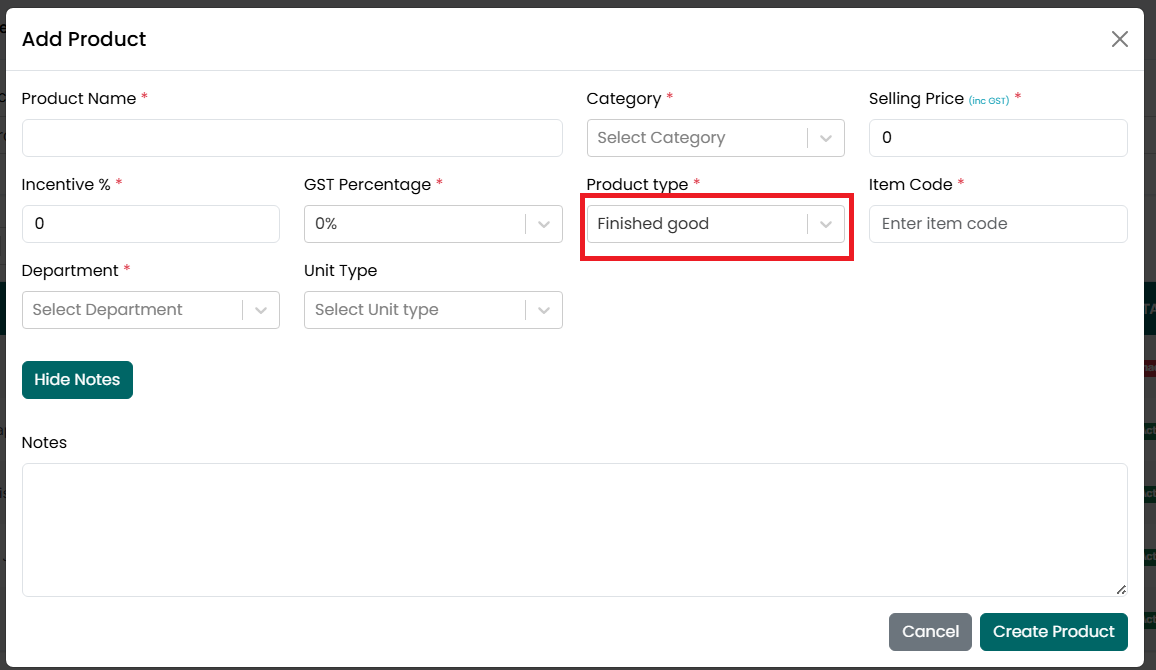
- Select the Product Type as Finished
Goods. This field is required.
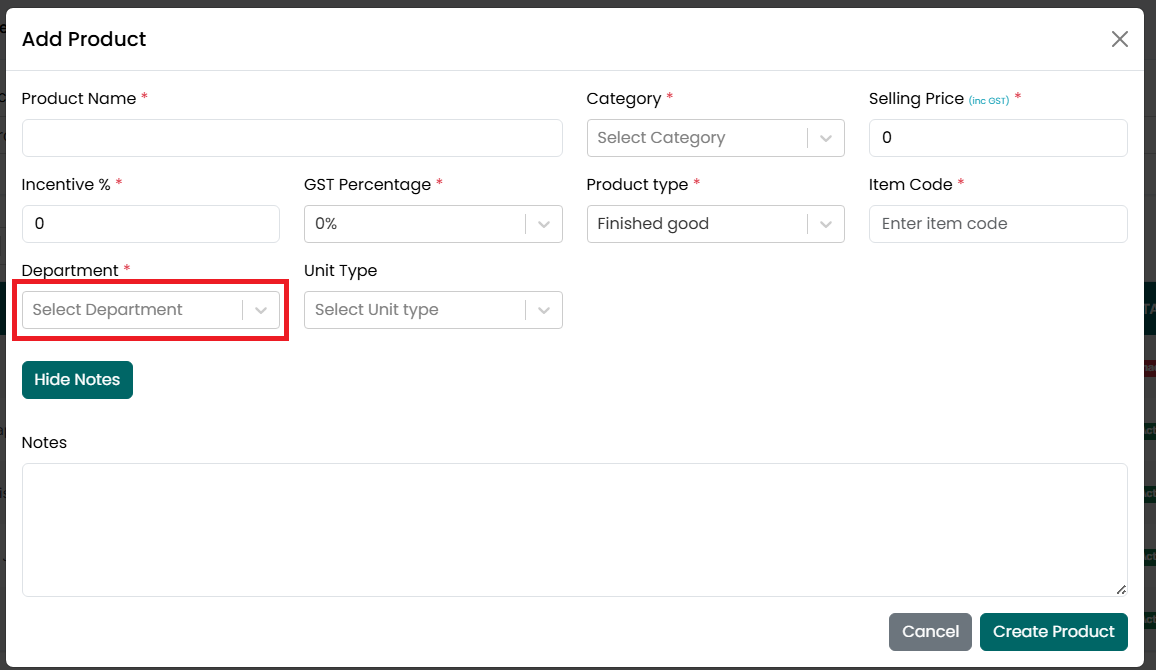
- Select the Department. This field is
required for Finished Goods and is used to assign the product to a
specific operational department.
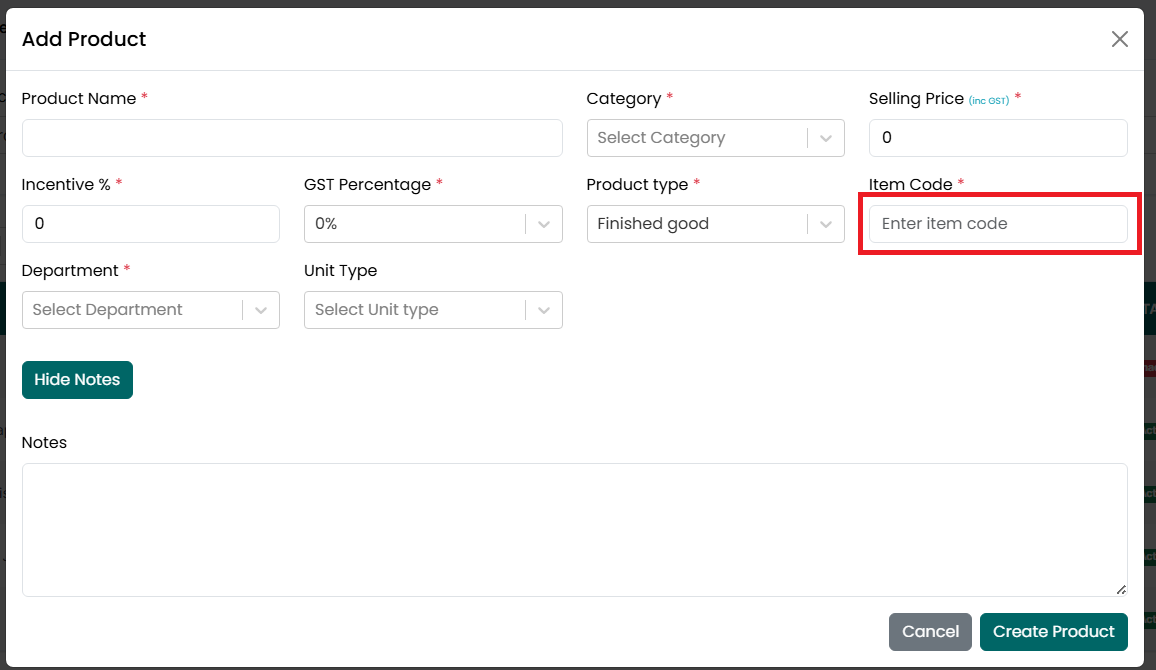
- Enter the Item Code. This field is
mandatory for Finished Goods. The Item Code is used to uniquely identify
the product during billing and inventory transactions. Each Item Code must
be unique. Duplicate Item Codes are not allowed.
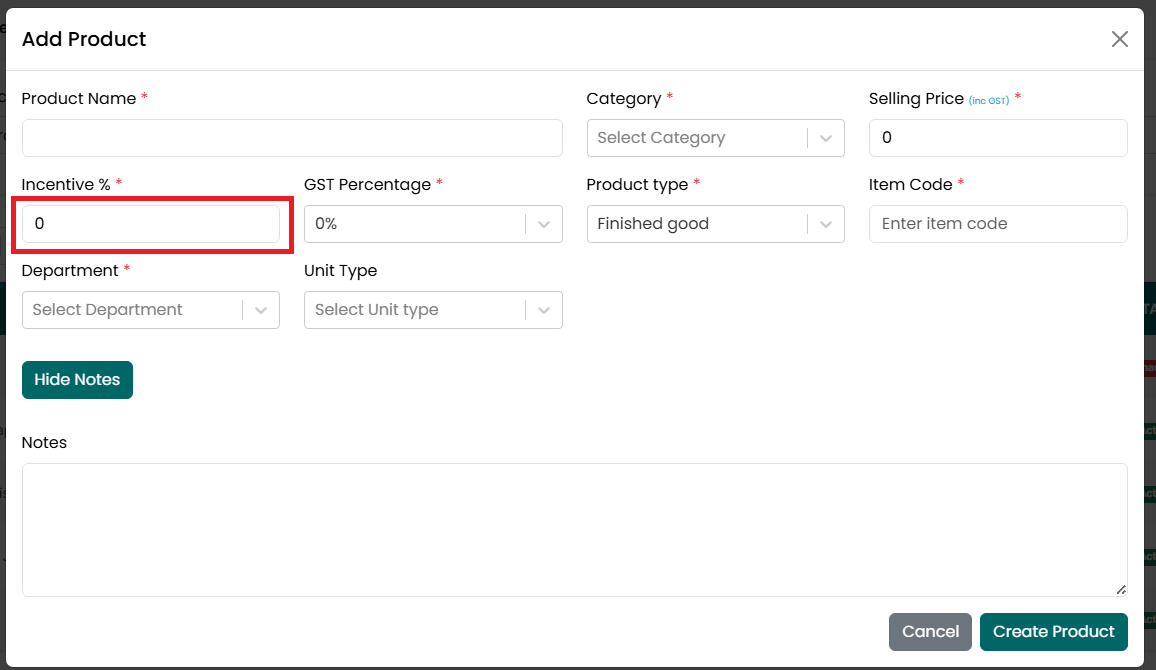
- Enter the Incentive Percentage. This
field is required and is generally used for Finished Goods to calculate
sales incentives.
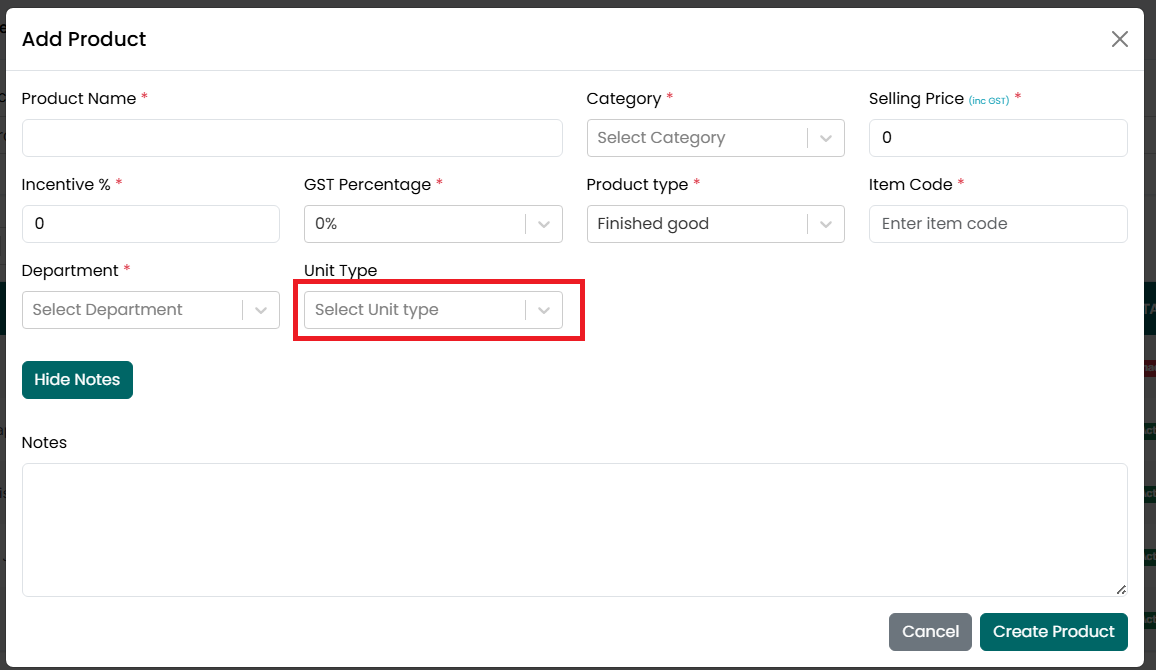
- Select the Unit Type. This field is
optional. The Unit Type defines how the product is measured, such as
Piece, Kg, Gram, Litre, or Portion.
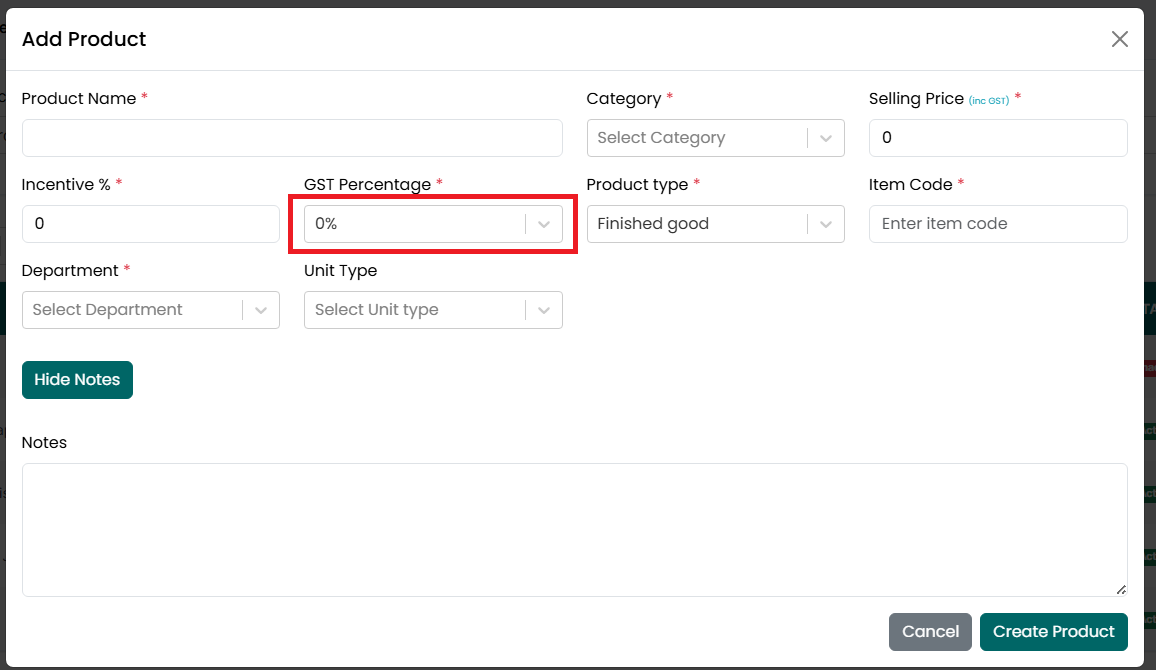
- Select the GST Percentage. This field
is required and determines the tax rate applicable to the product.
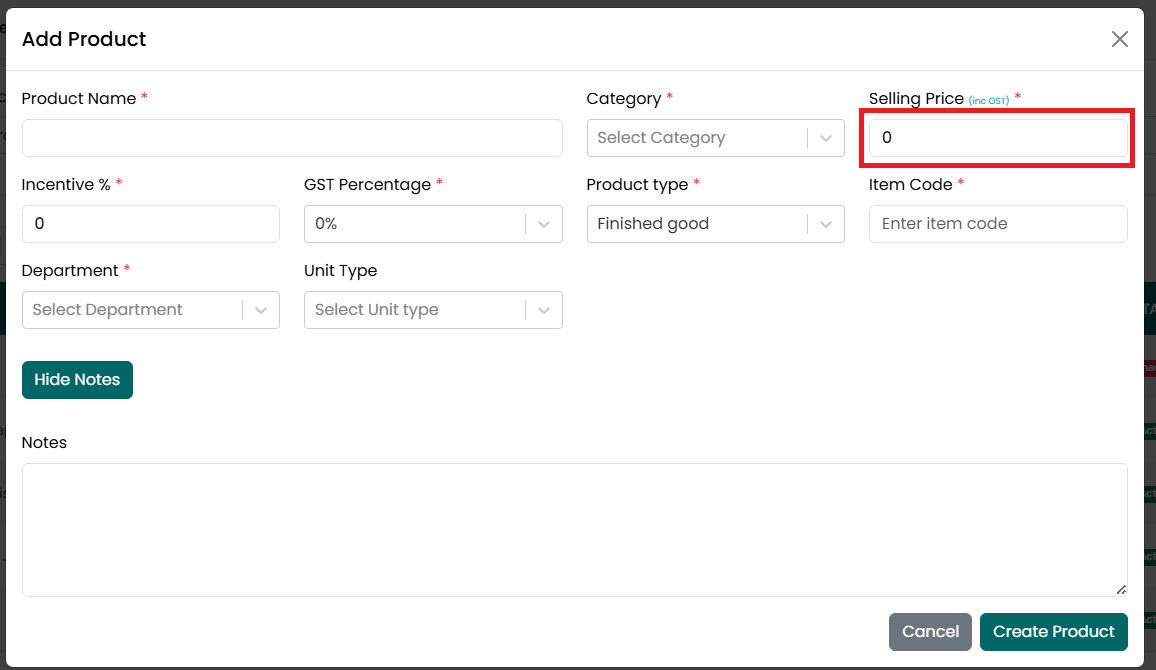
- Enter the Selling Price. This field is
required and represents the price charged to customers.
- Click Add Notes if you want to enter
additional information about the product. This field is optional.
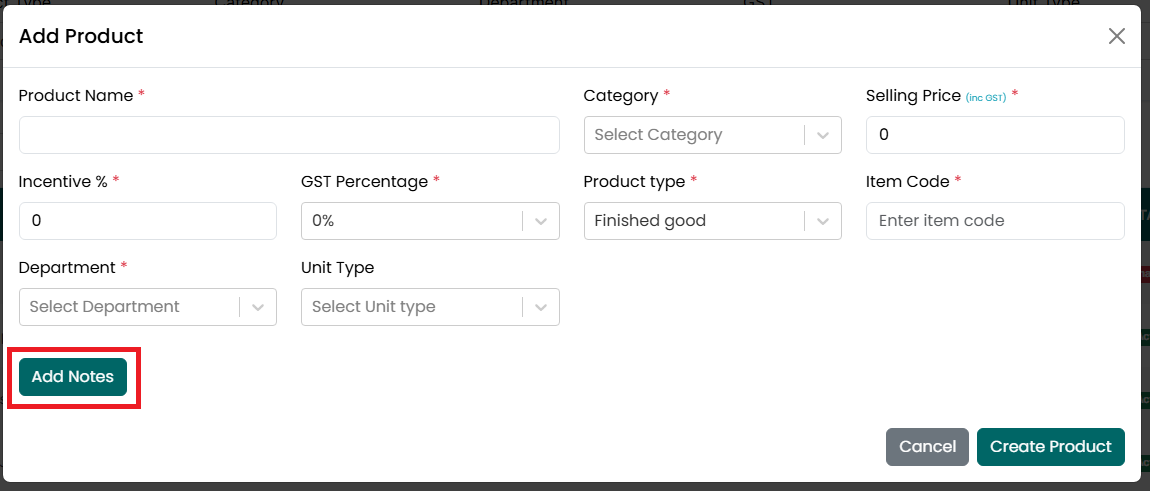
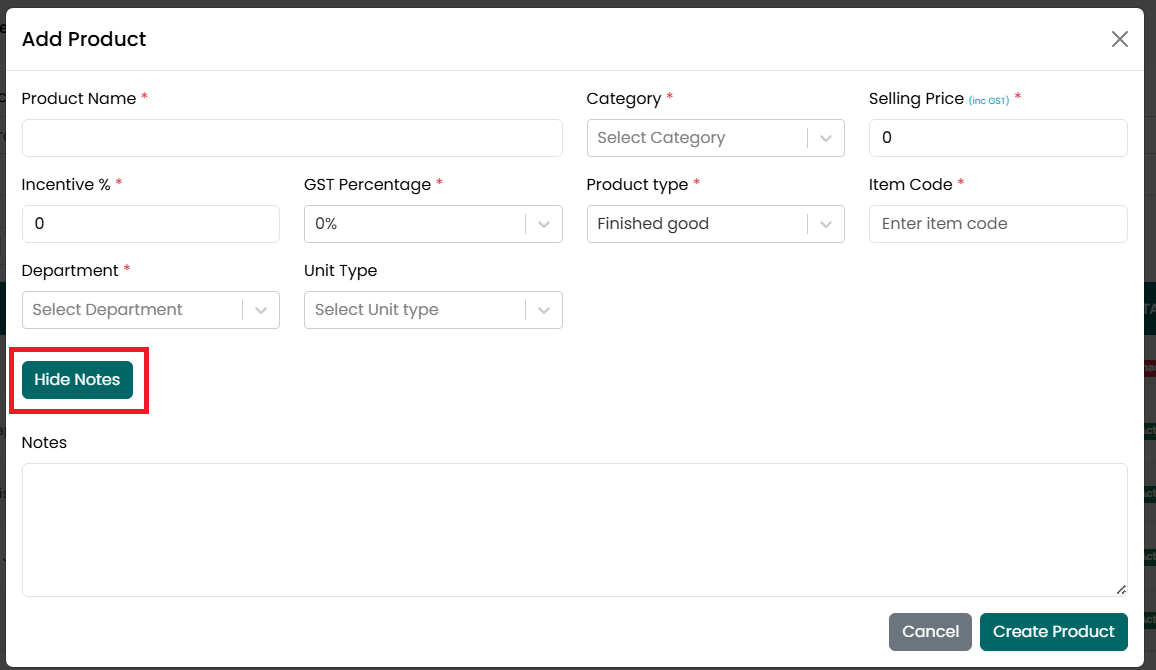
- After the Description section is
expanded, you can enter the product description. Click Hide Notes if you
want to collapse the Description section without removing the entered
information.
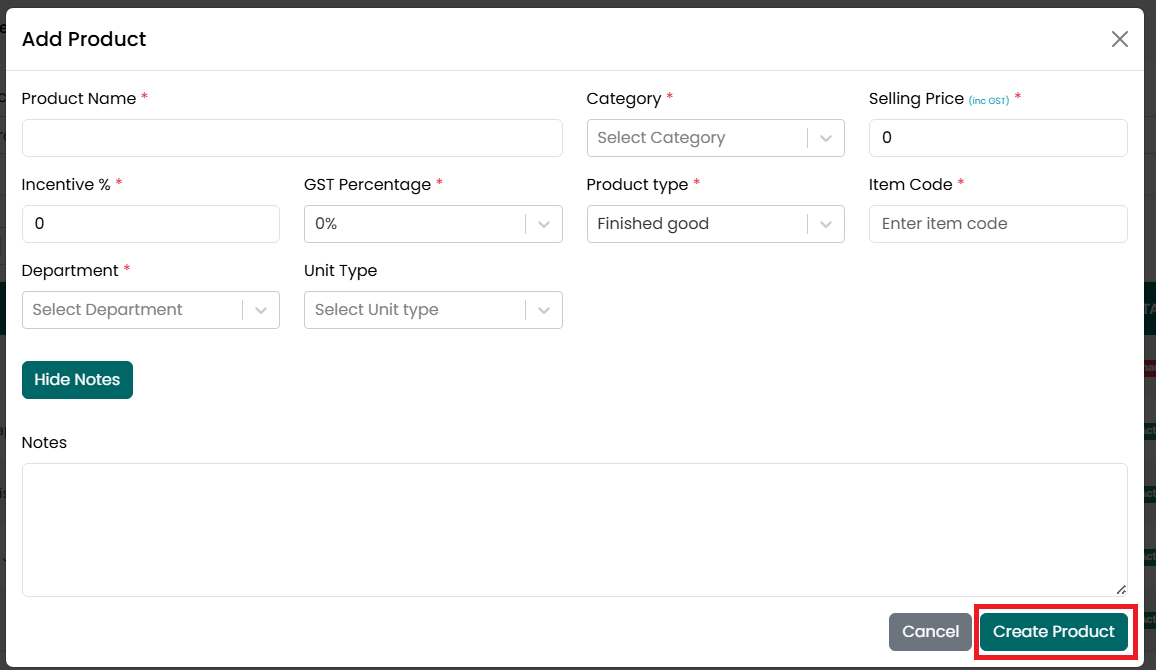
- Click Create Product to save the
product.
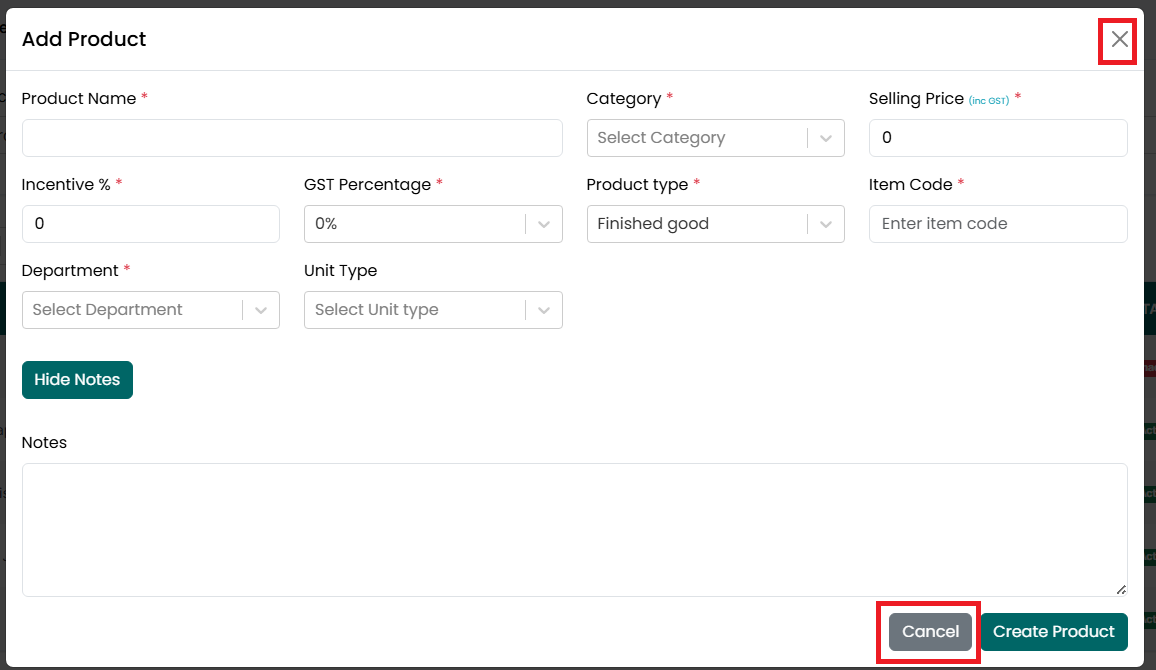
- Click Cancel or the X icon to close
the window without saving.
- After the product is created successfully, a confirmation message is displayed, and the new product appears in the Product Listing page.
Add Product (Raw Material)
To create a new Raw Material product, follow the steps below.
- Go
to the Main Menu and click Products. The Product Listing page is
displayed.
- Click Add Product.
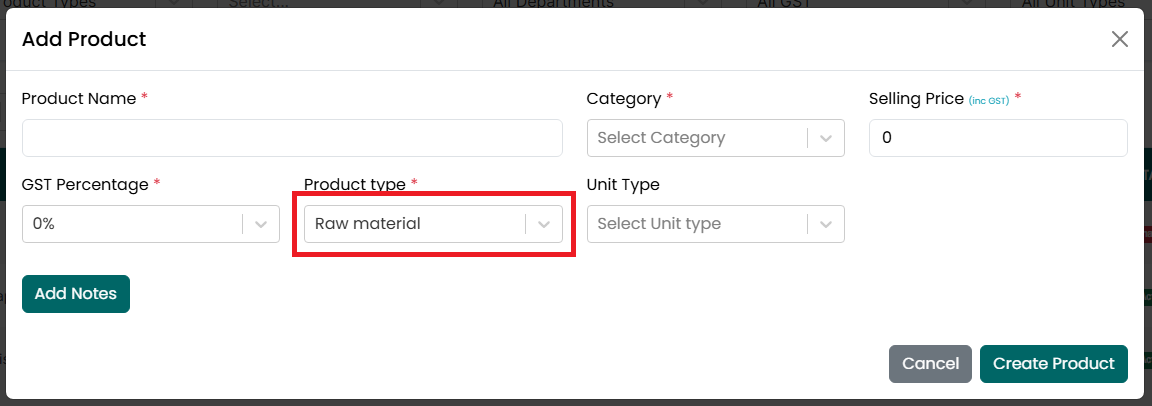
- The Add Product window is displayed.
- Select the Product Type as Raw
Material. This field is required.
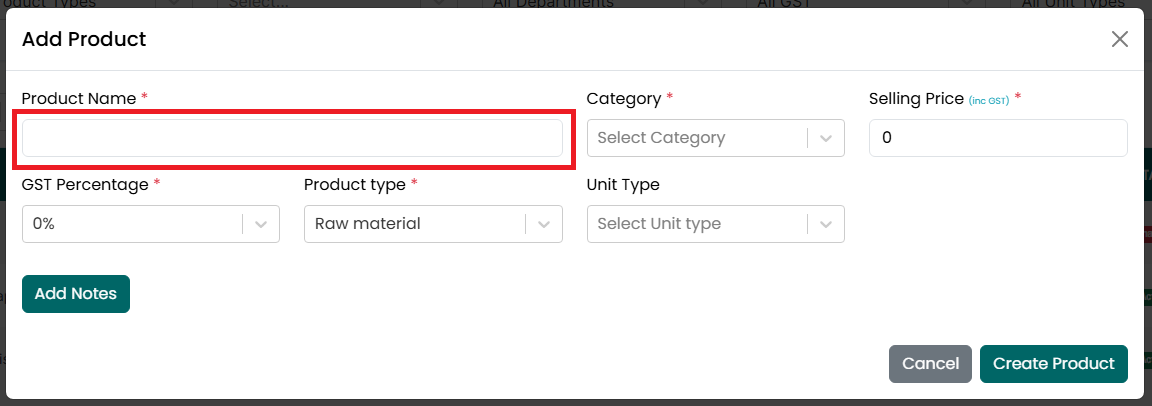
- Enter the Product Name. This field is
required. Each product must have a unique Product Name. Duplicate product
names are not allowed.
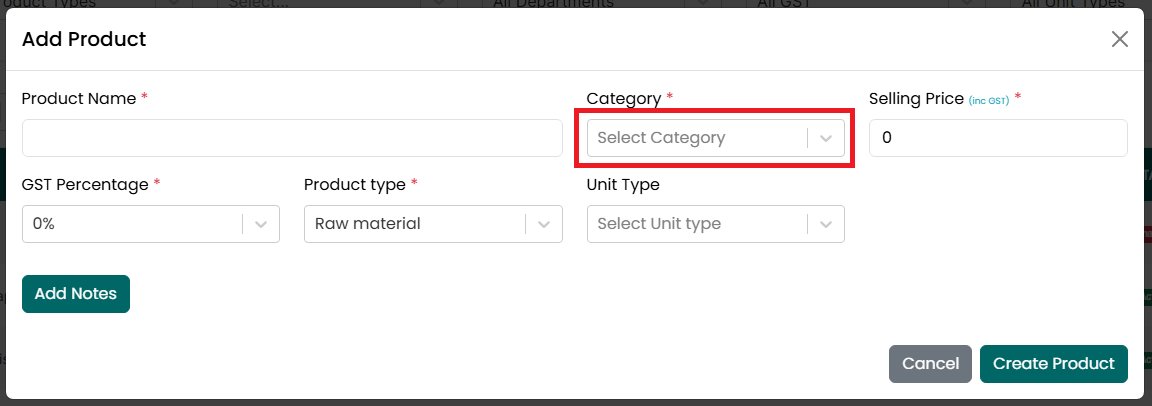
- Select the Category. This field is
required.
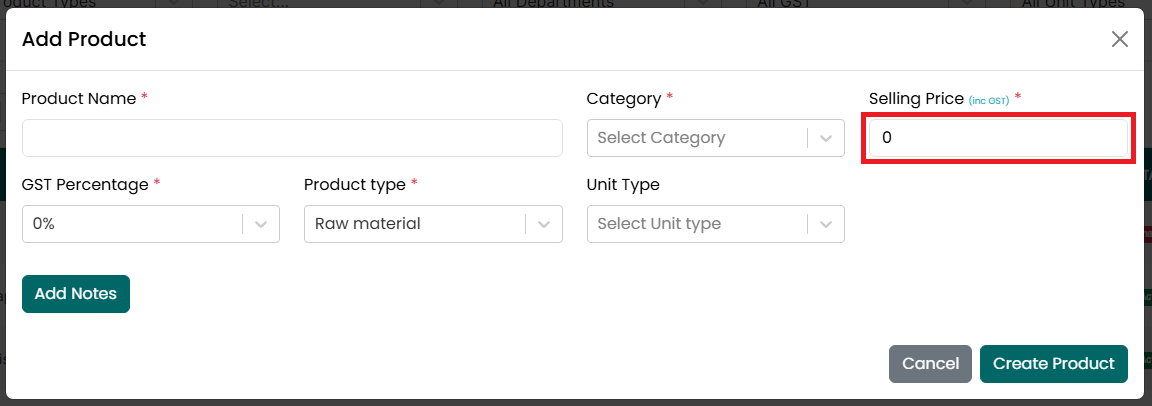
- Enter the Selling Price. This field
is required and represents the selling price of the product.
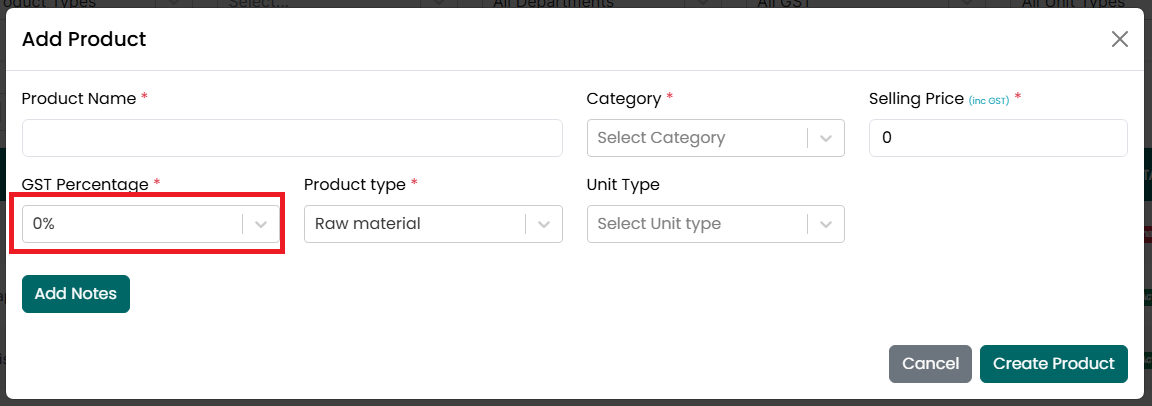
- Select the GST Percentage. This field
is required and determines the tax rate applicable to the product.
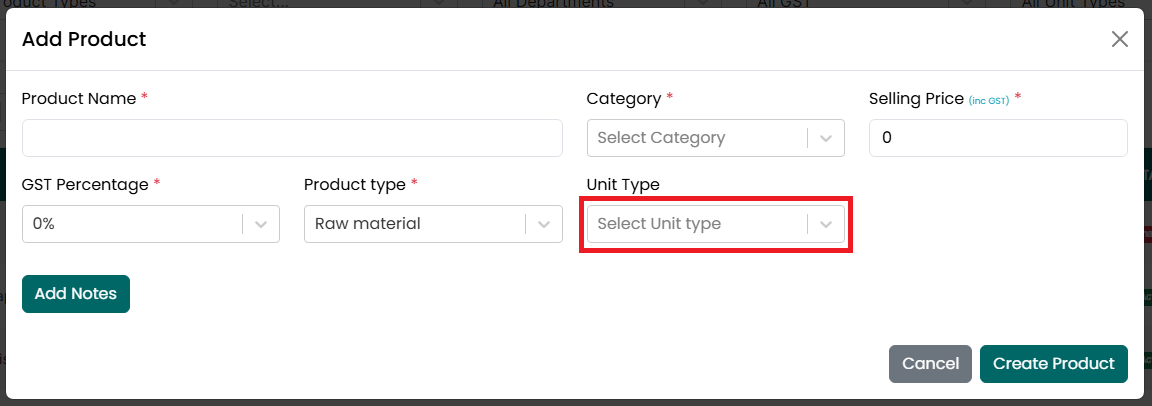
- Select the Unit Type, if required.
This field is optional. The Unit Type defines how the product is measured,
such as Piece, Kg, Gram, Litre, or Portion.
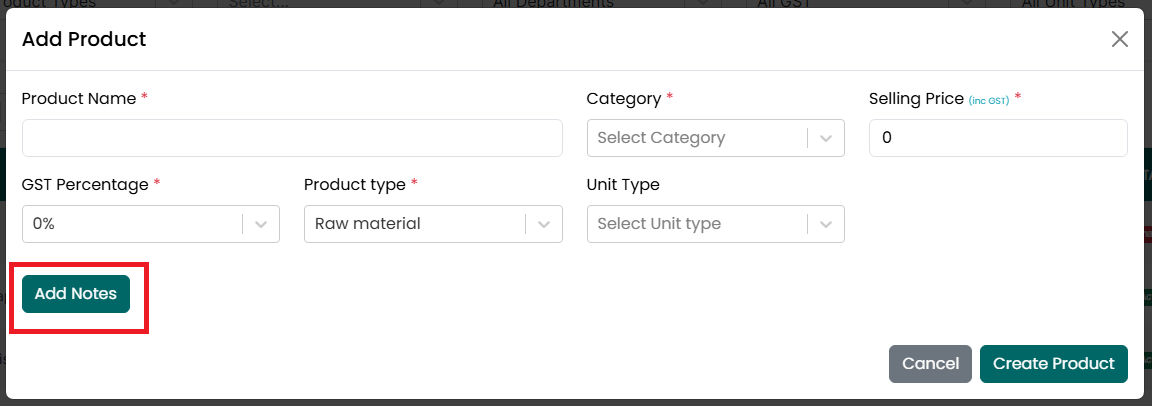
- Click Add Notes if you want to record
additional information about the product. This field is optional.
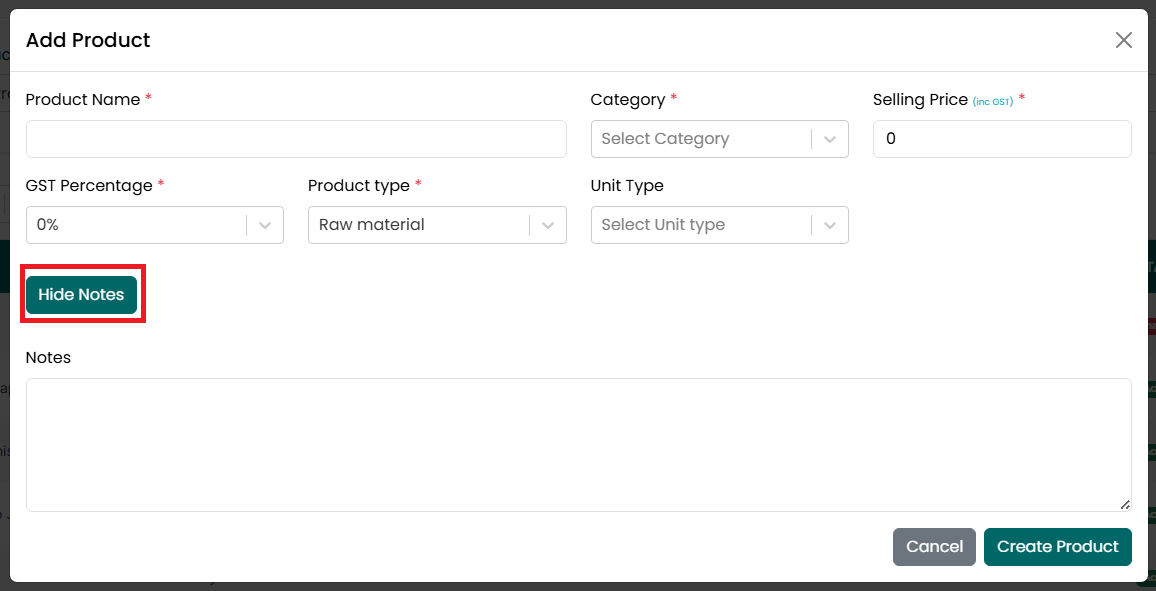
- After the Notes section is expanded,
enter the product notes. Click Hide Notes to collapse the Notes section
without removing the entered information.
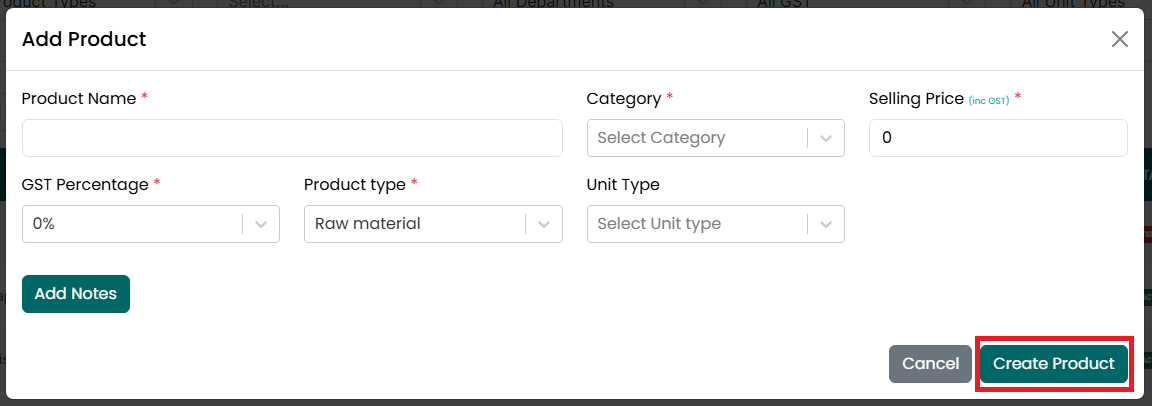
- Click Create Product to save the
product.
- Click Cancel or the X icon to close
the window without saving.
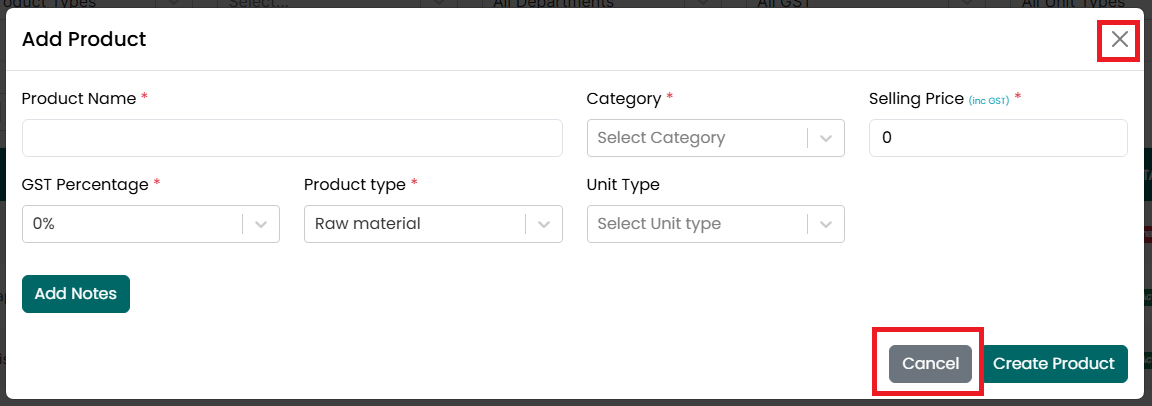
- After the product is created successfully, a confirmation message is displayed, and the new product appears in the Product Listing page.
Here's the Opening Stock Update section written in the same style and format as your existing user guide. It is intended for Raw Material products only.
Opening Stock
Opening Stock is available only for Raw Material products. It is used to record the initial stock quantity available at each branch before day-to-day inventory transactions begin.
To update the opening stock for a Raw Material product, follow the steps below.
- Go
to the Main Menu and click Products. The Product Listing page is
displayed.
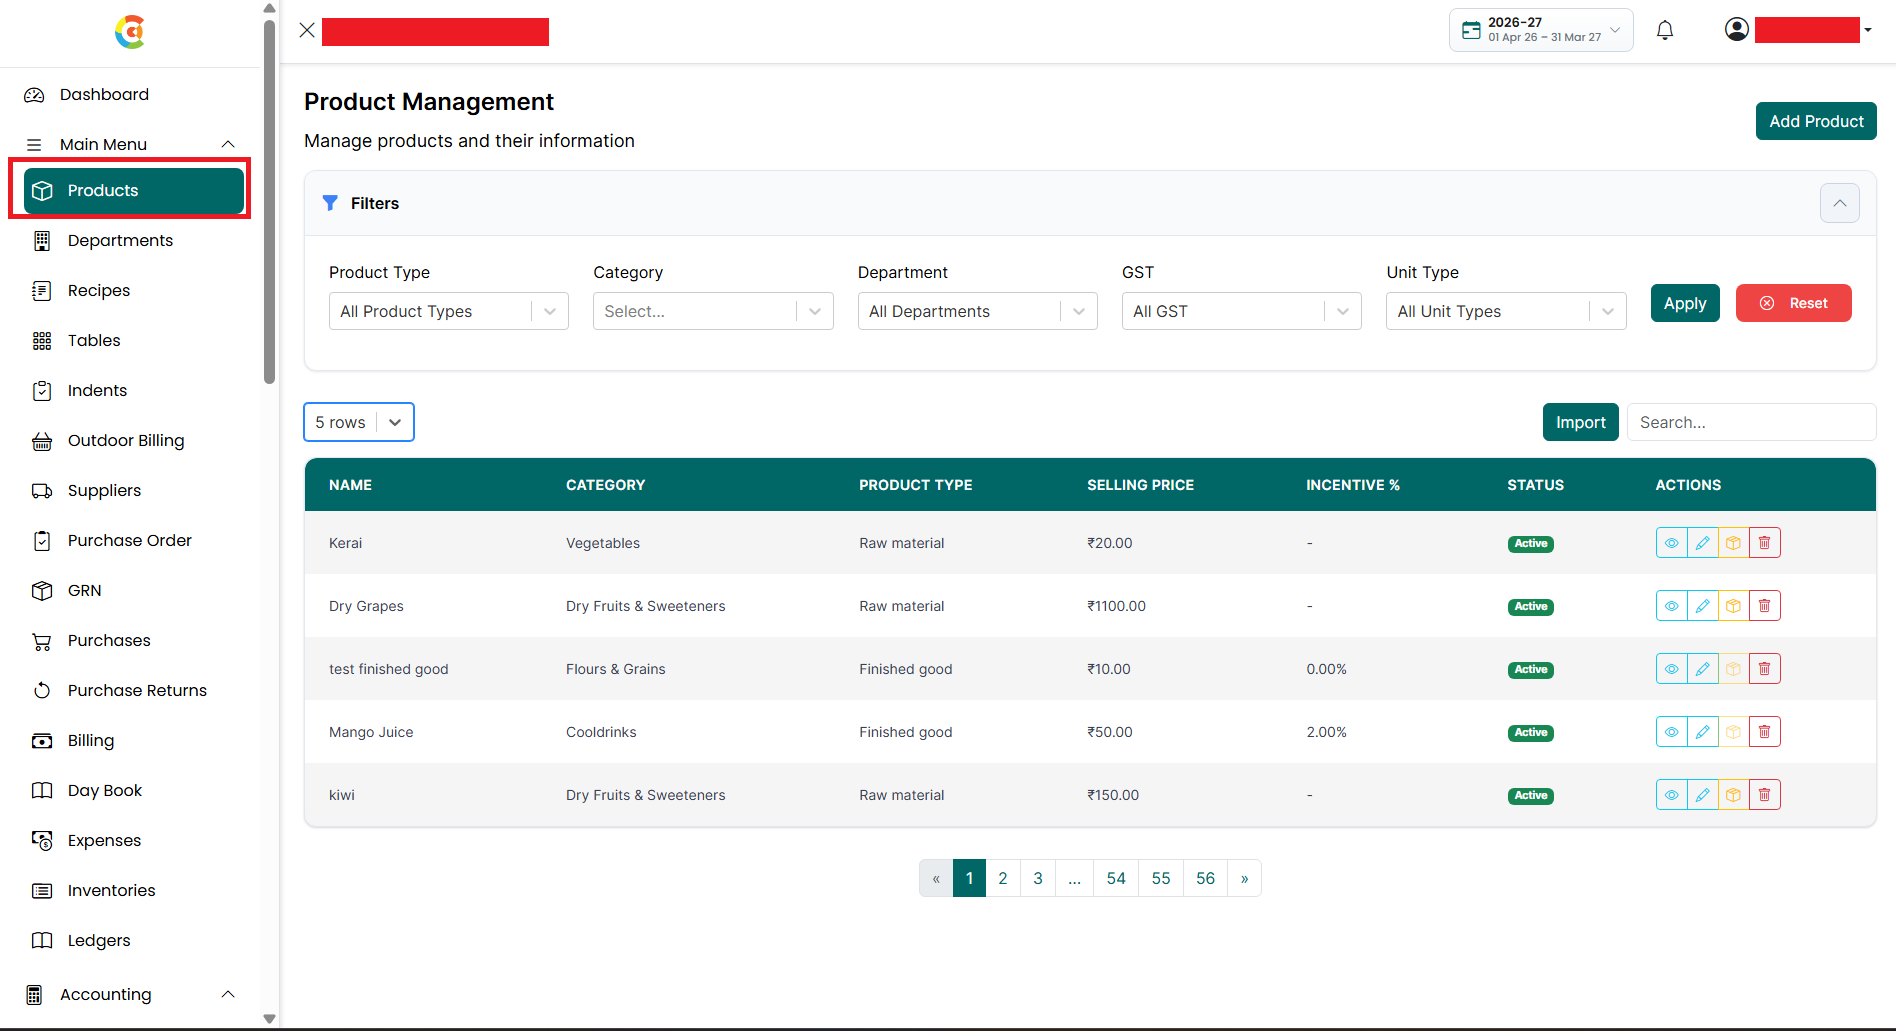
- Find the Raw Material product for
which you want to update the opening stock. Click the Opening Stock icon.
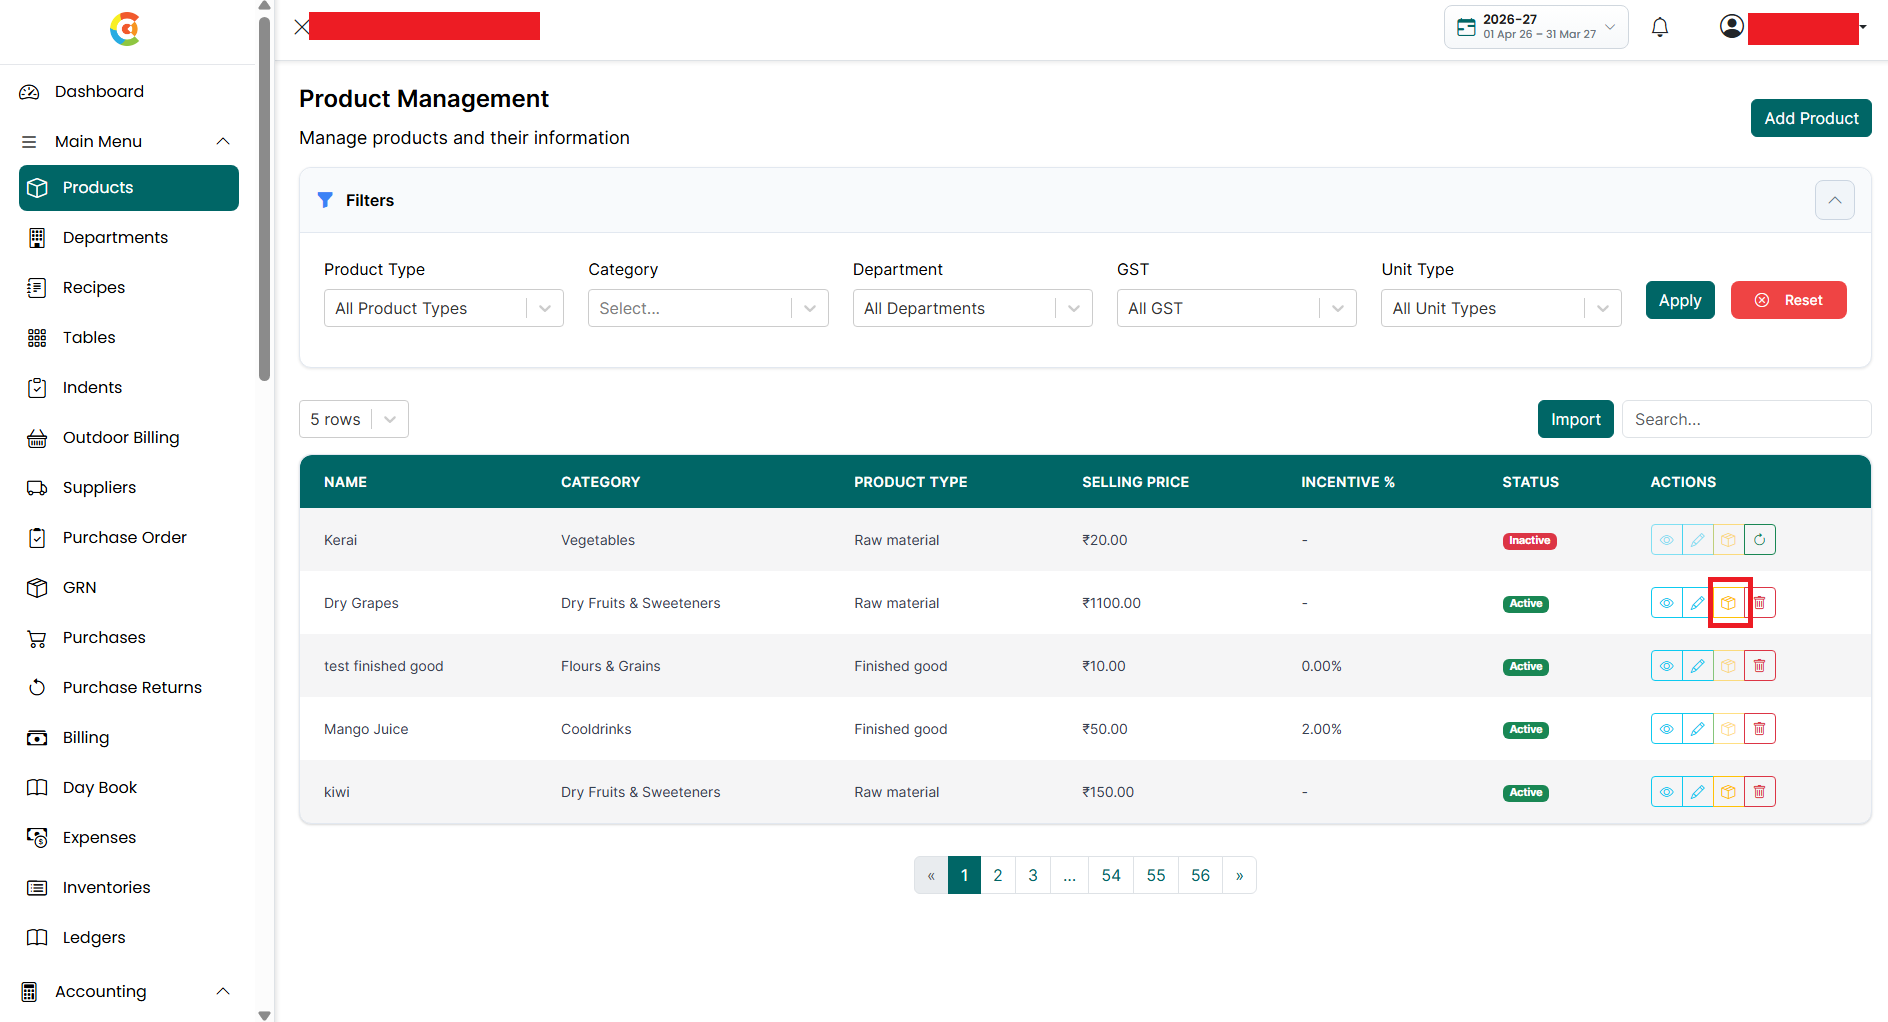
- The Opening Stock Update window is
displayed.
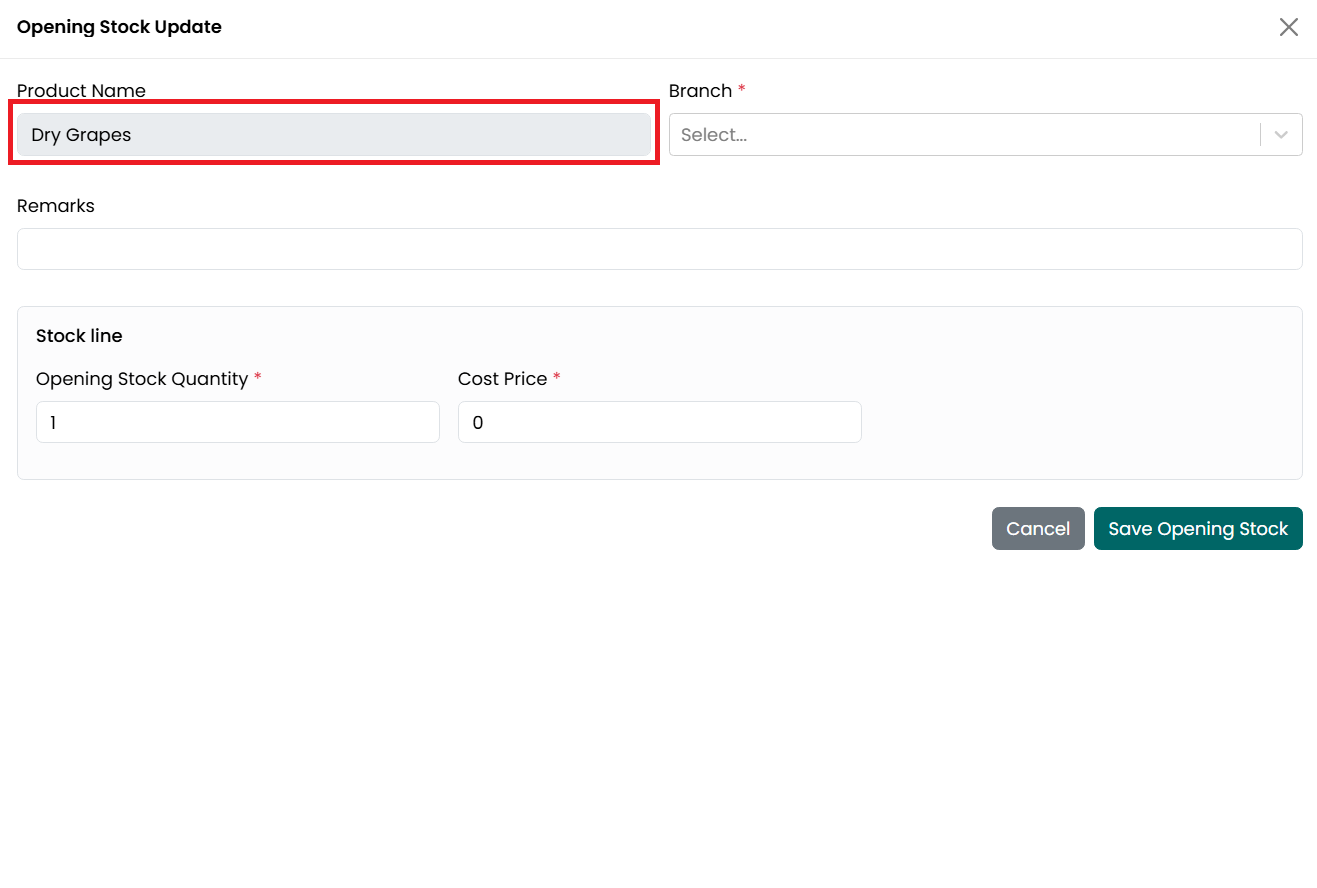
- The Product Name is displayed for
your reference and cannot be modified.
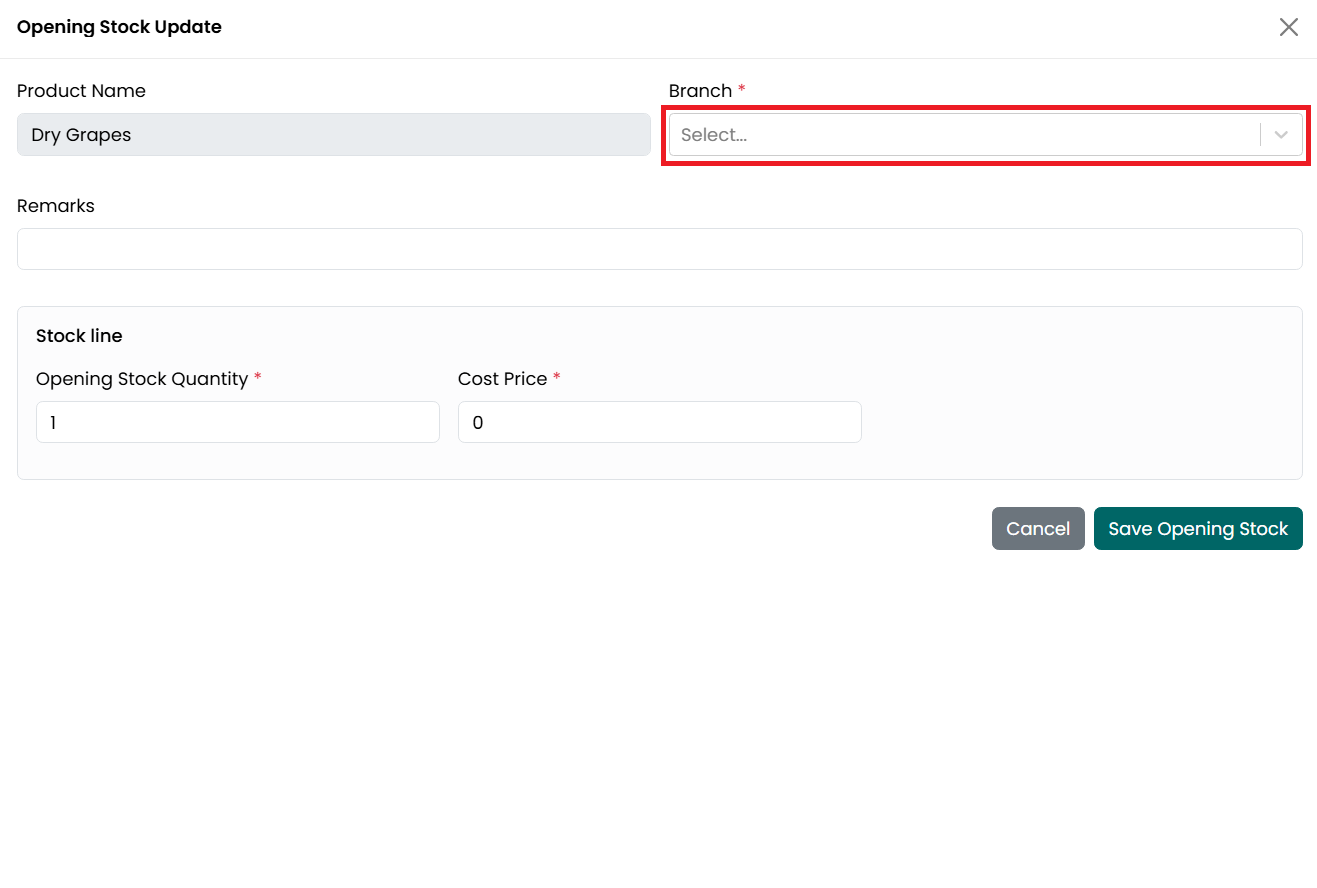
- Select the Branch. This field is
required. Choose the branch where the opening stock is available.
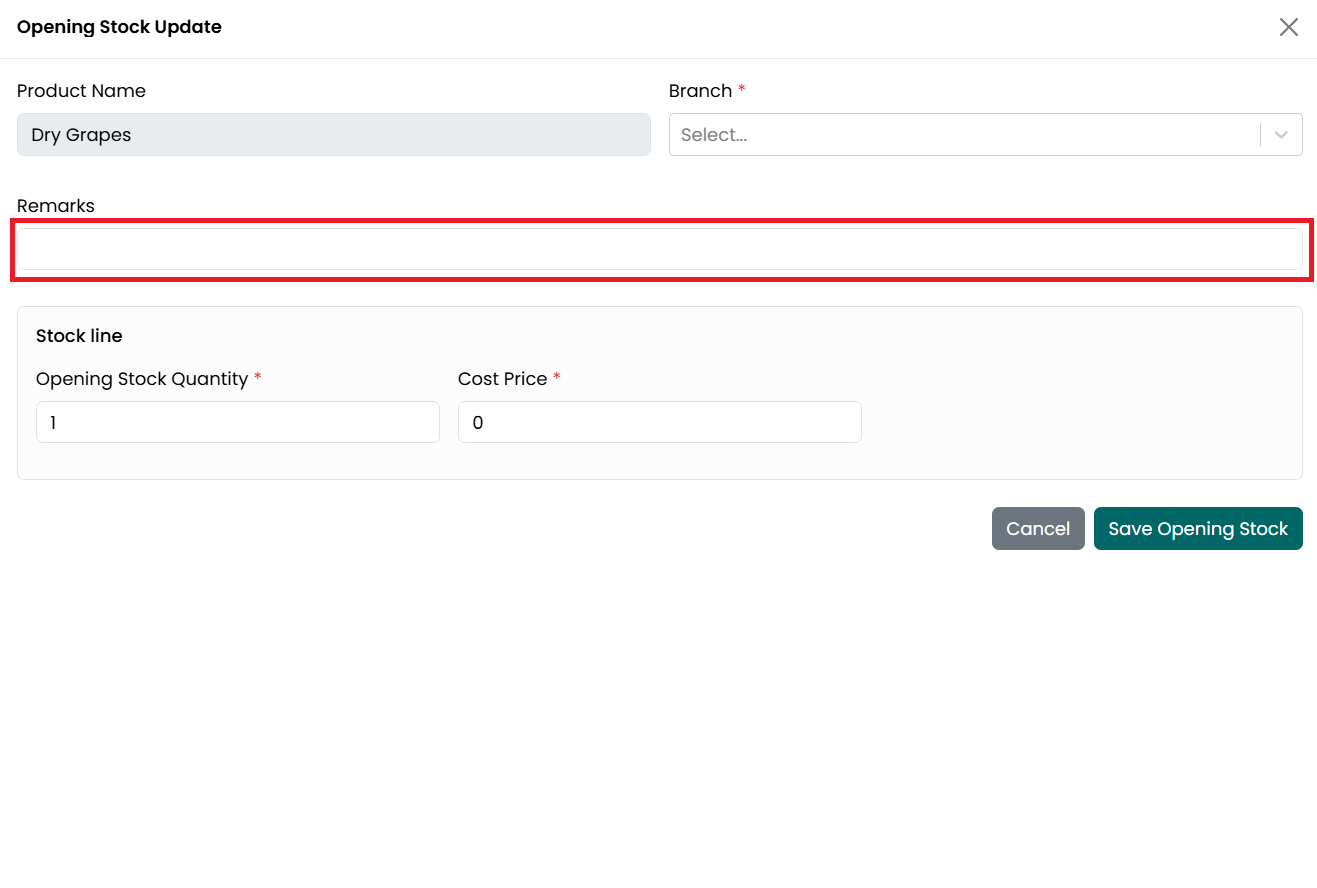
- Enter Remarks, if required. This
field is optional and can be used to record additional information about
the opening stock.
- Under the Stock Line section:
• Enter
the Opening Stock Quantity. This field is required. It specifies the quantity
of stock available for the selected branch.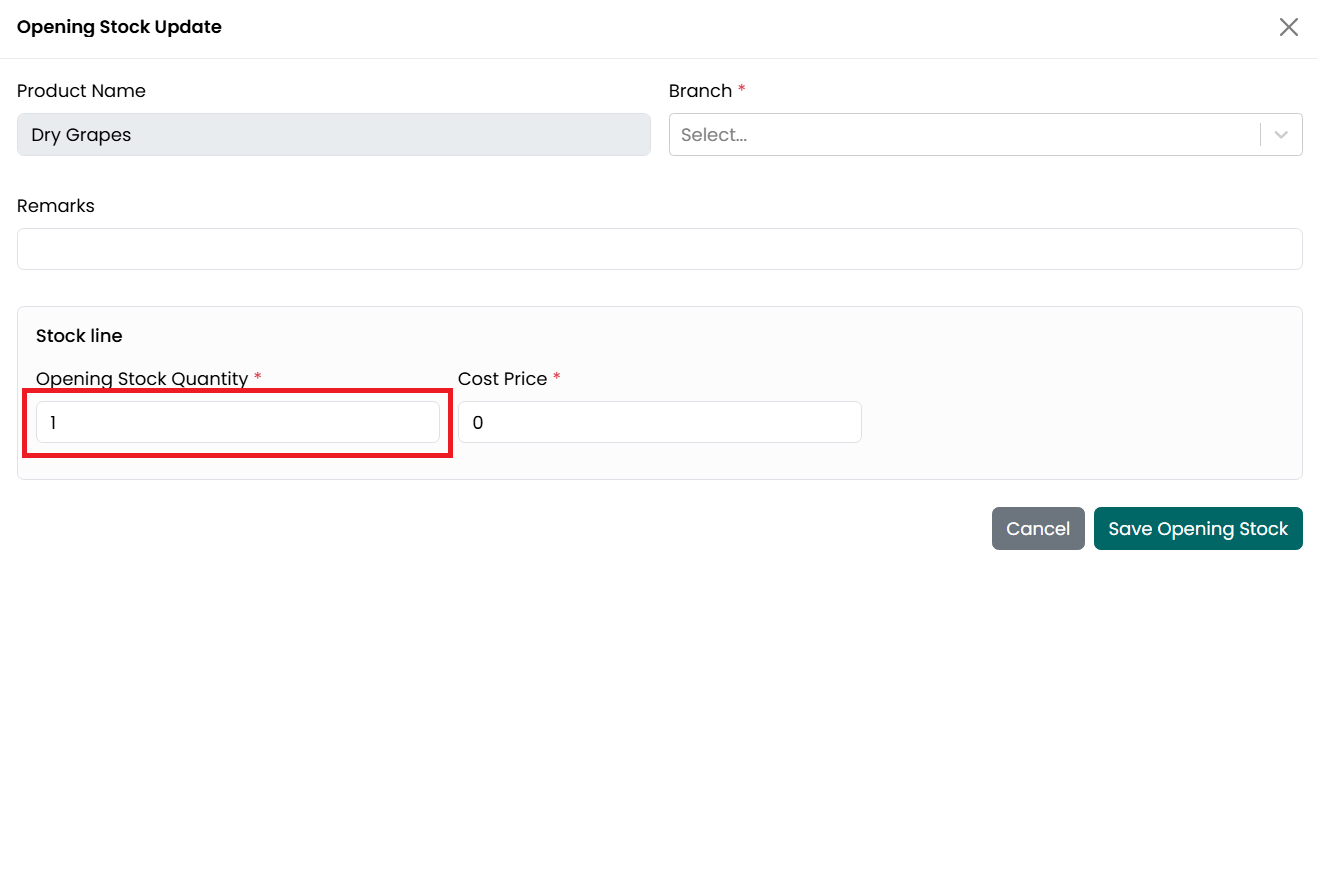
• Enter
the Cost Price. This field is required. It represents the cost price of one
unit of the product.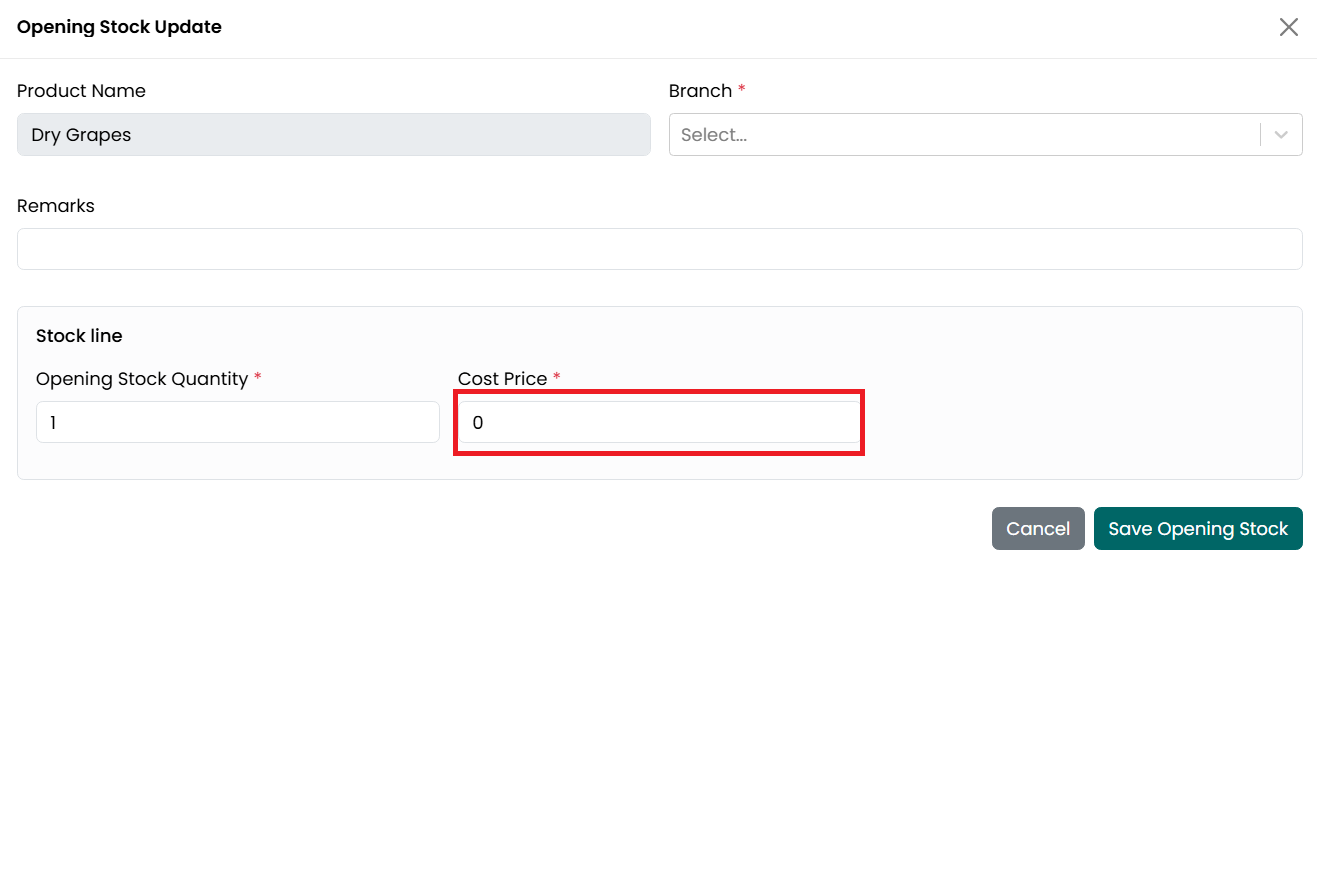
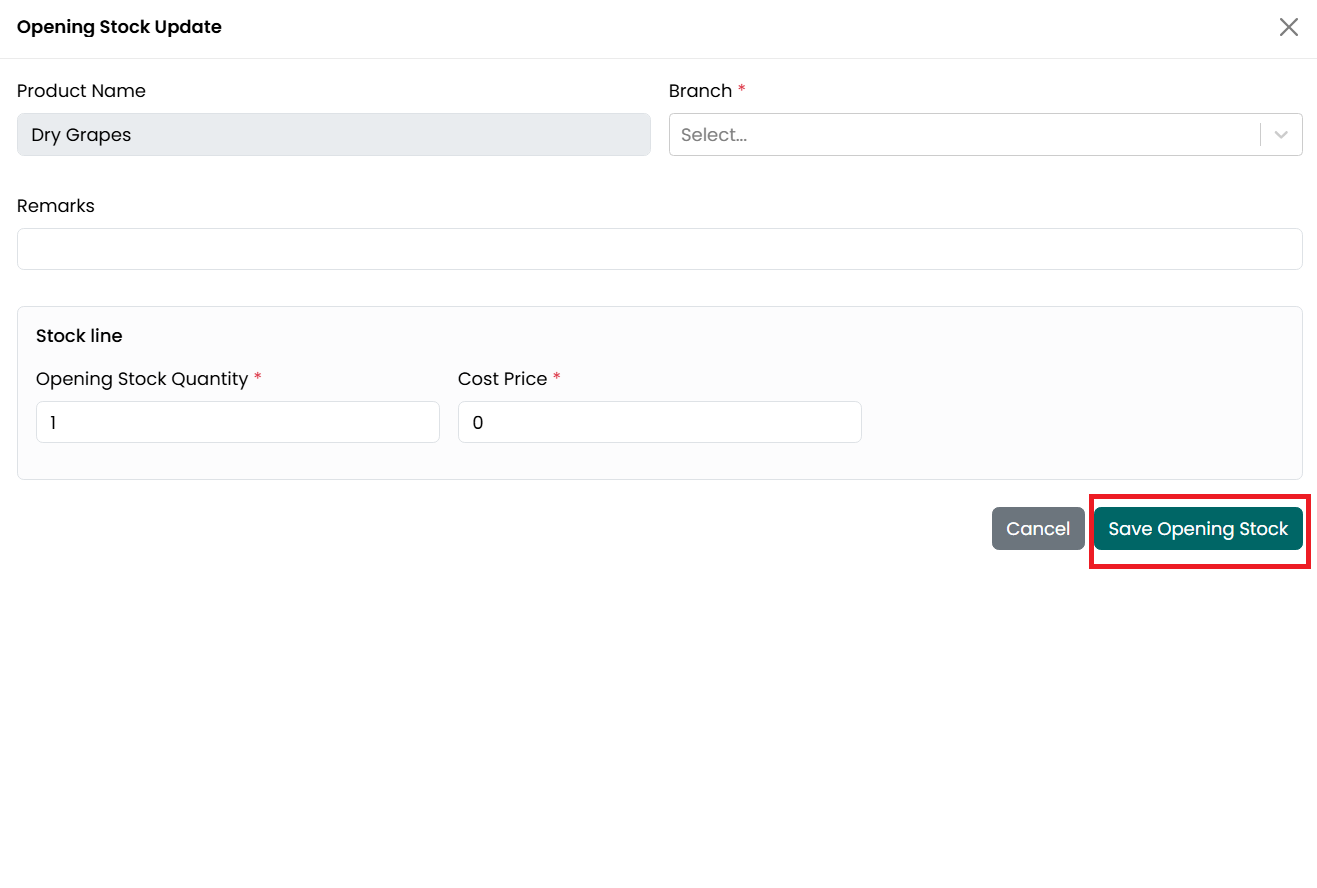
- Click Save Opening Stock to save the
opening stock details.
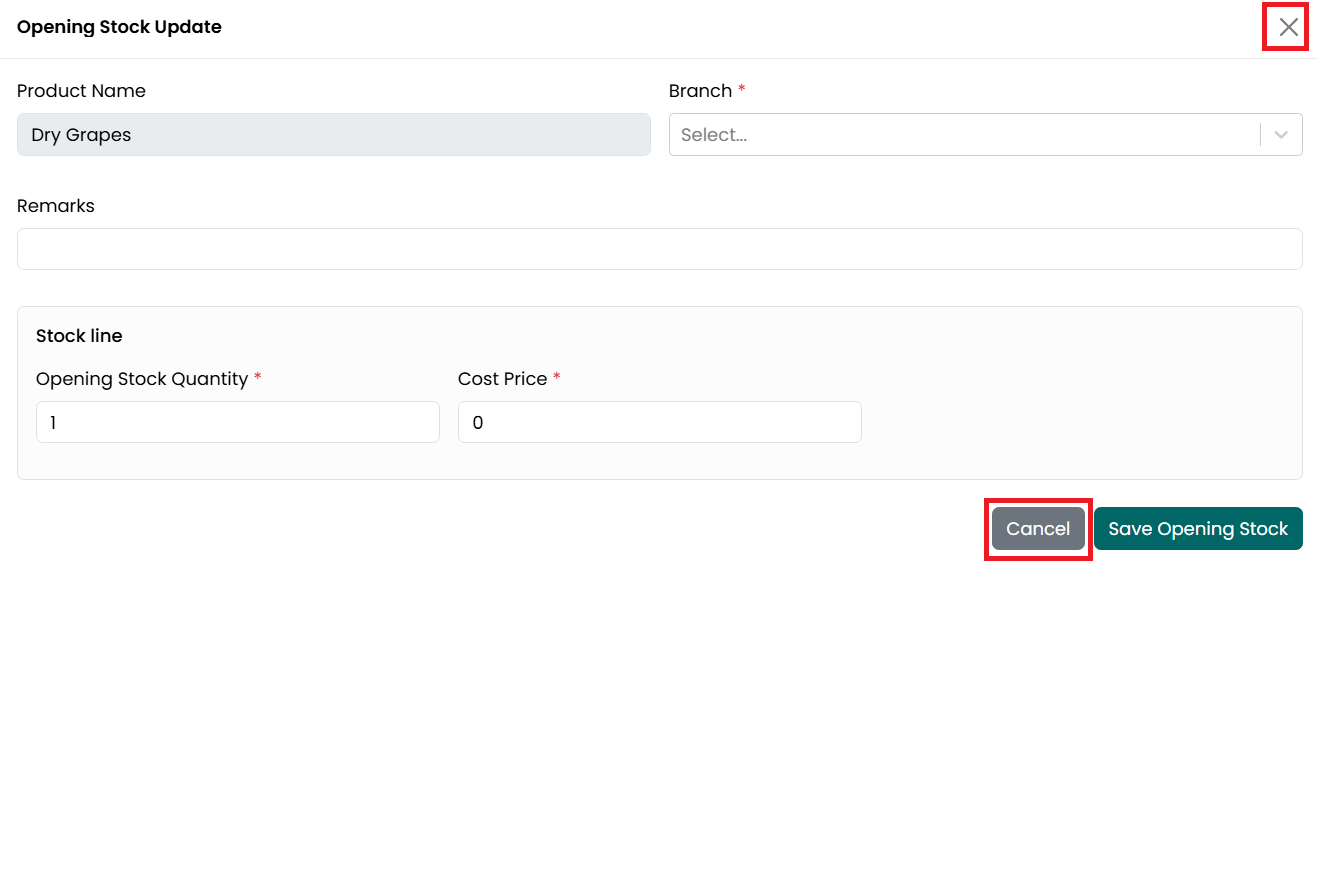
- Click Cancel or the X icon to close
the window without saving.
- After the opening stock is saved successfully, a confirmation message is displayed, and the opening stock becomes available for inventory and purchase-related transactions at the selected branch.
Import Products
To import multiple products at once, follow the steps below.
- Go
to the Main Menu and click Products. The Product Listing page is
displayed.
- Click Import.
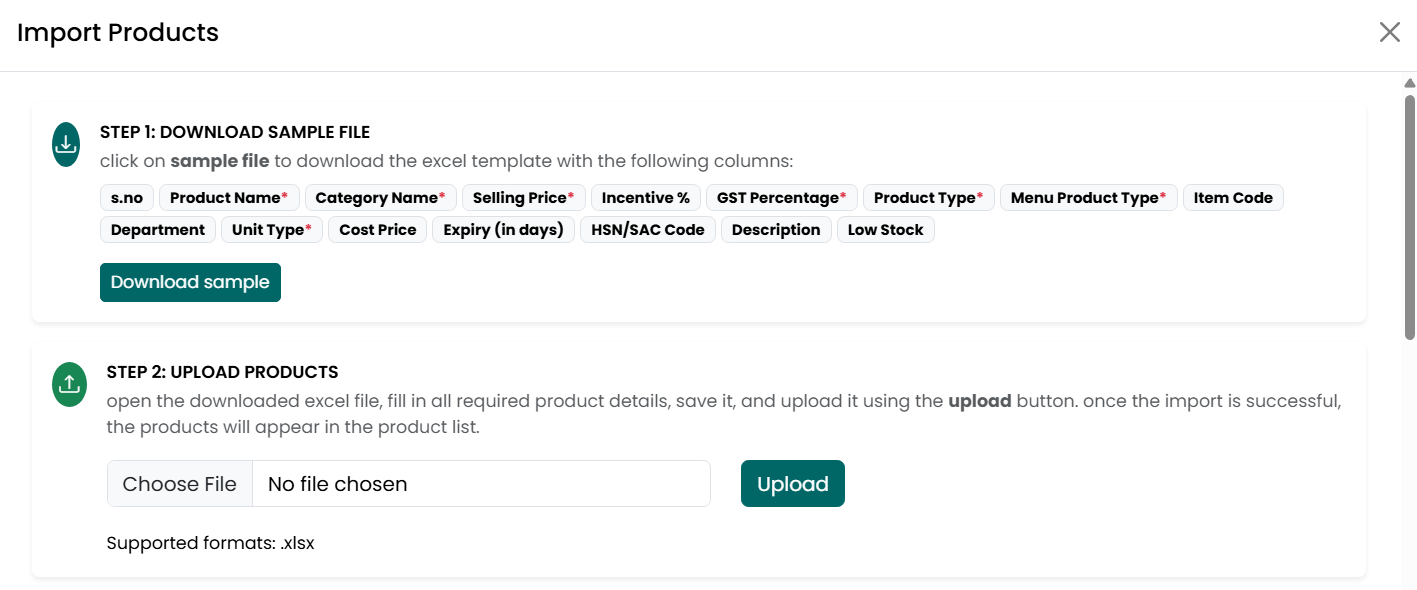
- The Import Products window is
displayed.
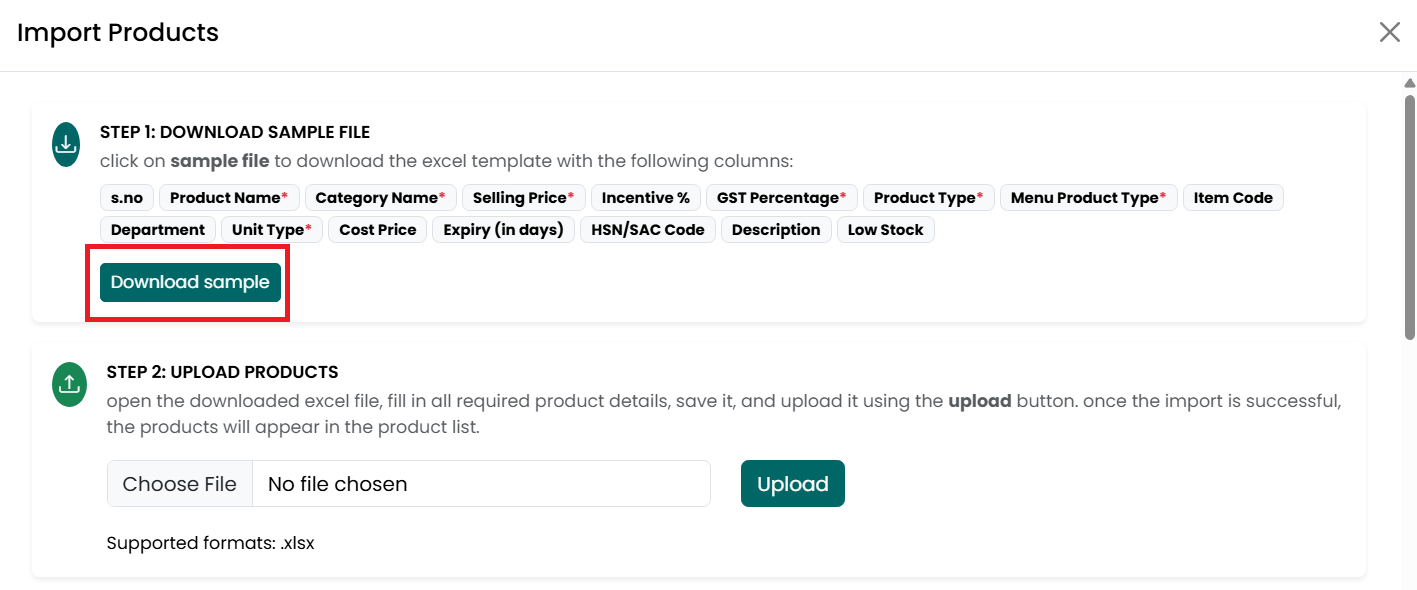
- Click Download Sample to download the
product import template.
- Open the downloaded file and enter
the product details.

- The template contains the following fields:
|
Field |
Required / Optional |
|
Product Name |
Required |
|
Category Name |
Required |
|
Selling Price |
Required |
|
GST Percentage |
Required |
|
Product Type |
Required |
|
Menu Product Type |
Required (Restaurant Vertical) |
|
Item Code |
Required for Finished Goods |
|
Department |
Required for Finished Goods |
|
Incentive Percentage |
Required for Finished Goods |
|
Unit Type |
Required |
|
Cost Price |
Optional |
|
Expiry (in Days) |
Optional |
|
HSN/SAC Code |
Optional |
|
Description |
Optional |
|
Low Stock Quantity |
Optional |
- Complete all the required fields. You may also fill in the optional fields if the information is available.
• Note:
■ For Finished Goods, enter the Item Code, Department, and Incentive Percentage.
■ For Raw Materials, leave the Item Code, Department, and Incentive Percentage fields blank.
- Save the completed file.
- Return to the Import Products window.
- Click Choose File and select the
completed file from your computer.
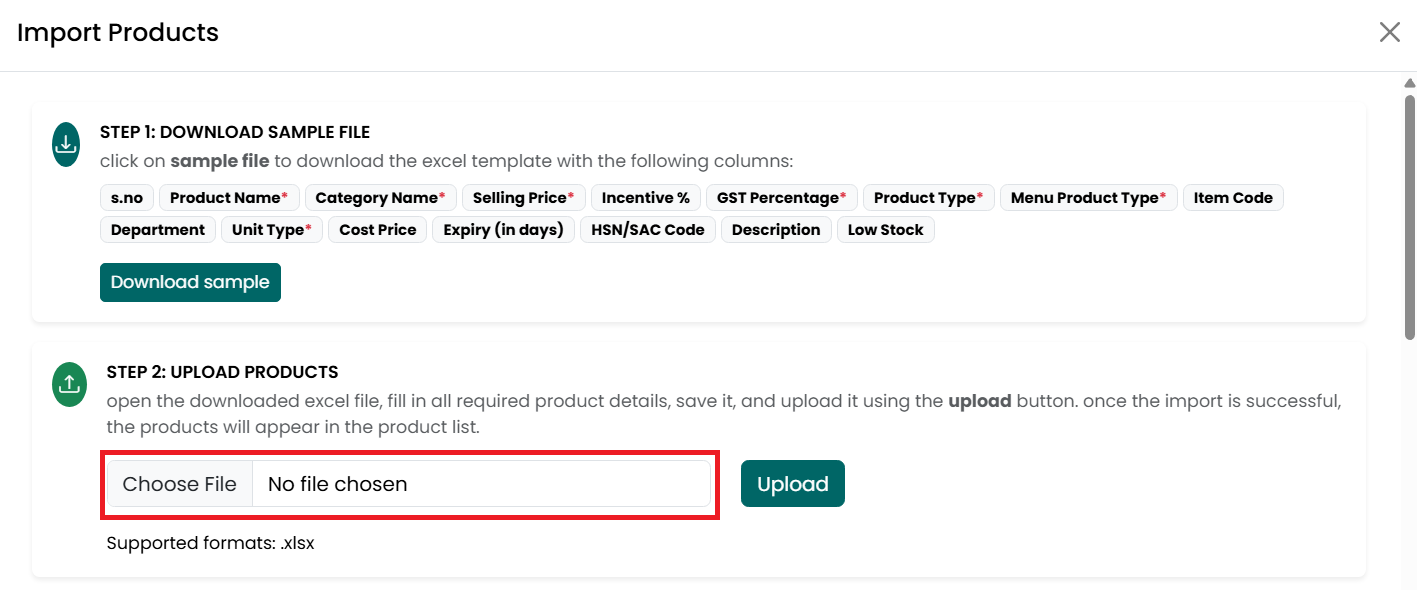
- Supported file format is .xlsx.
- Click Upload to import the product
records.
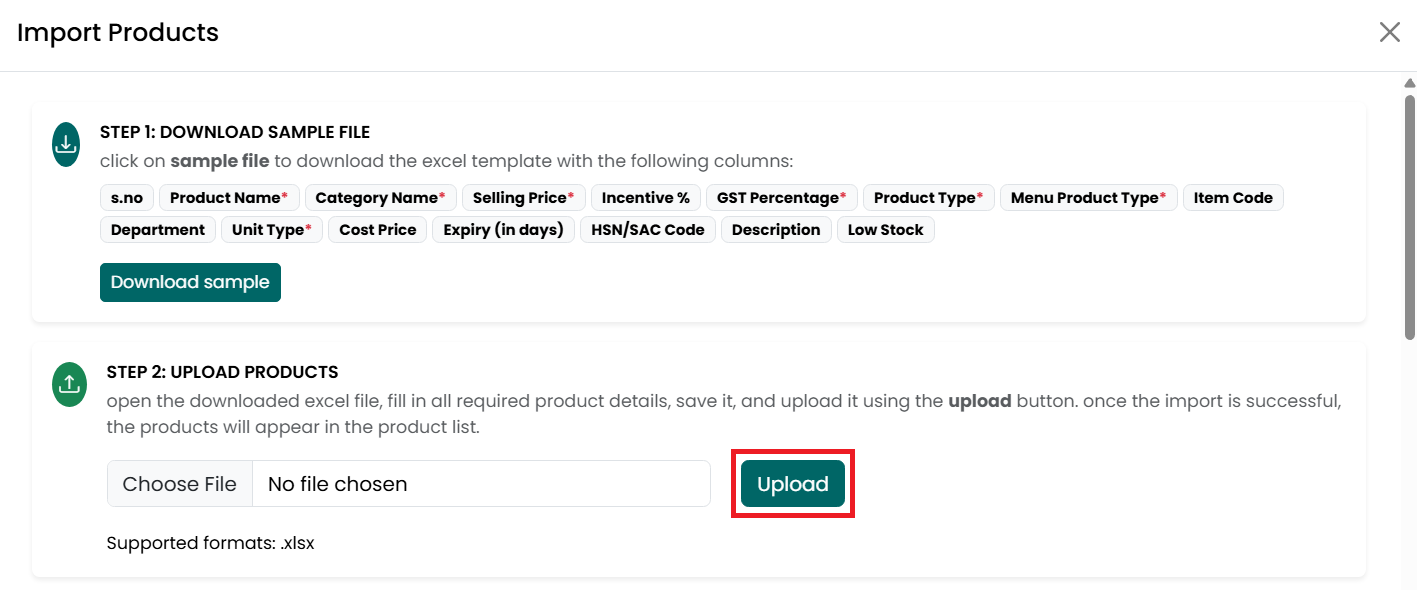
- If the uploaded file contains invalid, incomplete, or duplicate product information, those product records will not be imported.
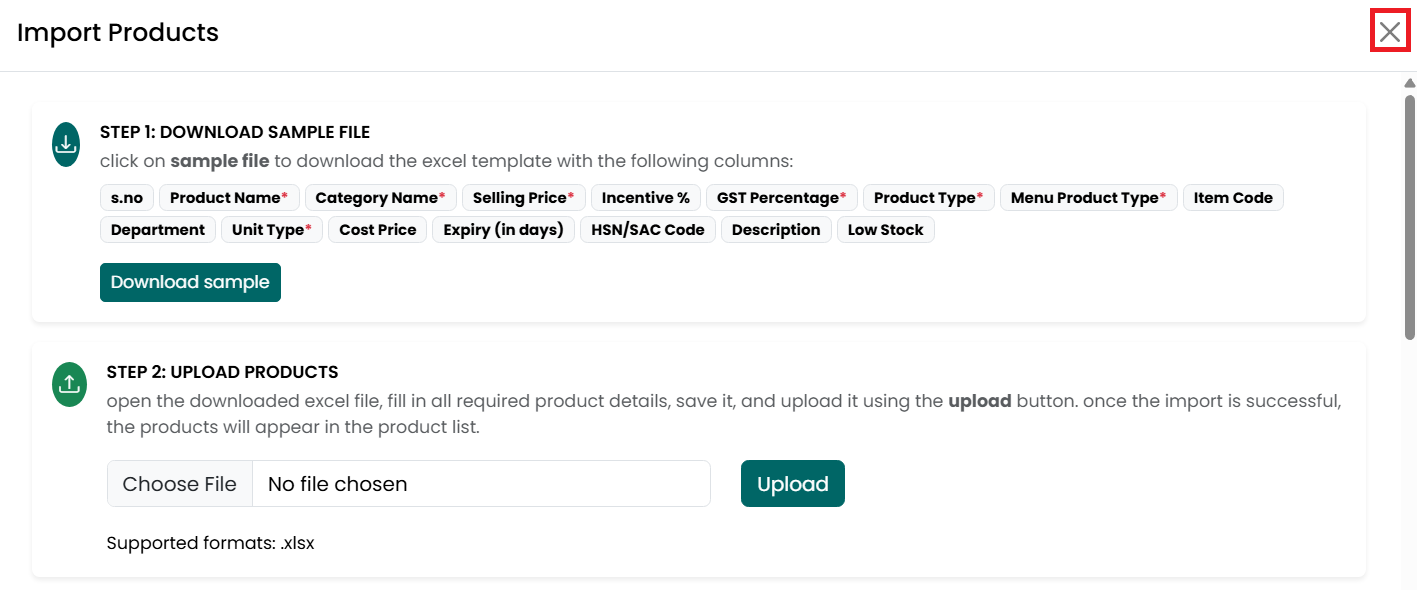
- Click the X icon to close the Import
Products window.
- After the products are imported successfully, a confirmation message is displayed, and the imported products appear in the Product Listing page.
Edit Product (Finished Goods)
To update an existing Finished Goods product, follow the steps below.
- Go
to the Main Menu and click Products. The Product Listing page is
displayed.
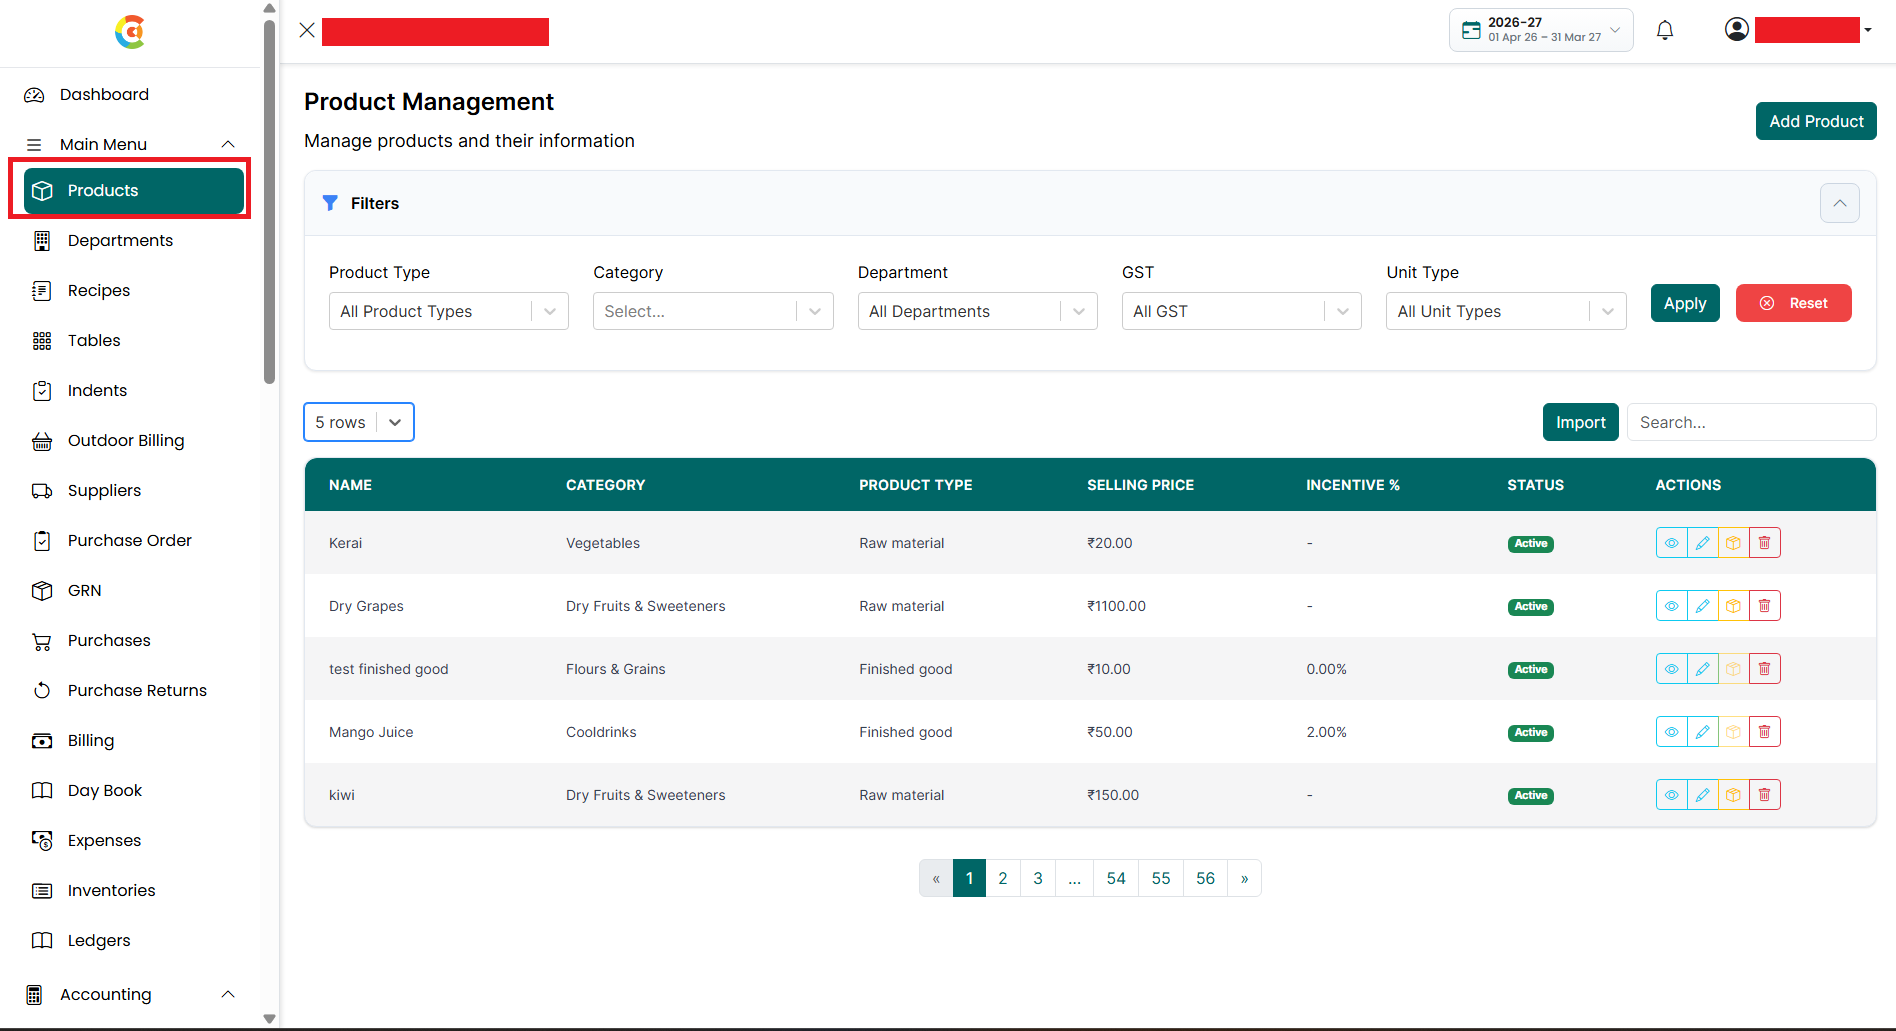
- Find the product you want to edit.
Click the Edit icon.
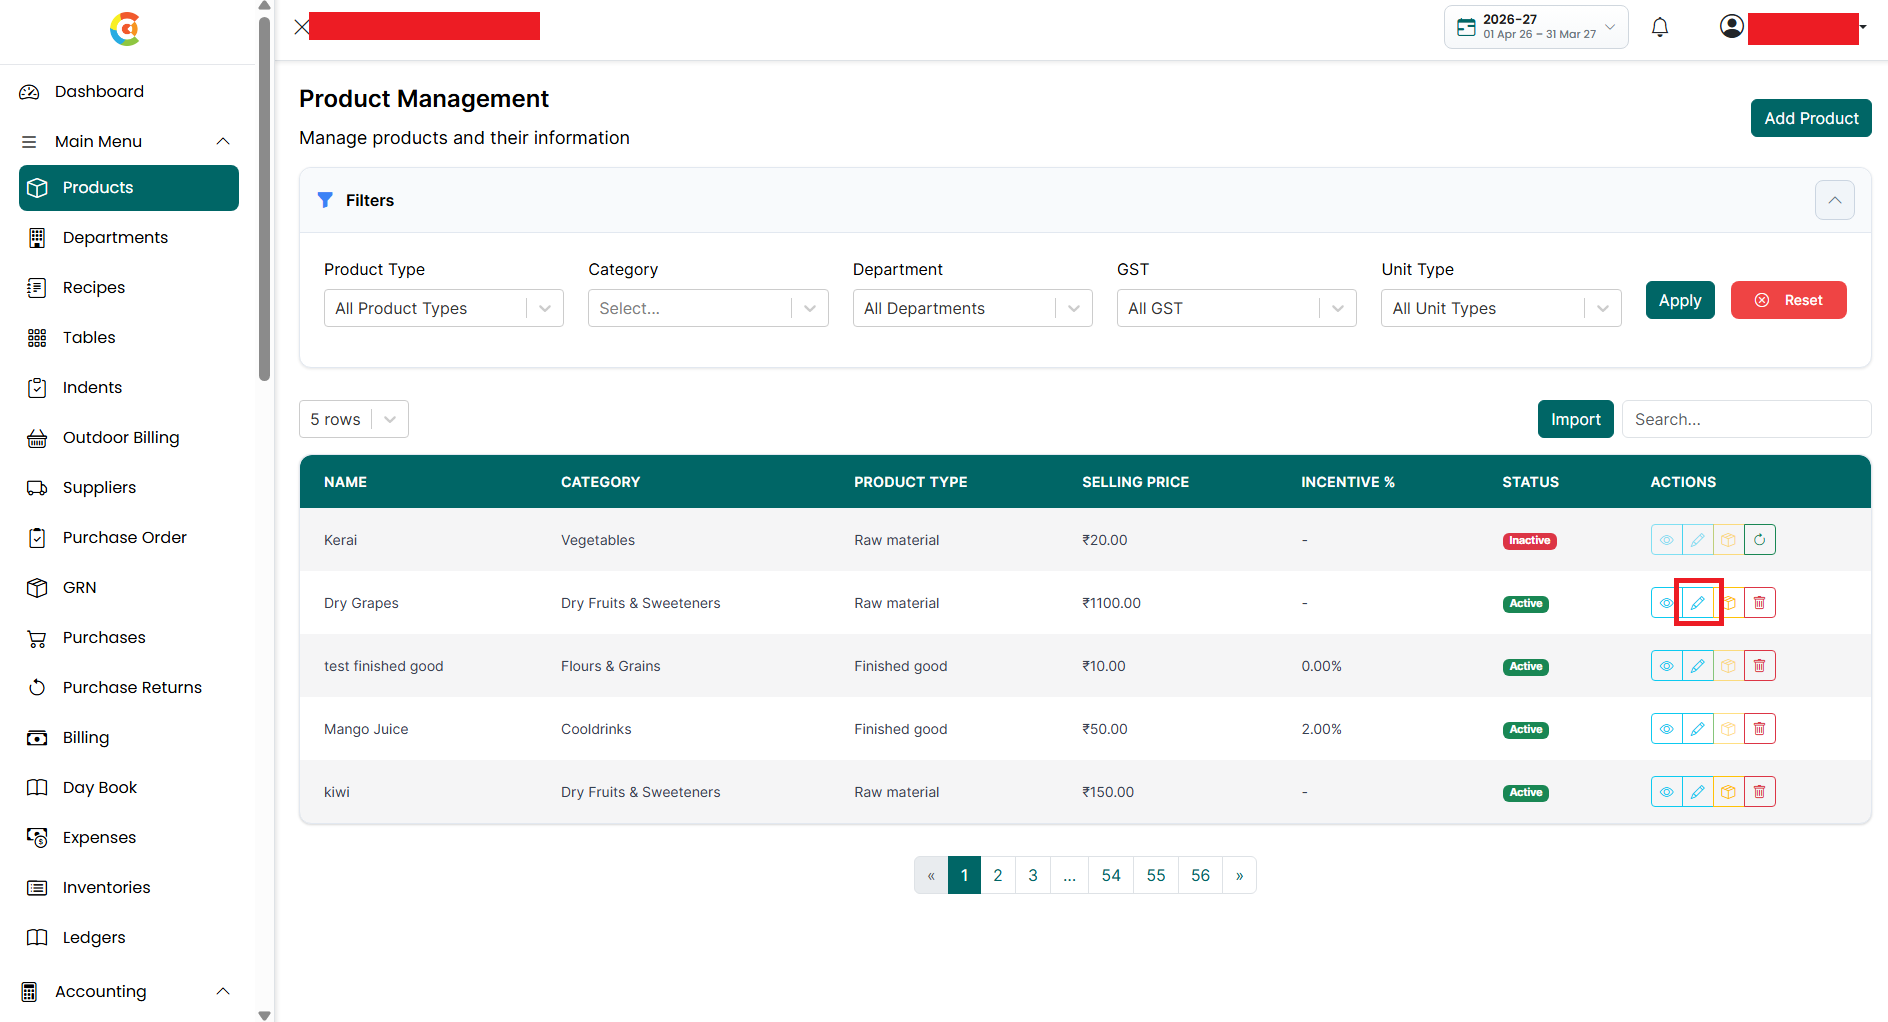
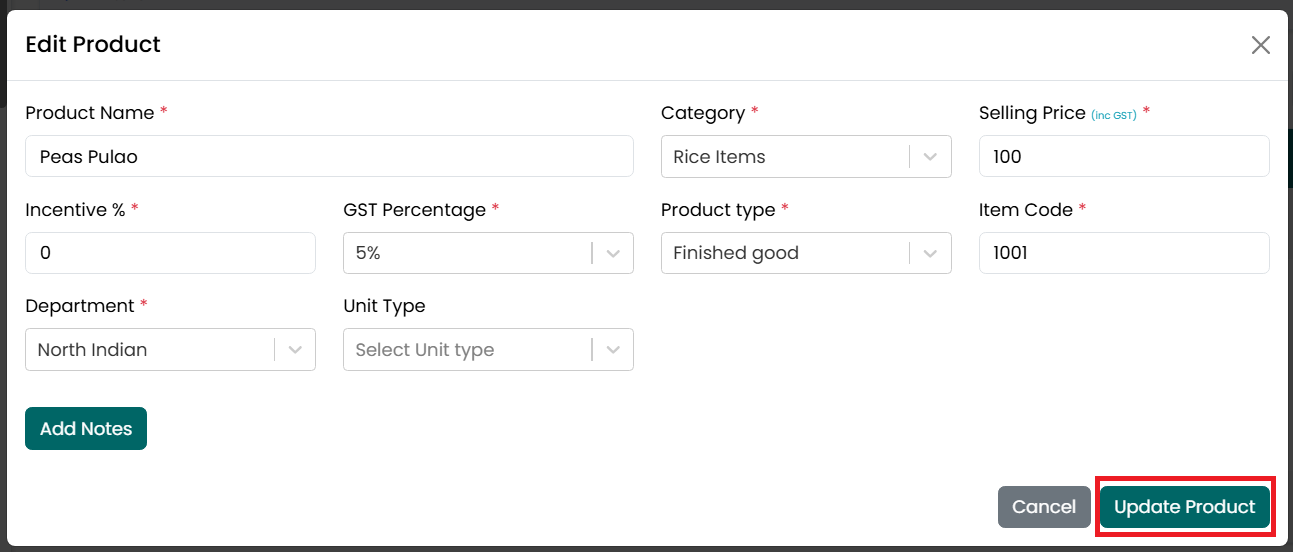
- The Edit Product window is displayed
with the existing product details.
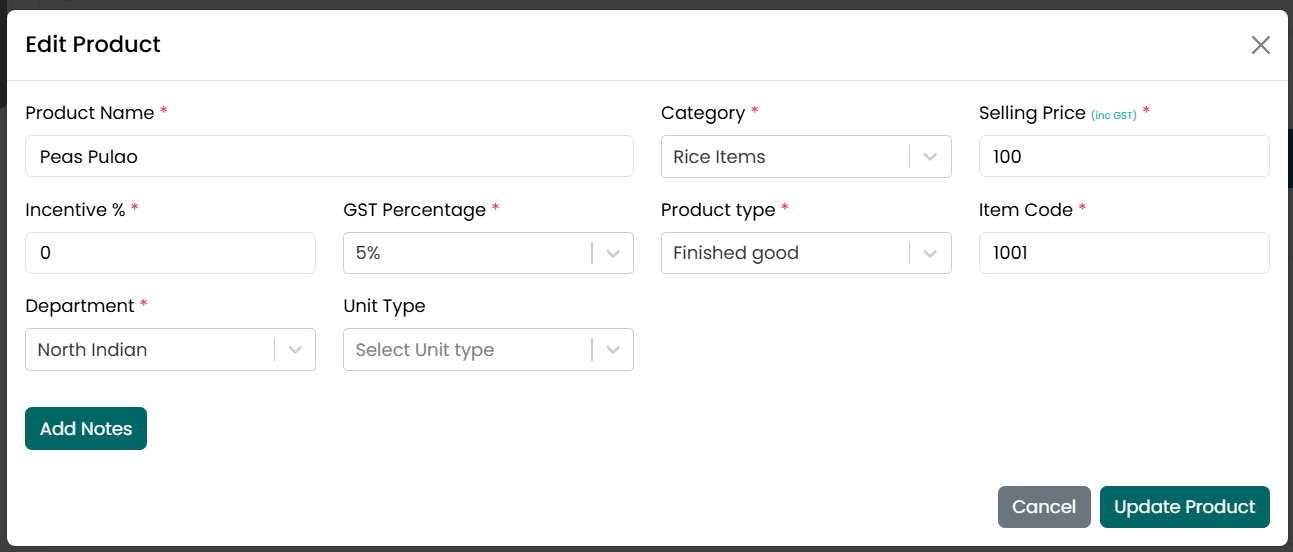
- Update the Product Name, if required.
This field is required. The Product Name must remain unique. Duplicate
product names are not allowed.
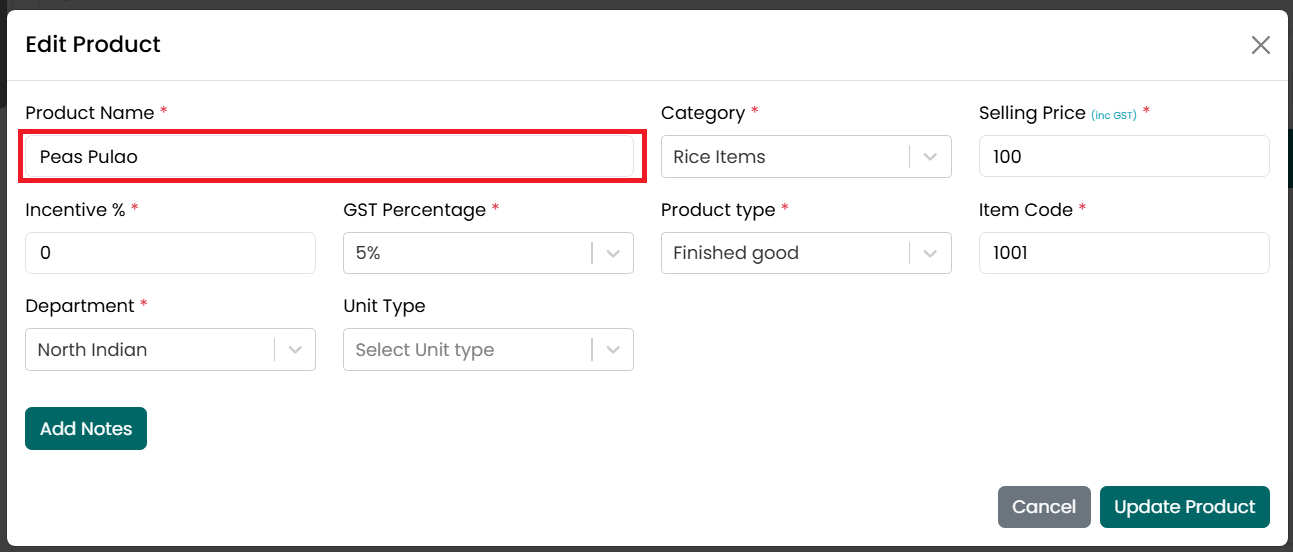
- Select a different Category, if
required. This field is required.
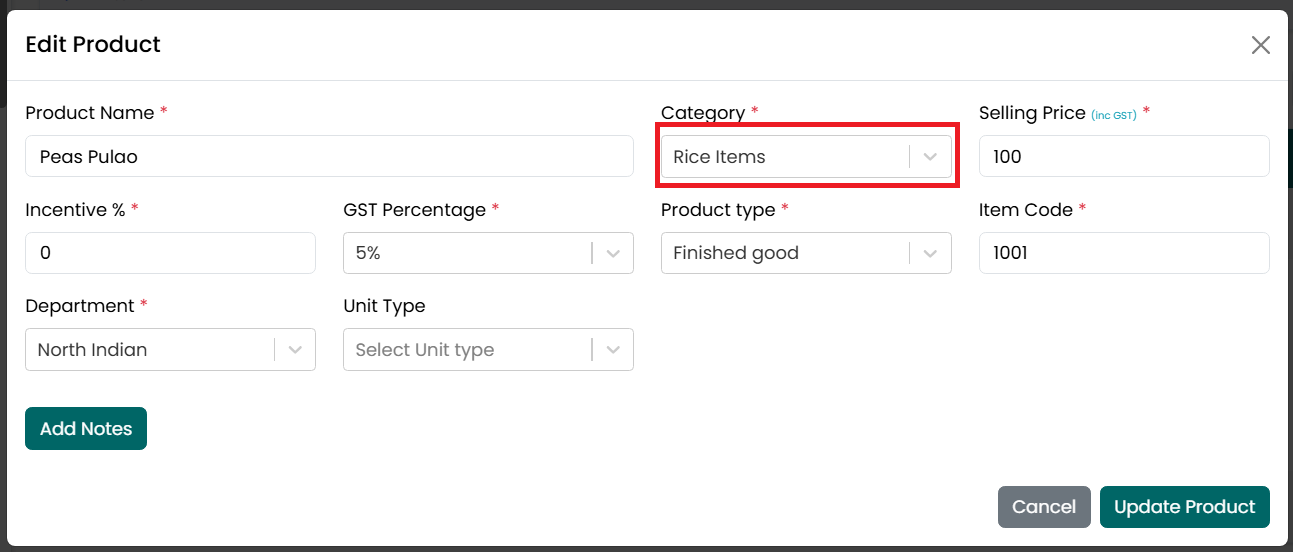
- Verify that the Product Type is set
to Finished Goods.
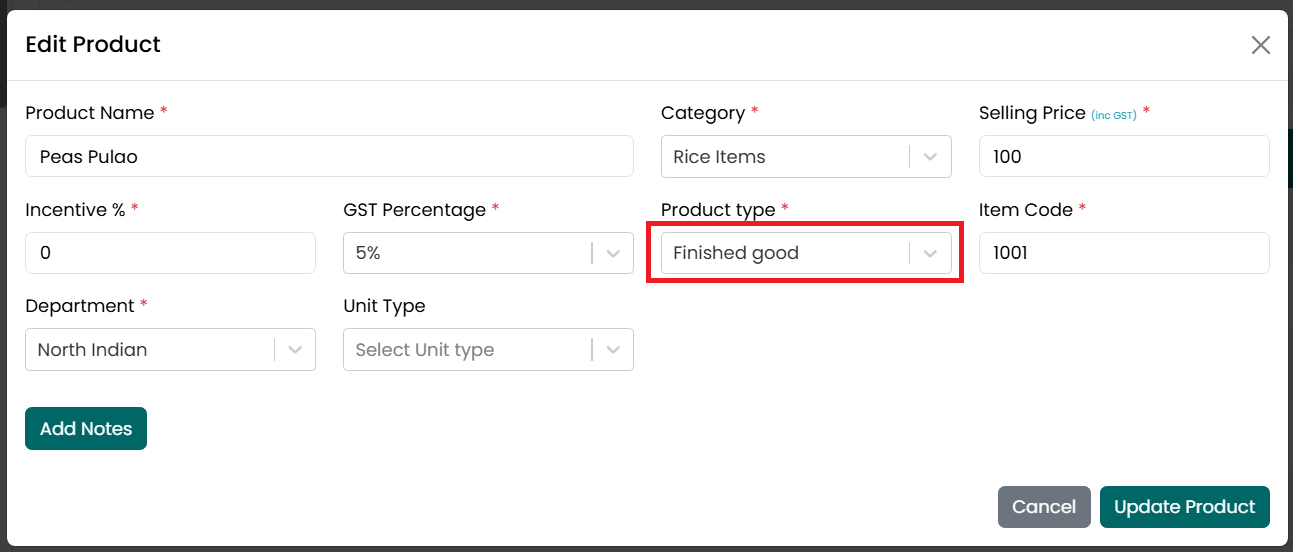
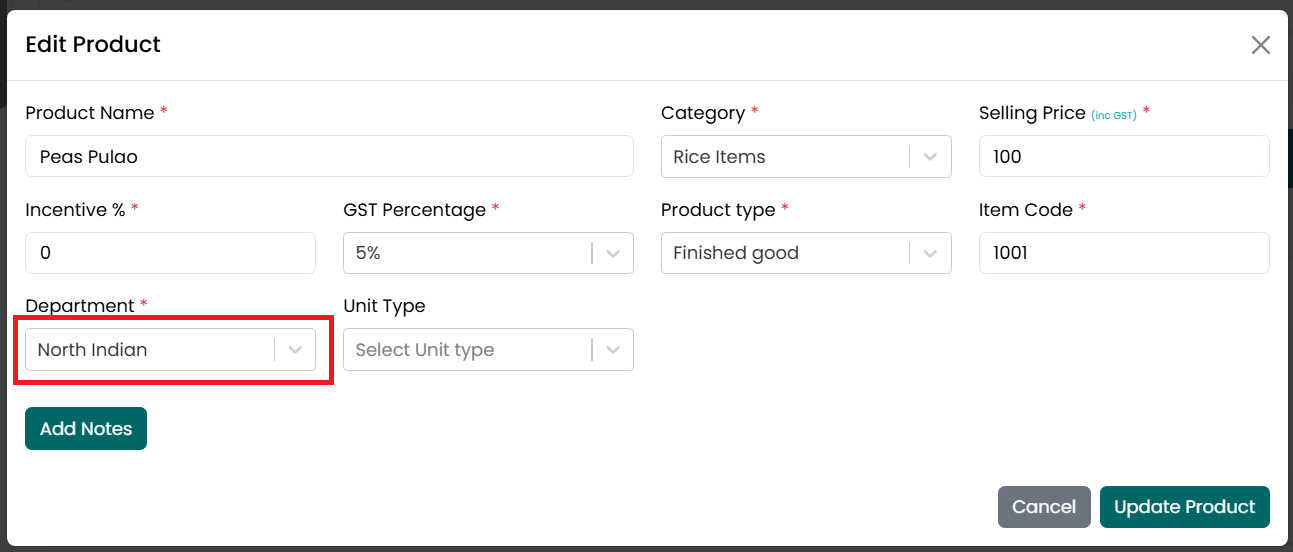
- Select a different Department, if
required. This field is required for Finished Goods.
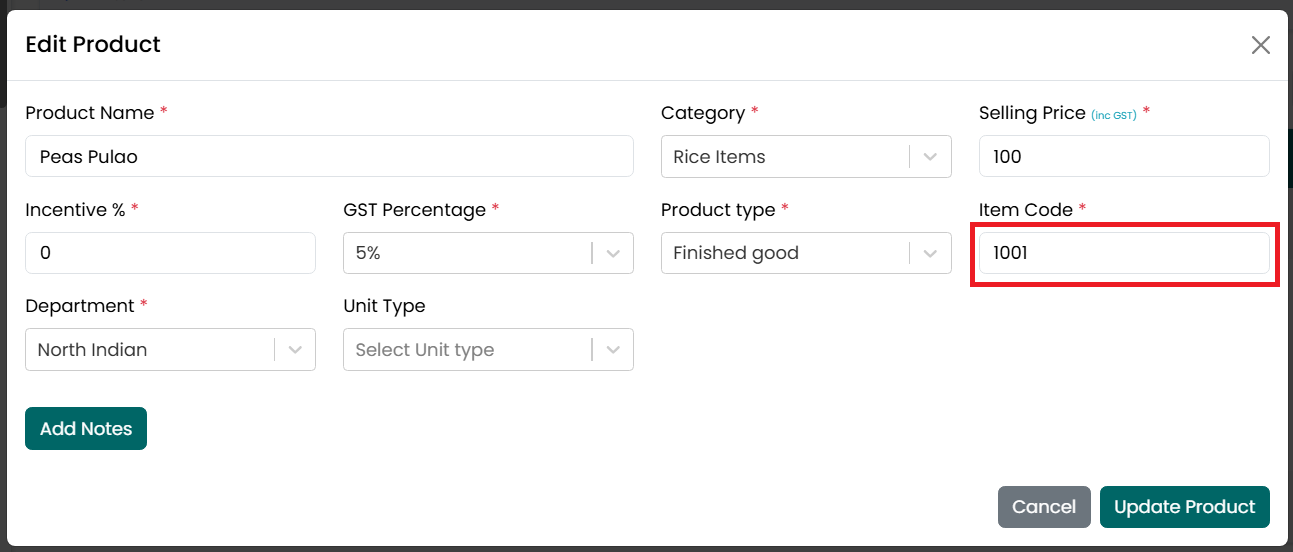
- Update the Item Code, if required.
This field is required for Finished Goods. The Item Code must remain
unique. Duplicate Item Codes are not allowed.
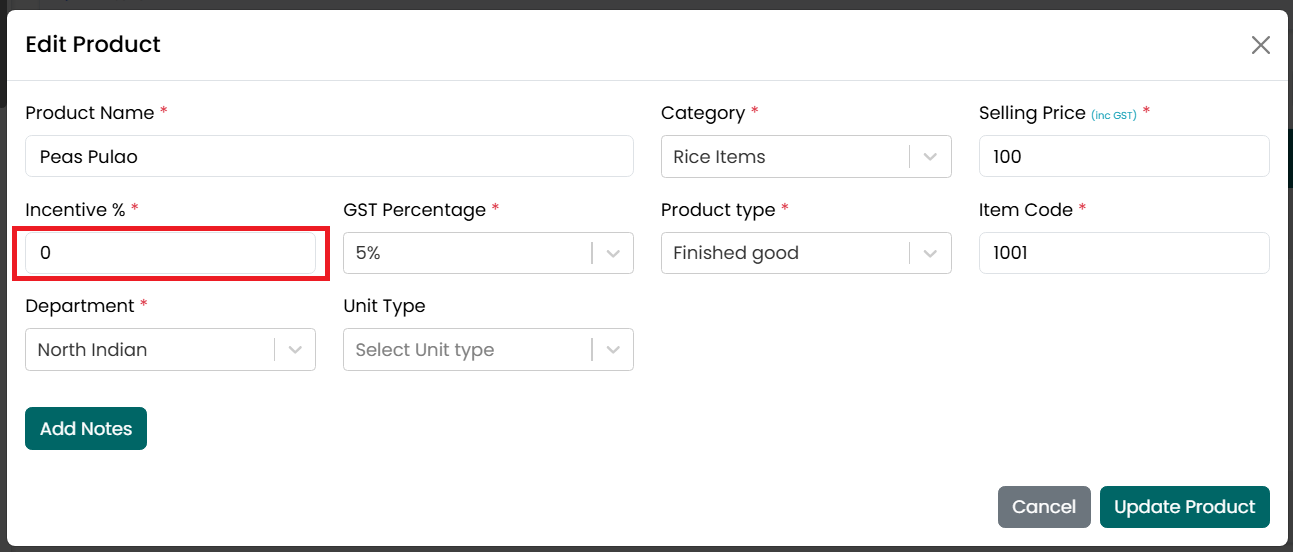
- Update the Incentive Percentage, if
required.
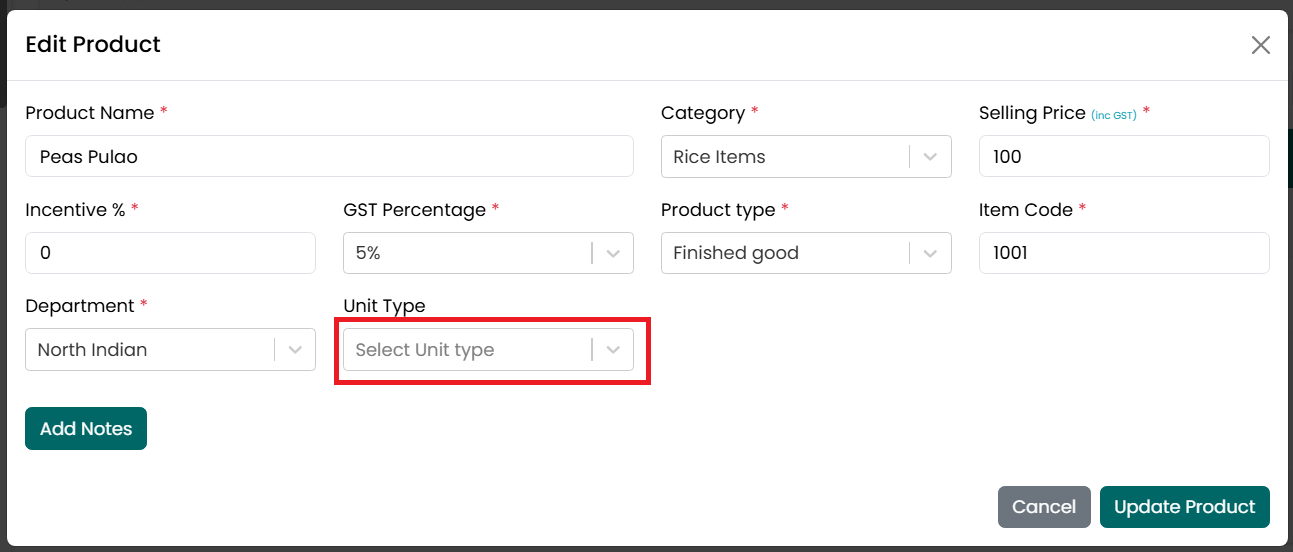
- Select a different Unit Type, if
required.
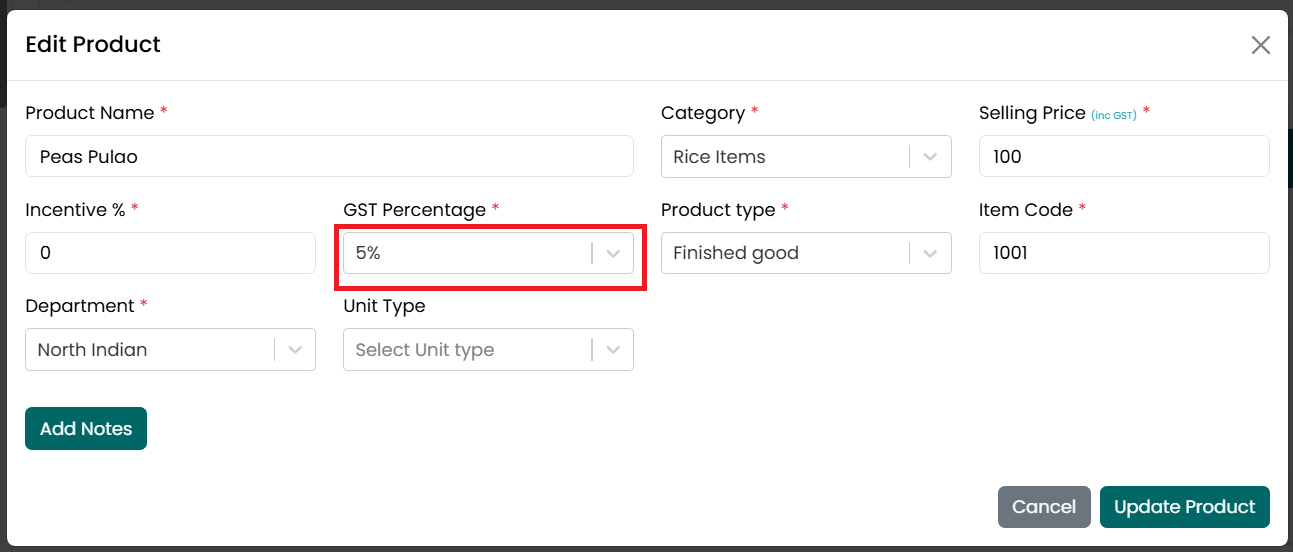
- Select a different GST Percentage, if
required.
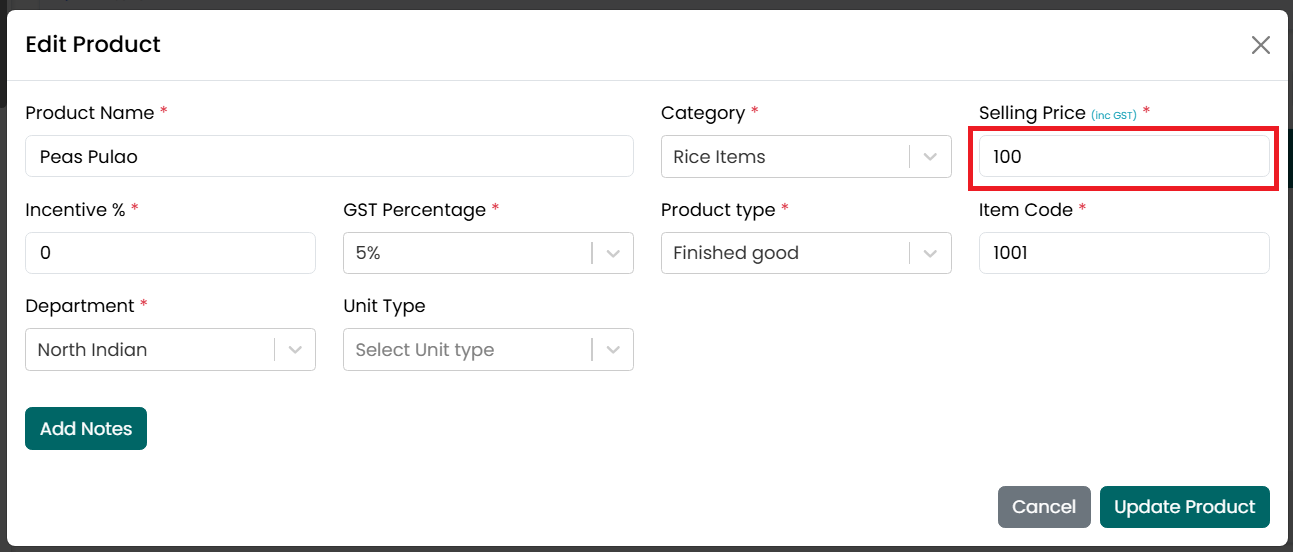
- Update the Selling Price, if
required. This field is required.
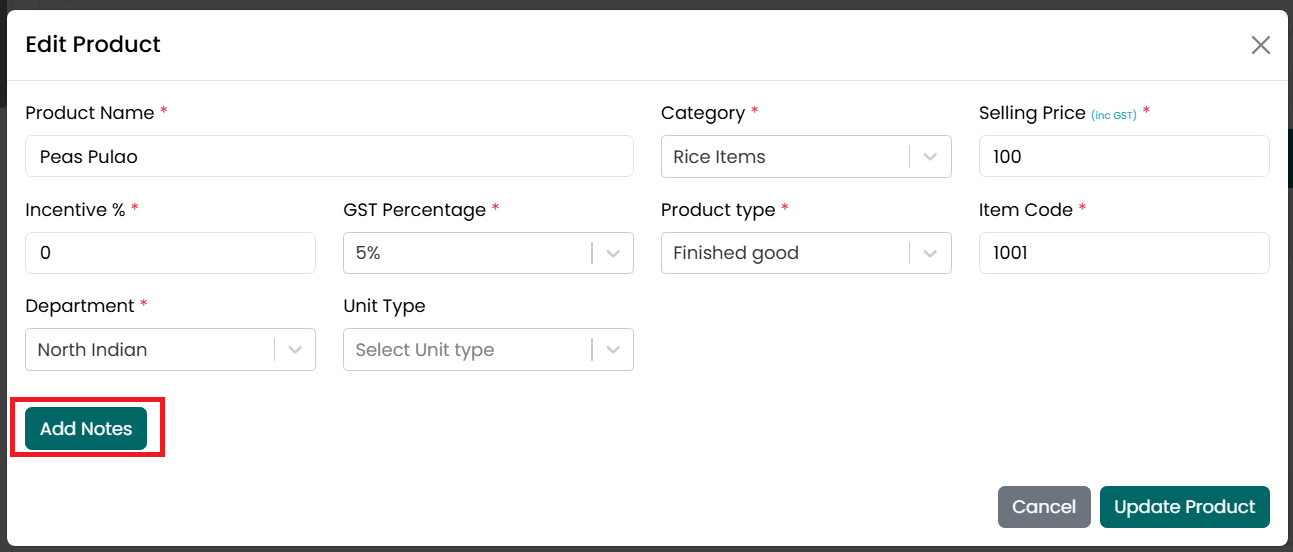
- Click Add Notes to view or modify the
product description, if required.
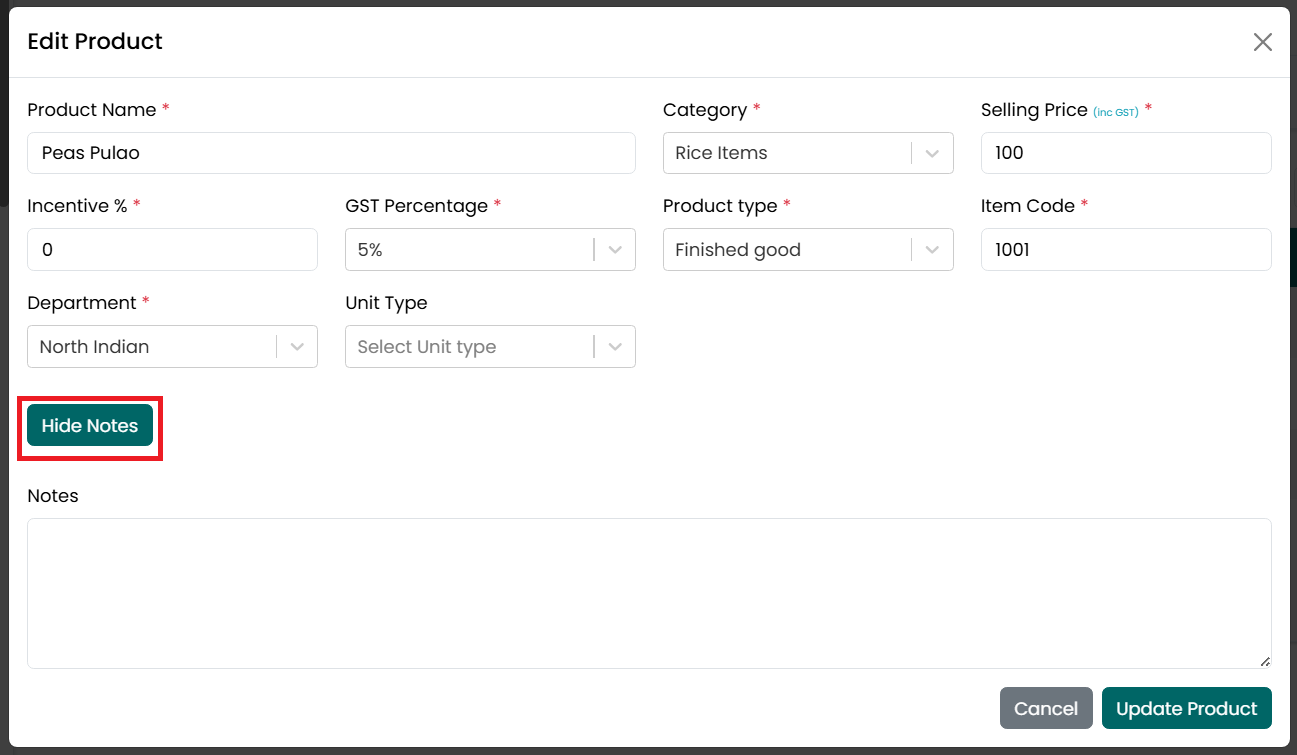
- After the Notes section is expanded,
update the product description as required. Click Hide Notes to collapse
the Notes section without removing the entered information.
- After making the required changes,
click Update Product to save the changes.
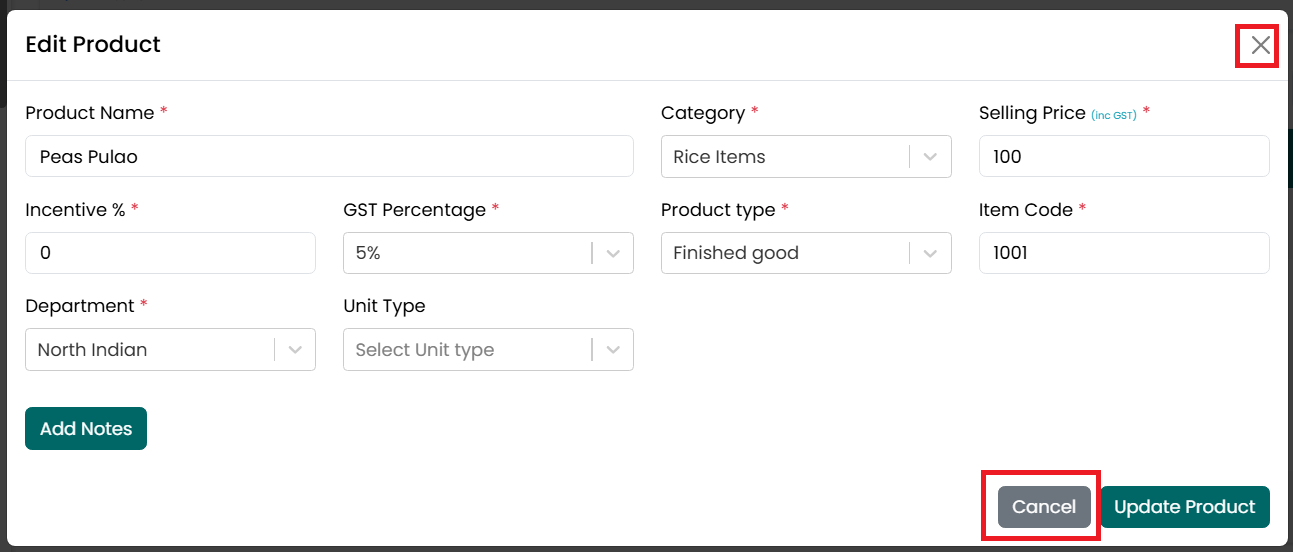
- Click Cancel or the X icon to close
the window without saving.
- After the product is updated successfully, a confirmation message is displayed, and the updated information appears in the Product Listing page.
Edit Product (Raw Material)
To update an existing Raw Material product, follow the steps below.
- Go
to the Main Menu and click Products. The Product Listing page is
displayed.
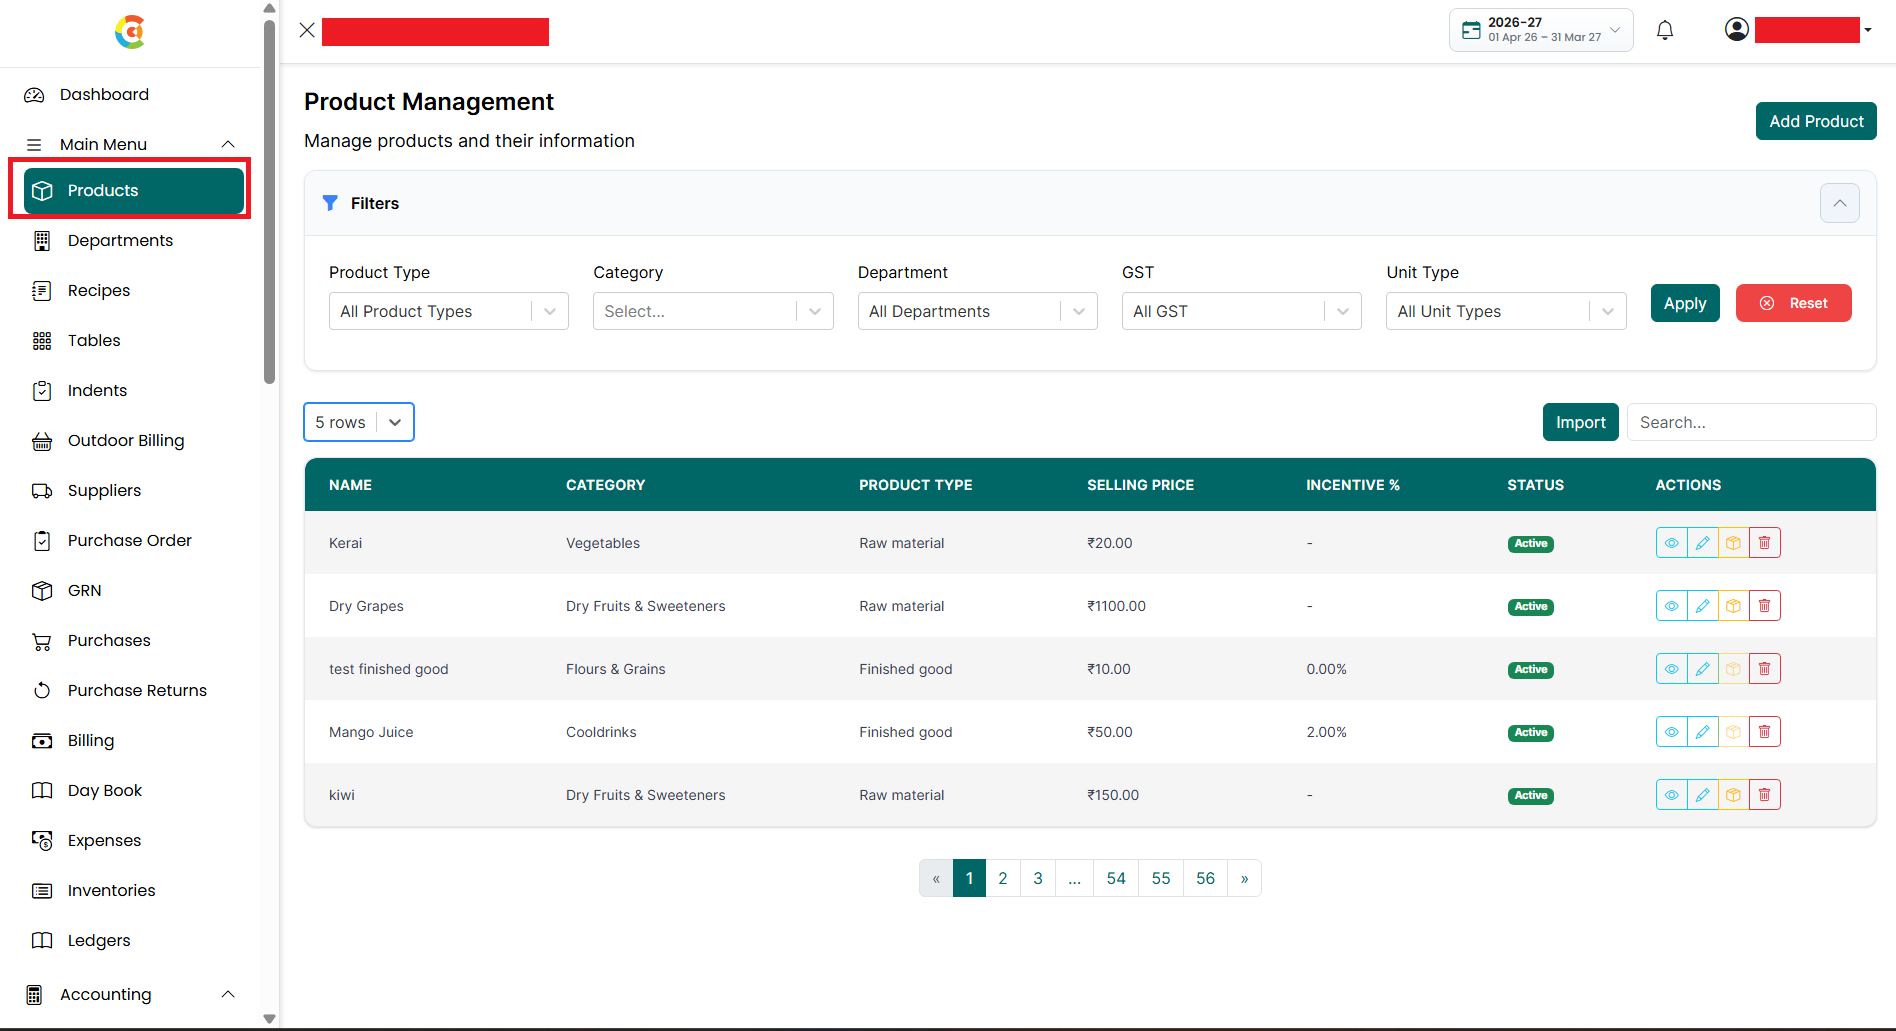
- Find the product you want to edit.
Click the Edit icon.
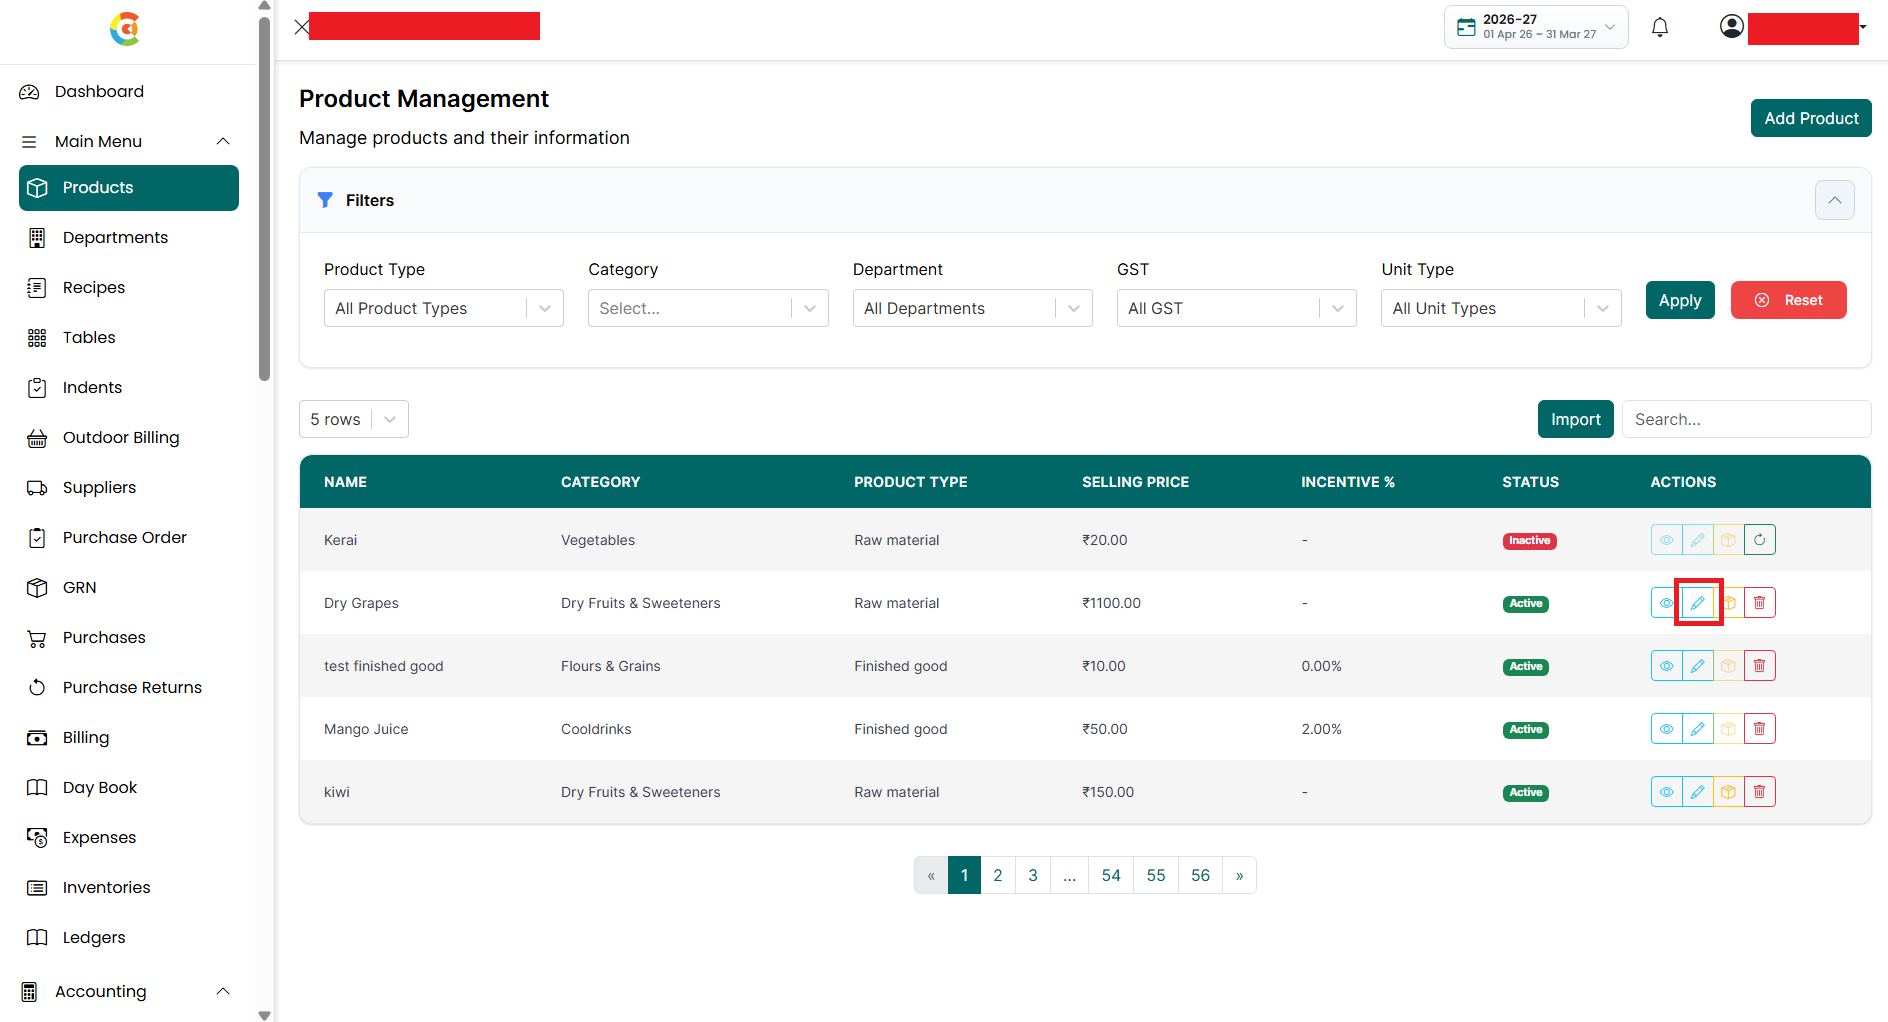
- The Edit Product window is displayed
with the existing product details.
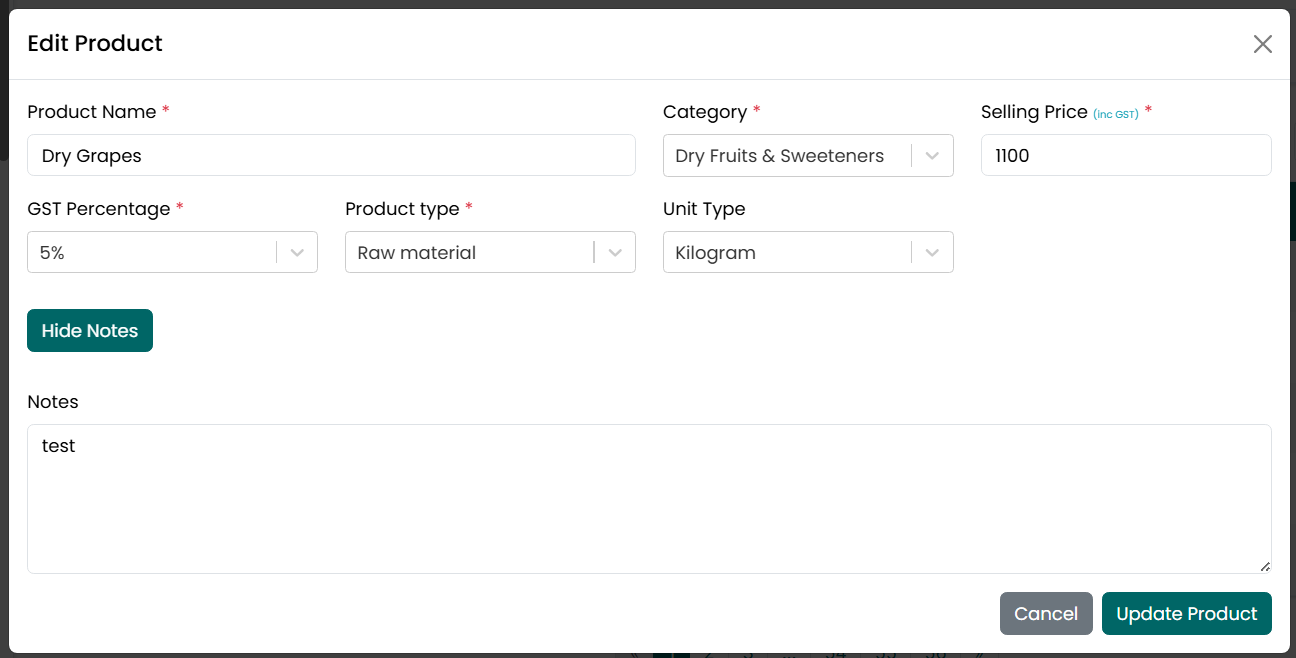
- Update the Product Name, if required.
This field is required. The Product Name must remain unique. Duplicate
product names are not allowed.
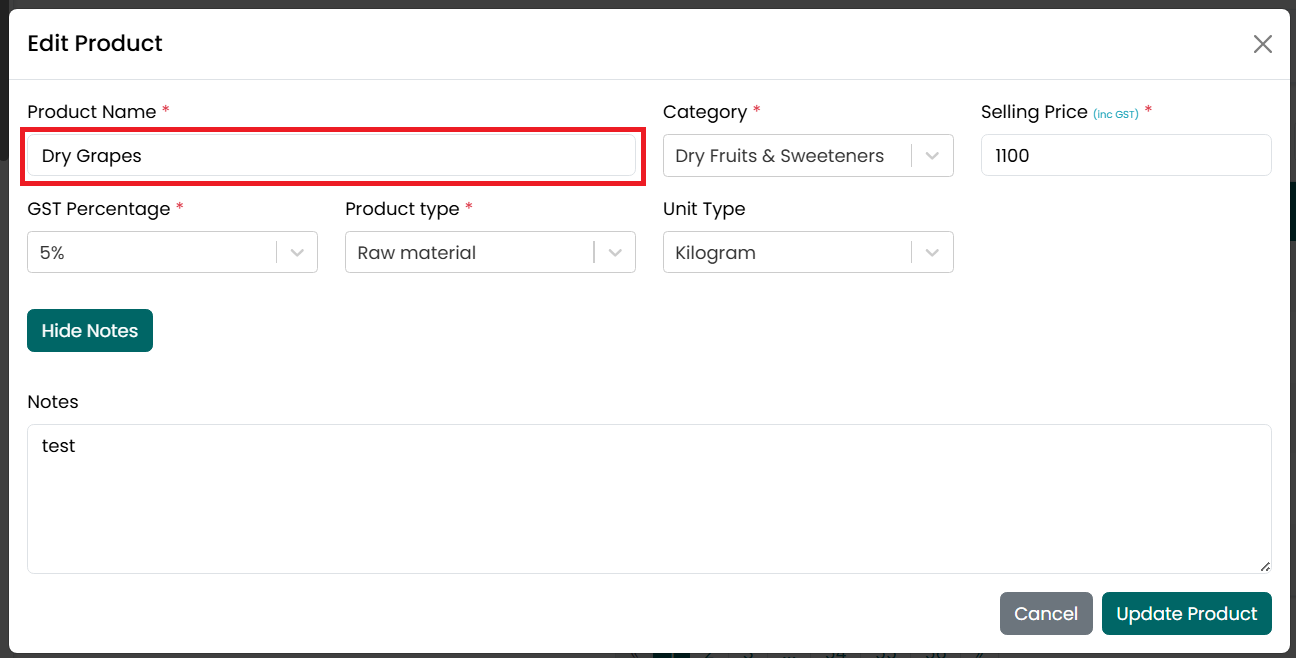
- Select a different Category, if
required. This field is required.
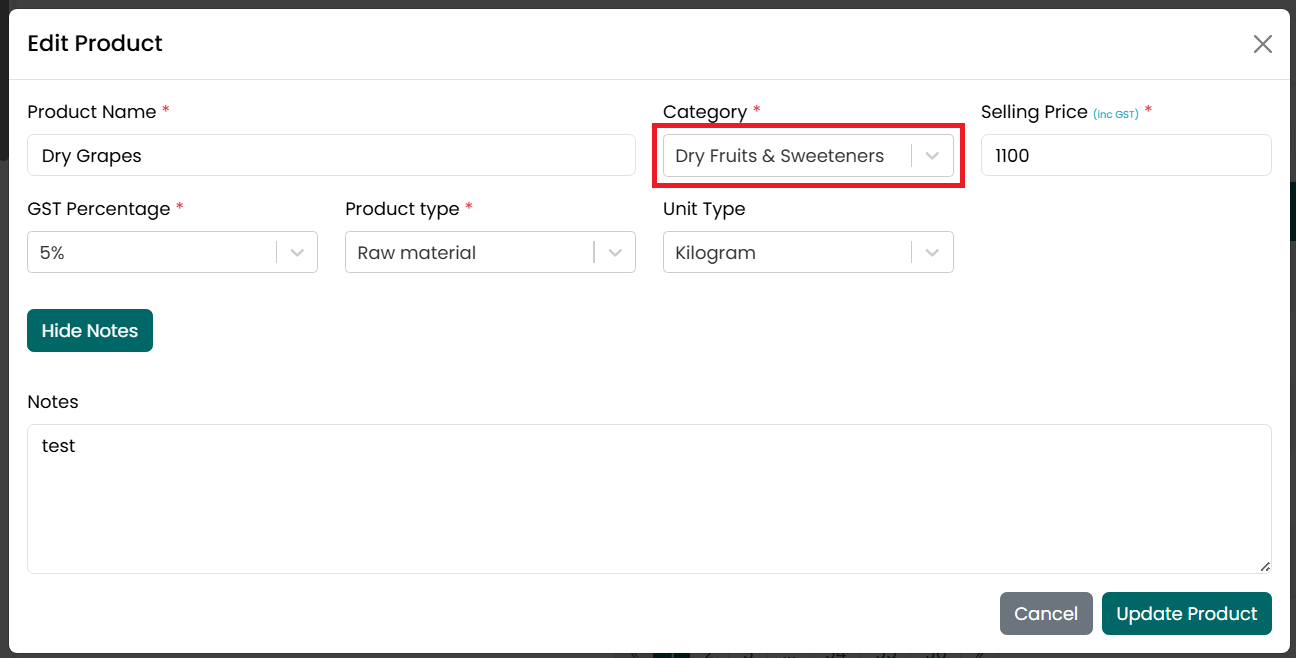
- Verify that the Product Type is set
to Raw Material.
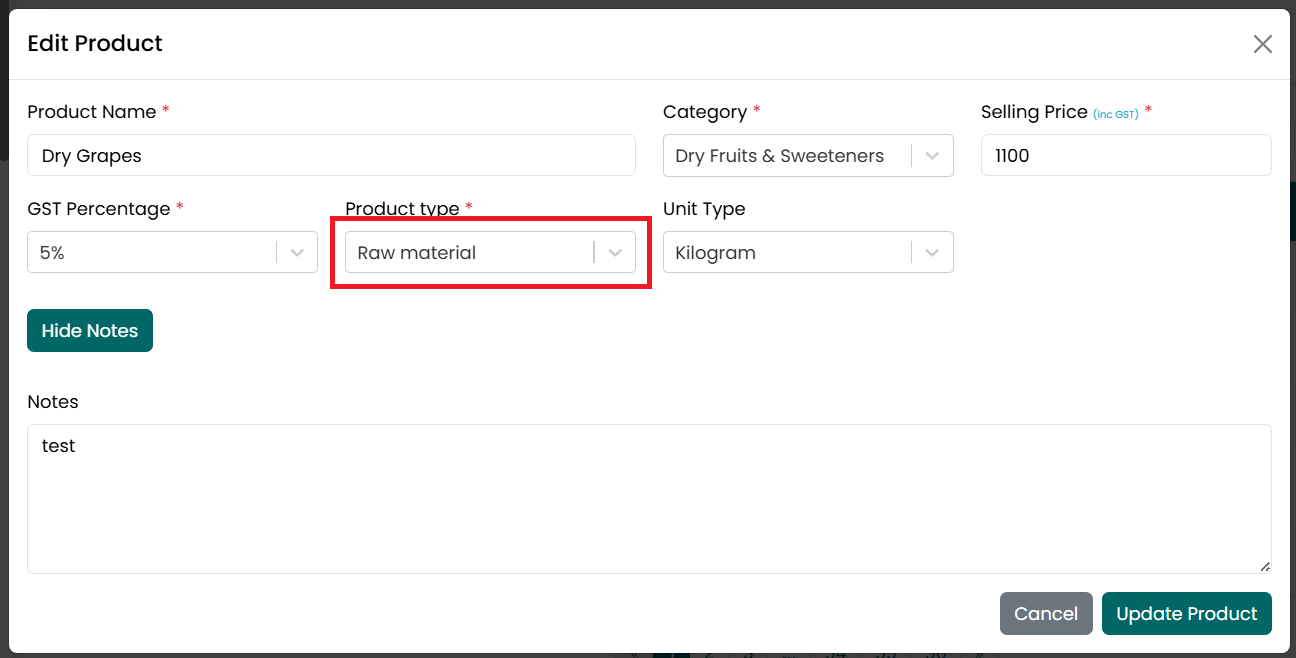
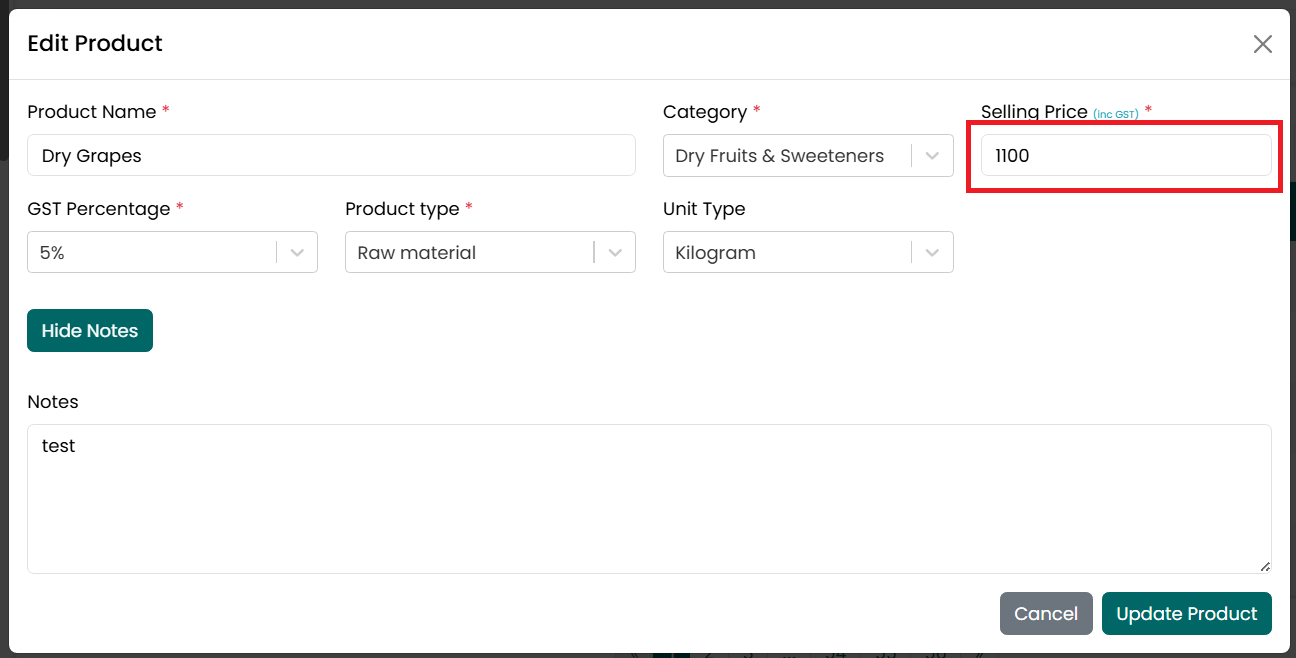
- Update the Selling Price, if
required. This field is required.
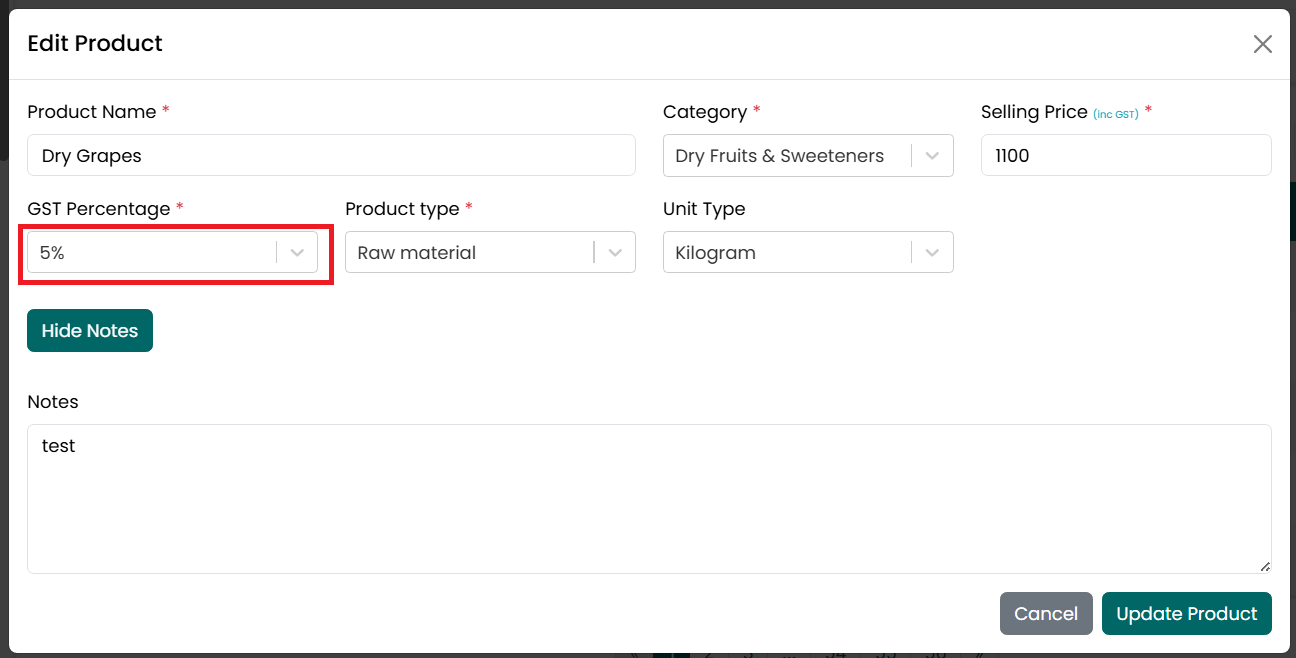
- Select a different GST Percentage, if
required.
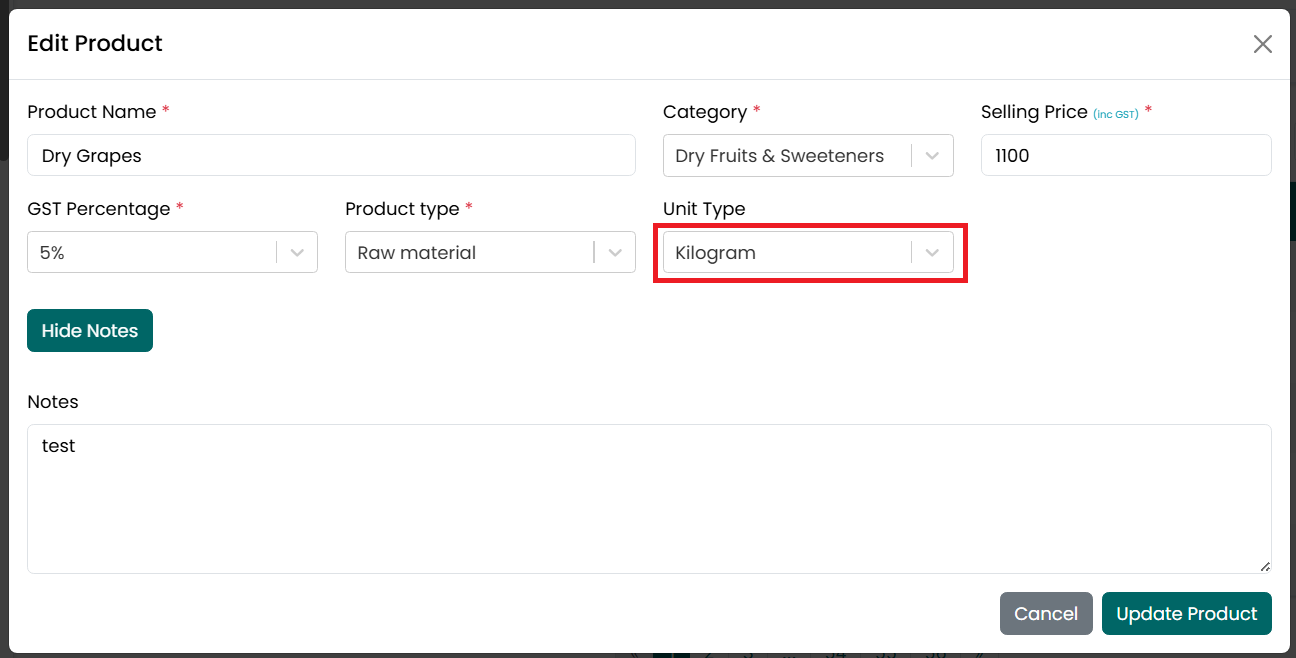
- Select a different Unit Type, if required.
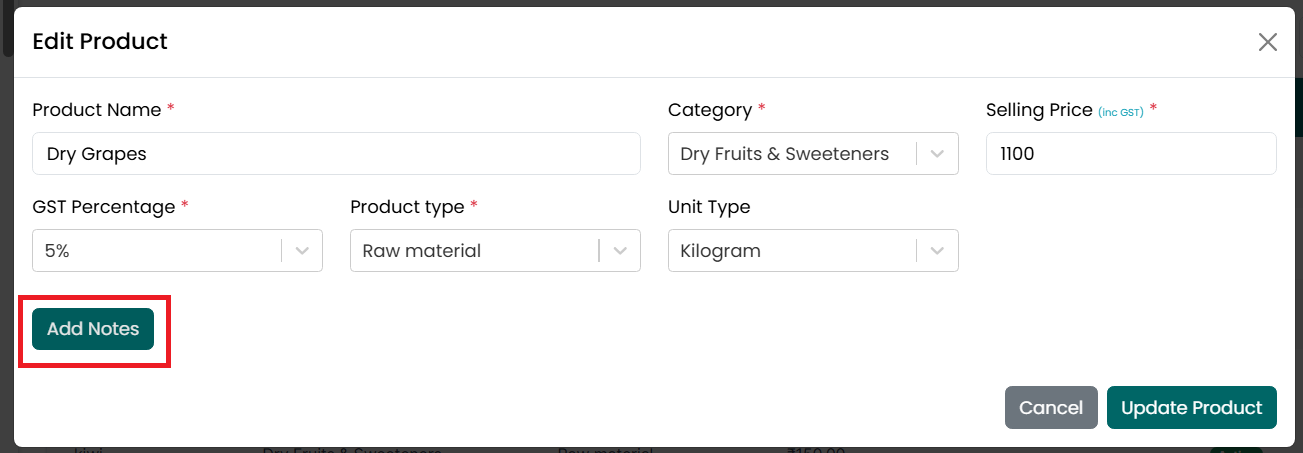
- Click Add Notes to view or modify the
product description, if required.
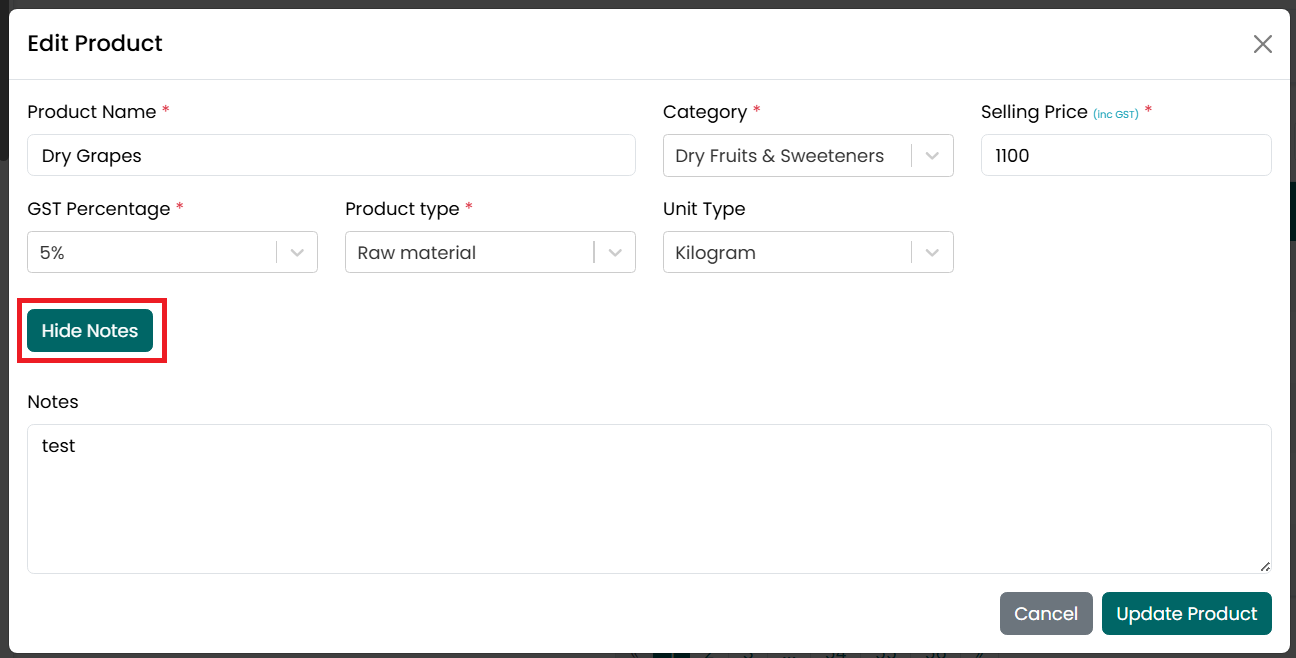
- After the Notes section is expanded,
update the product description as required. Click Hide Notes to collapse
the Notes section without removing the entered information.
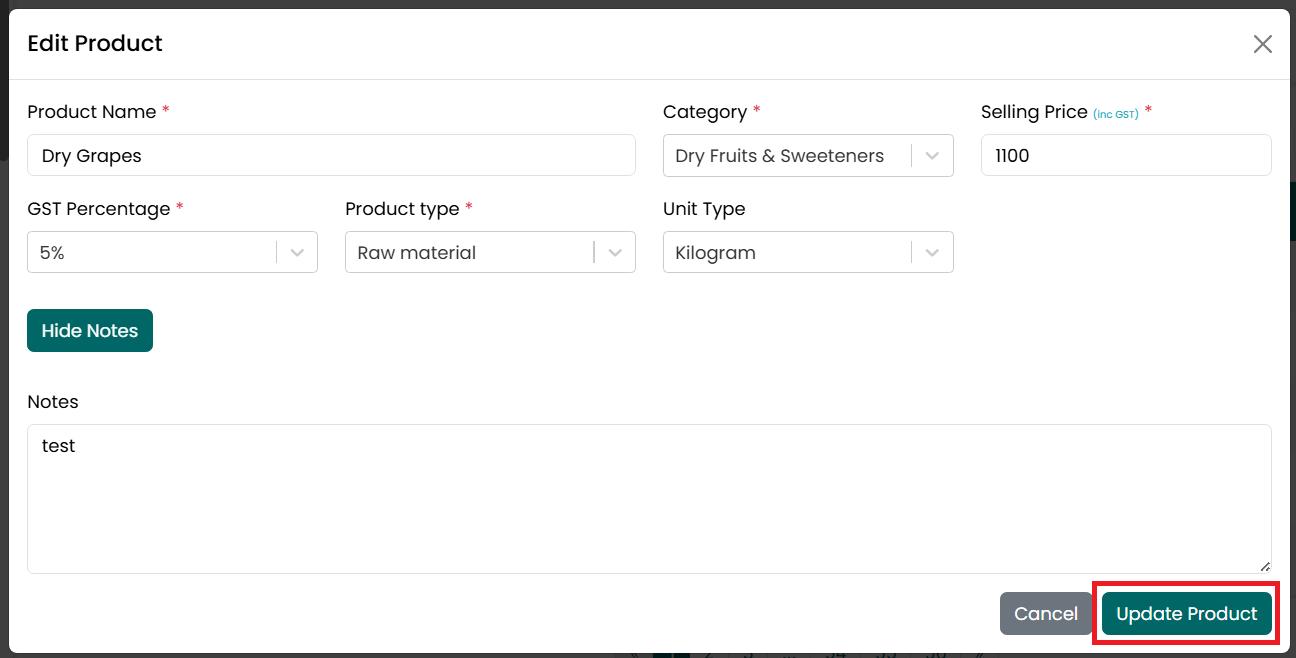
- After making the required changes,
click Update Product to save the changes.
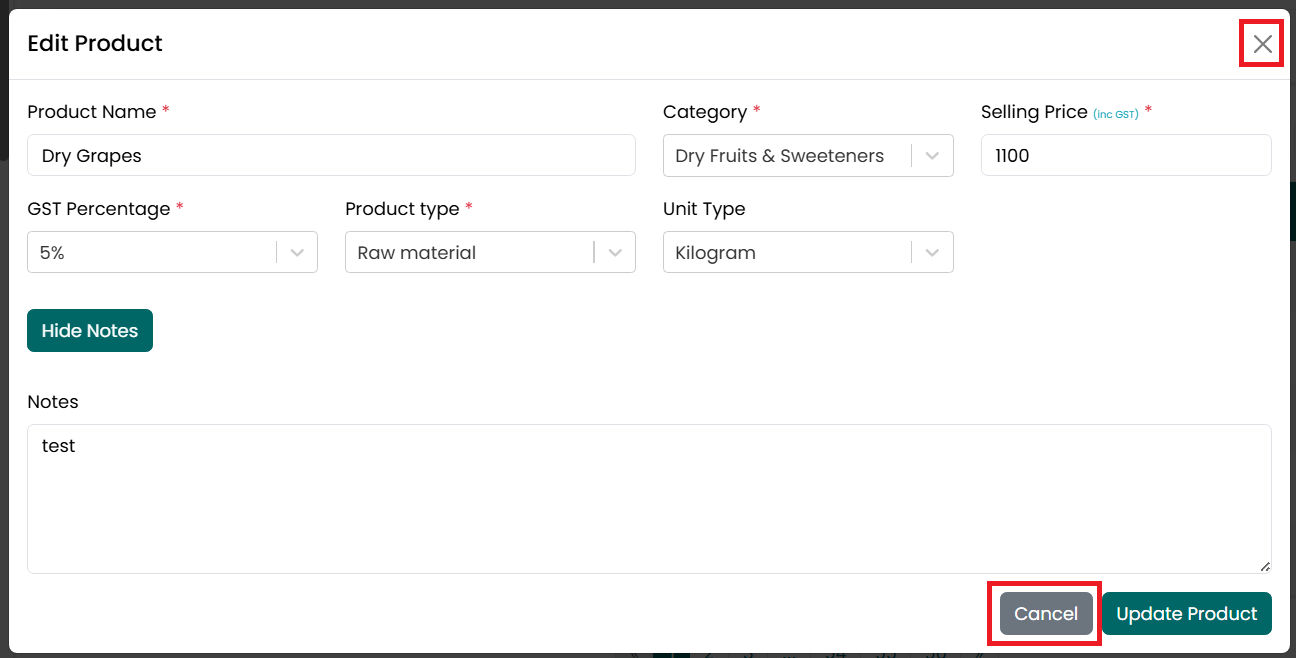
- Click Cancel or the X icon to close
the window without saving.
- After the product is updated successfully, a confirmation message is displayed, and the updated information appears in the Product Listing page.
View Product (Finished Goods)
To view the details of a Finished Goods product, follow the steps below.
- Go
to the Main Menu and click Products. The Product Listing page is
displayed.
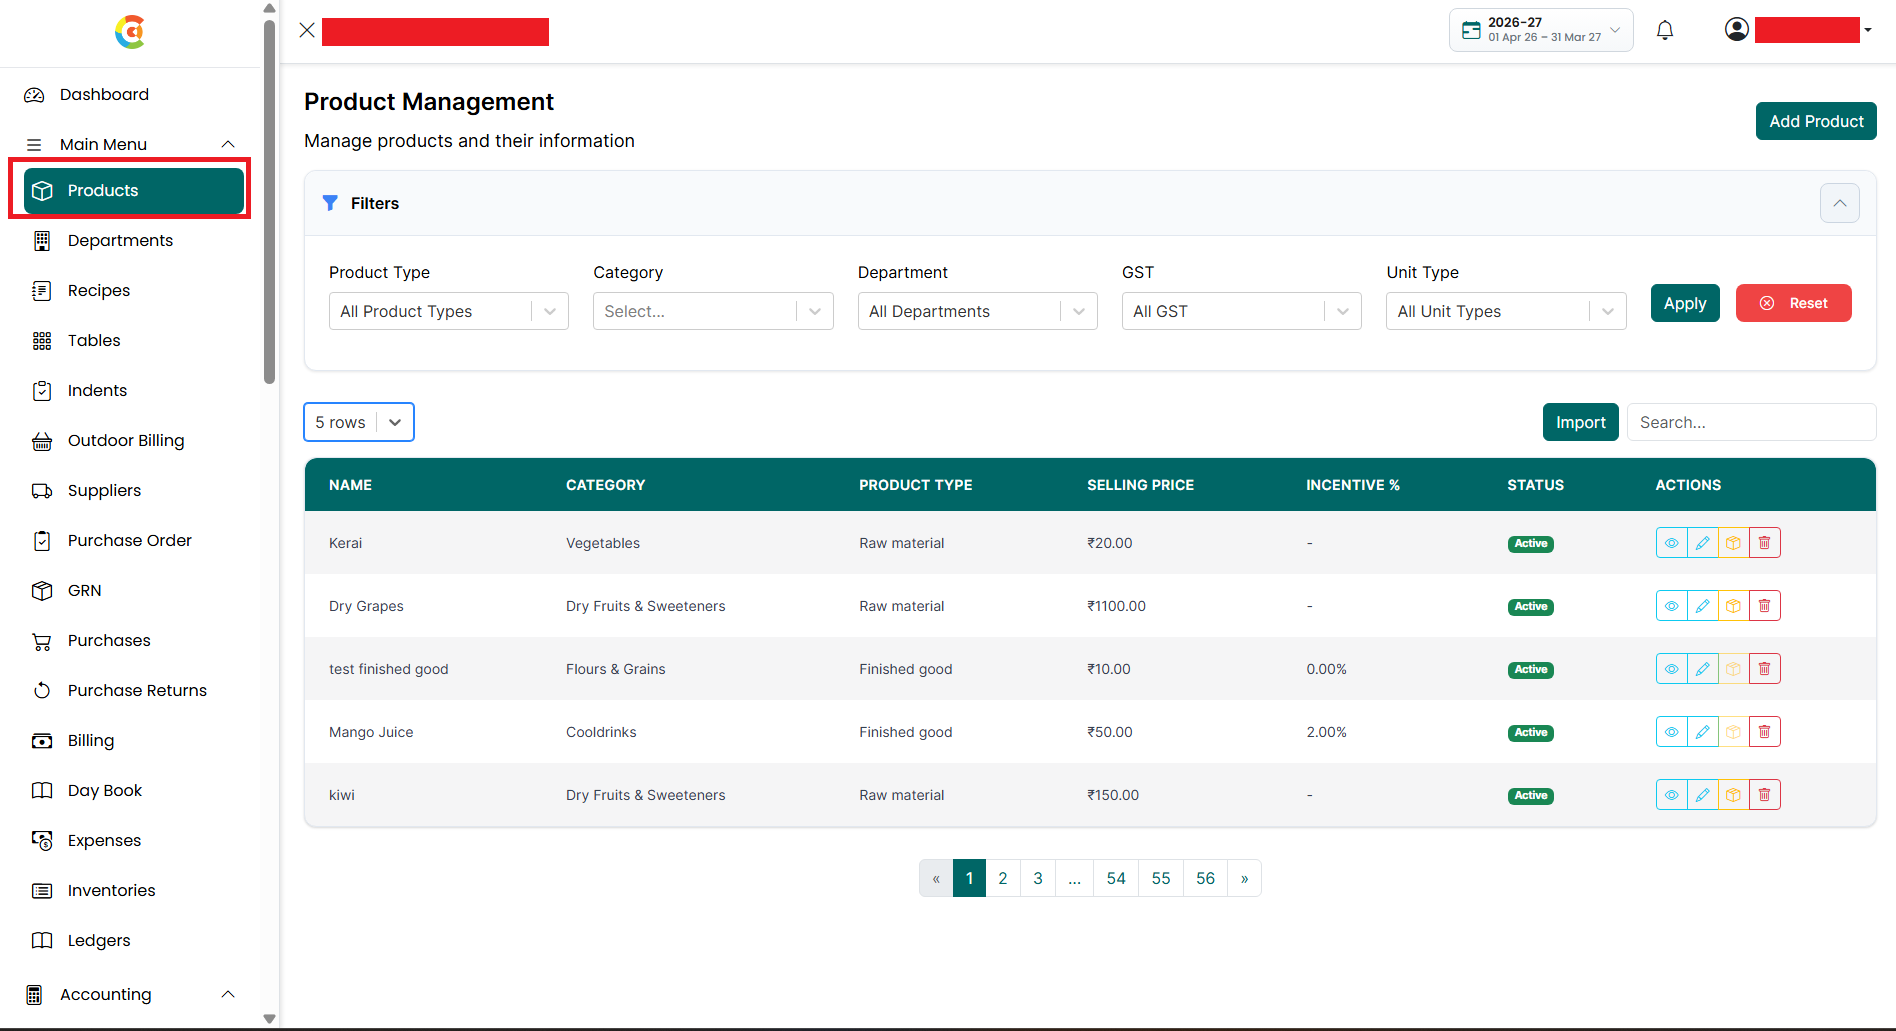
- Find the product you want to view.
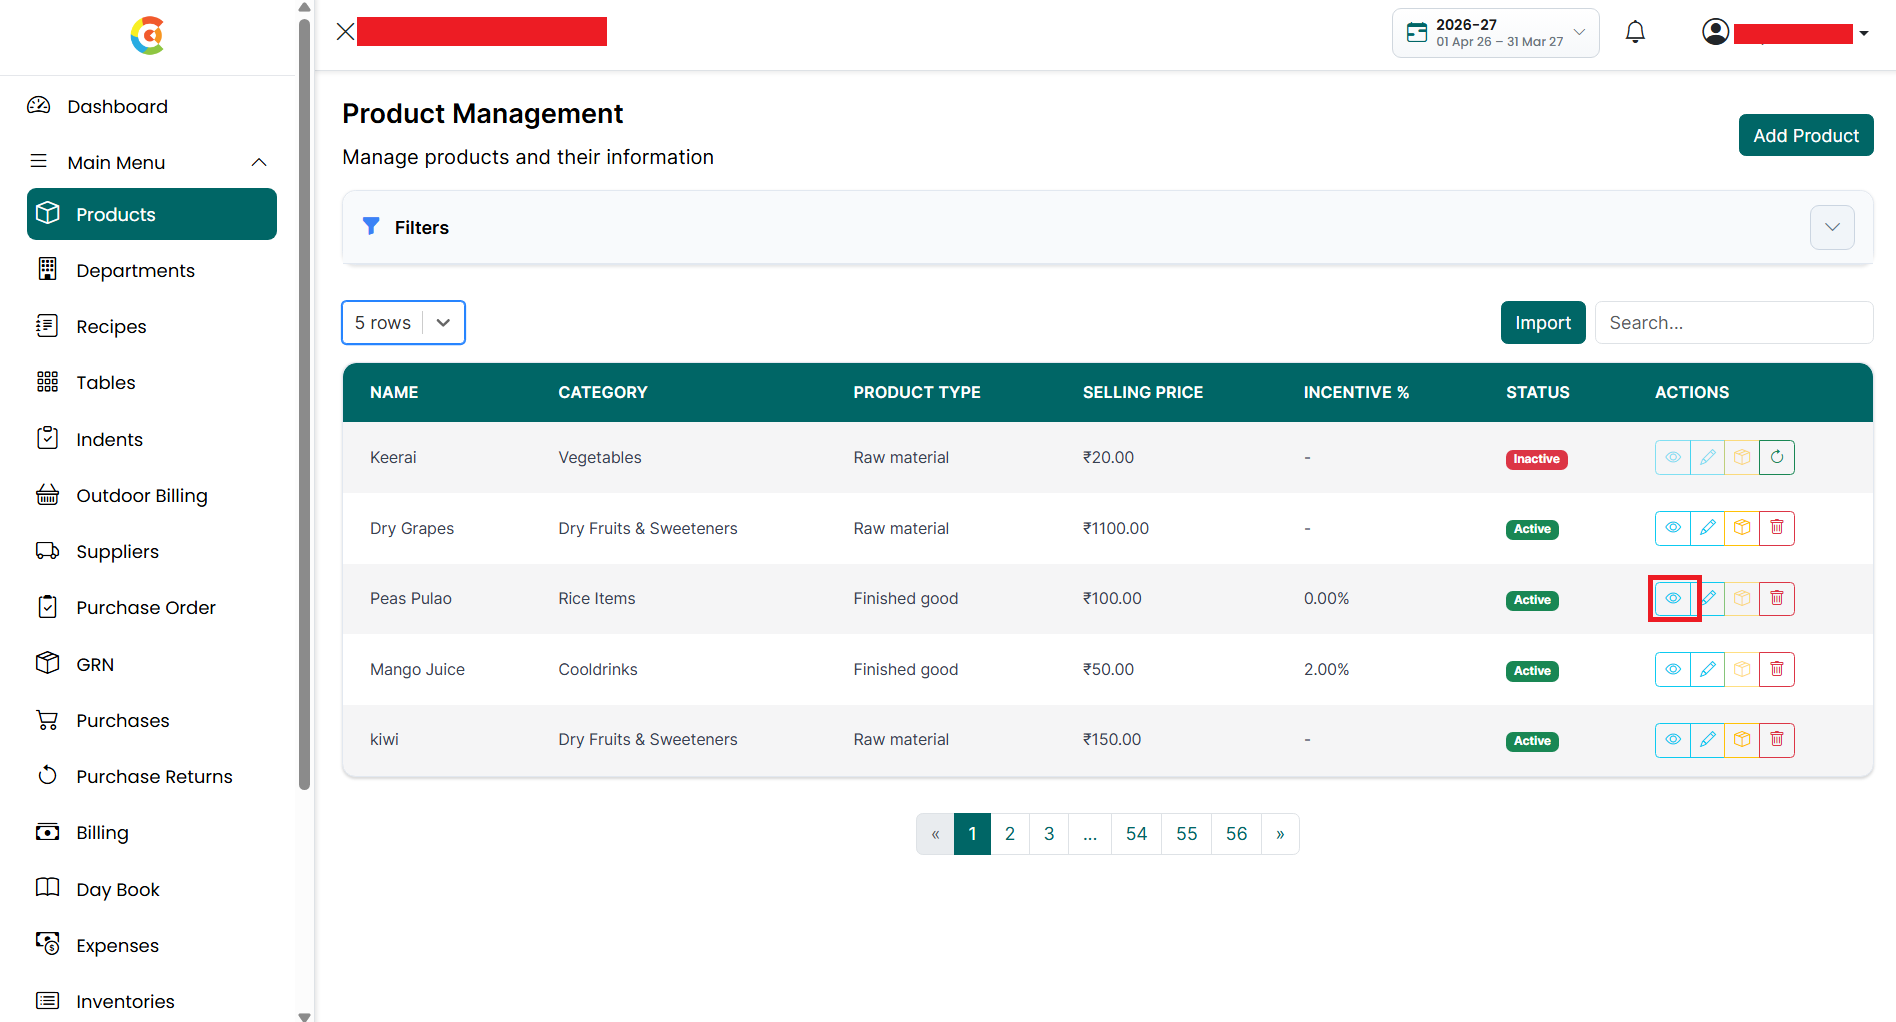
Click the View icon.
- The View Product window is displayed.
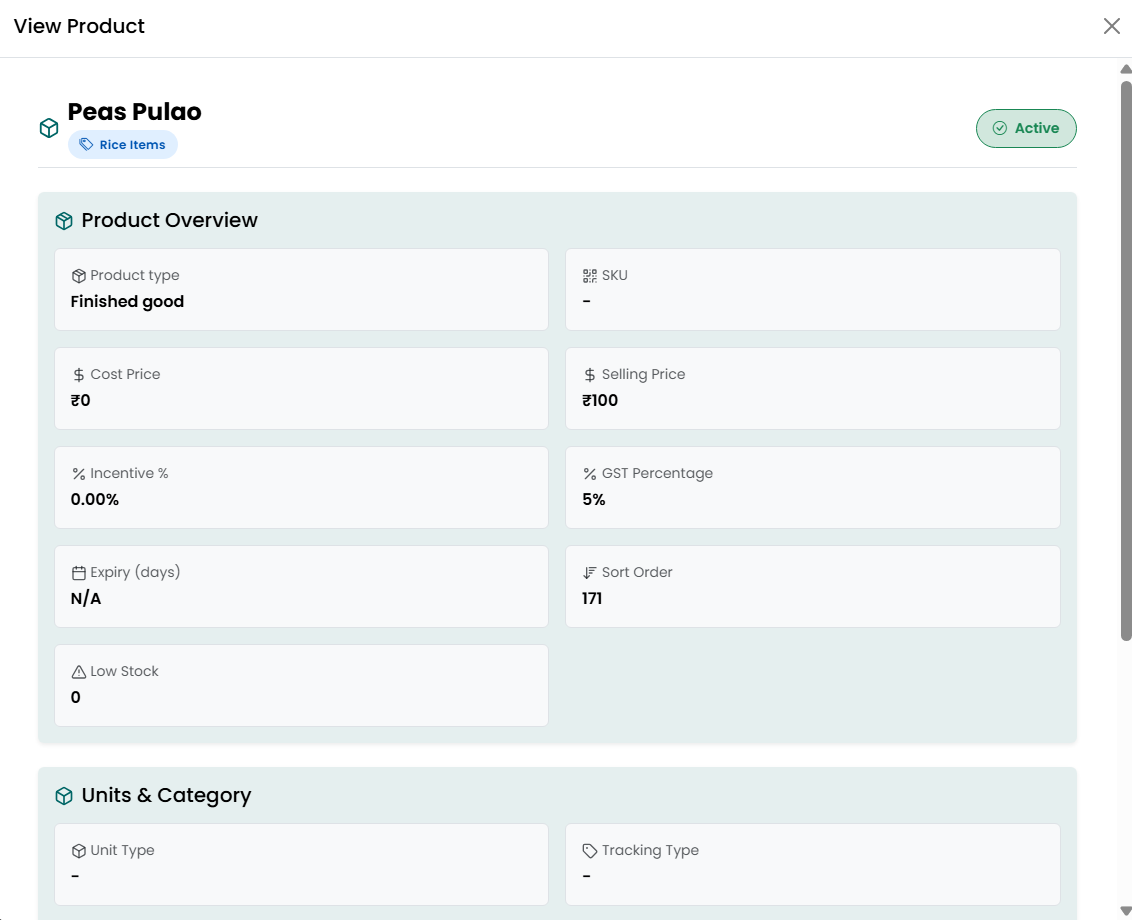
- The following information is available:
• Product Information
■ Product Name
■ Category
■ Product
Status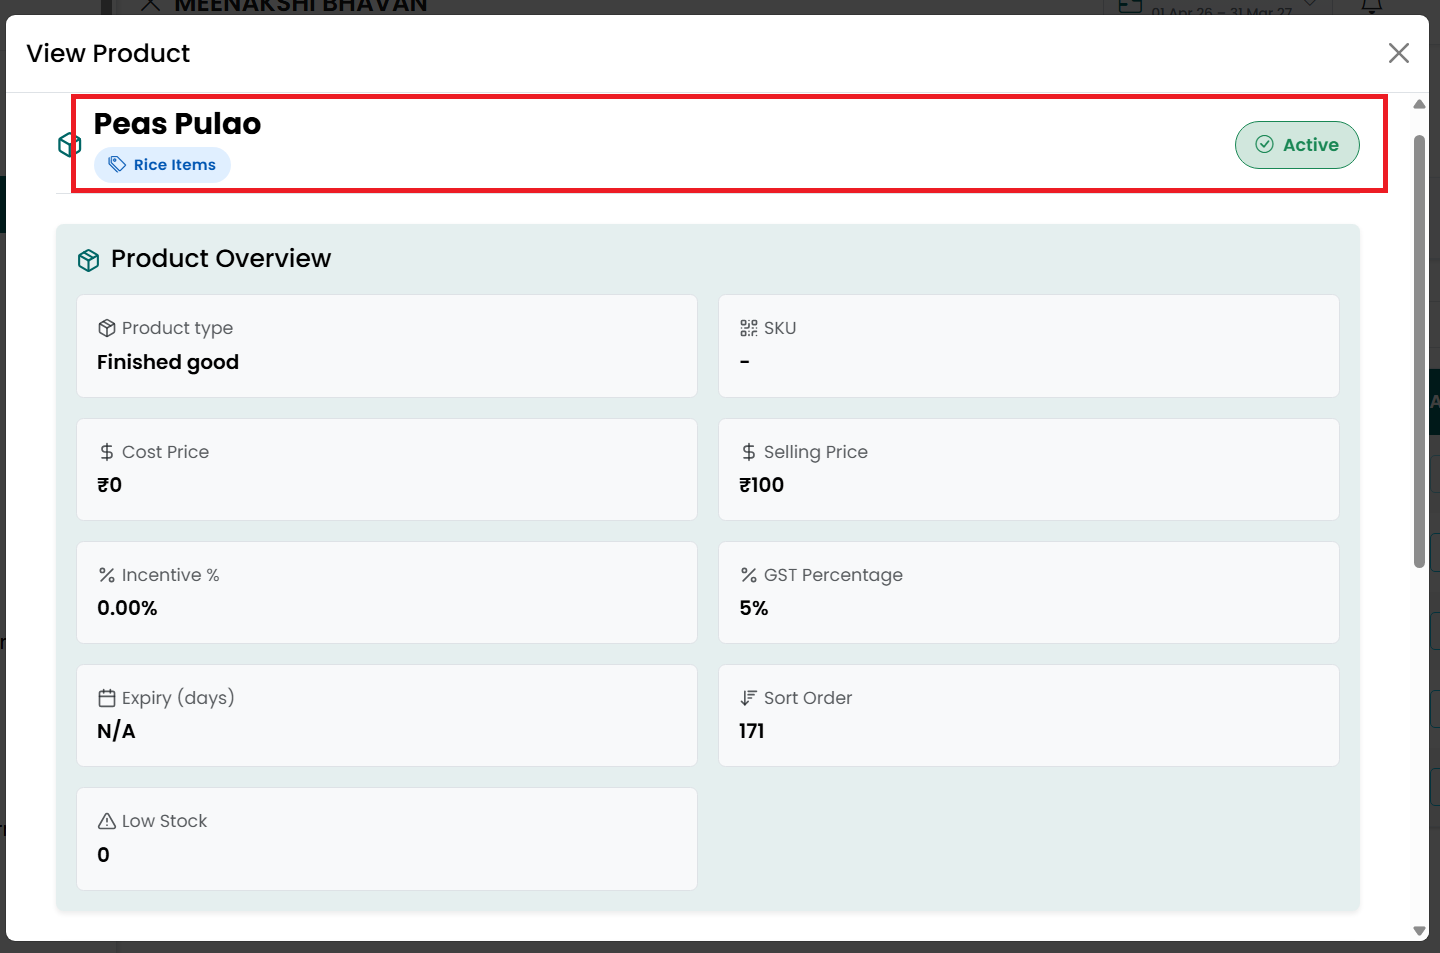
• Product Overview
■ Product Type
■ SKU / Item Code
■ Cost Price
■ Selling Price
■ Incentive Percentage
■ GST Percentage
■ Expiry (Days)
■ Sort Order
■ Low
Stock Quantity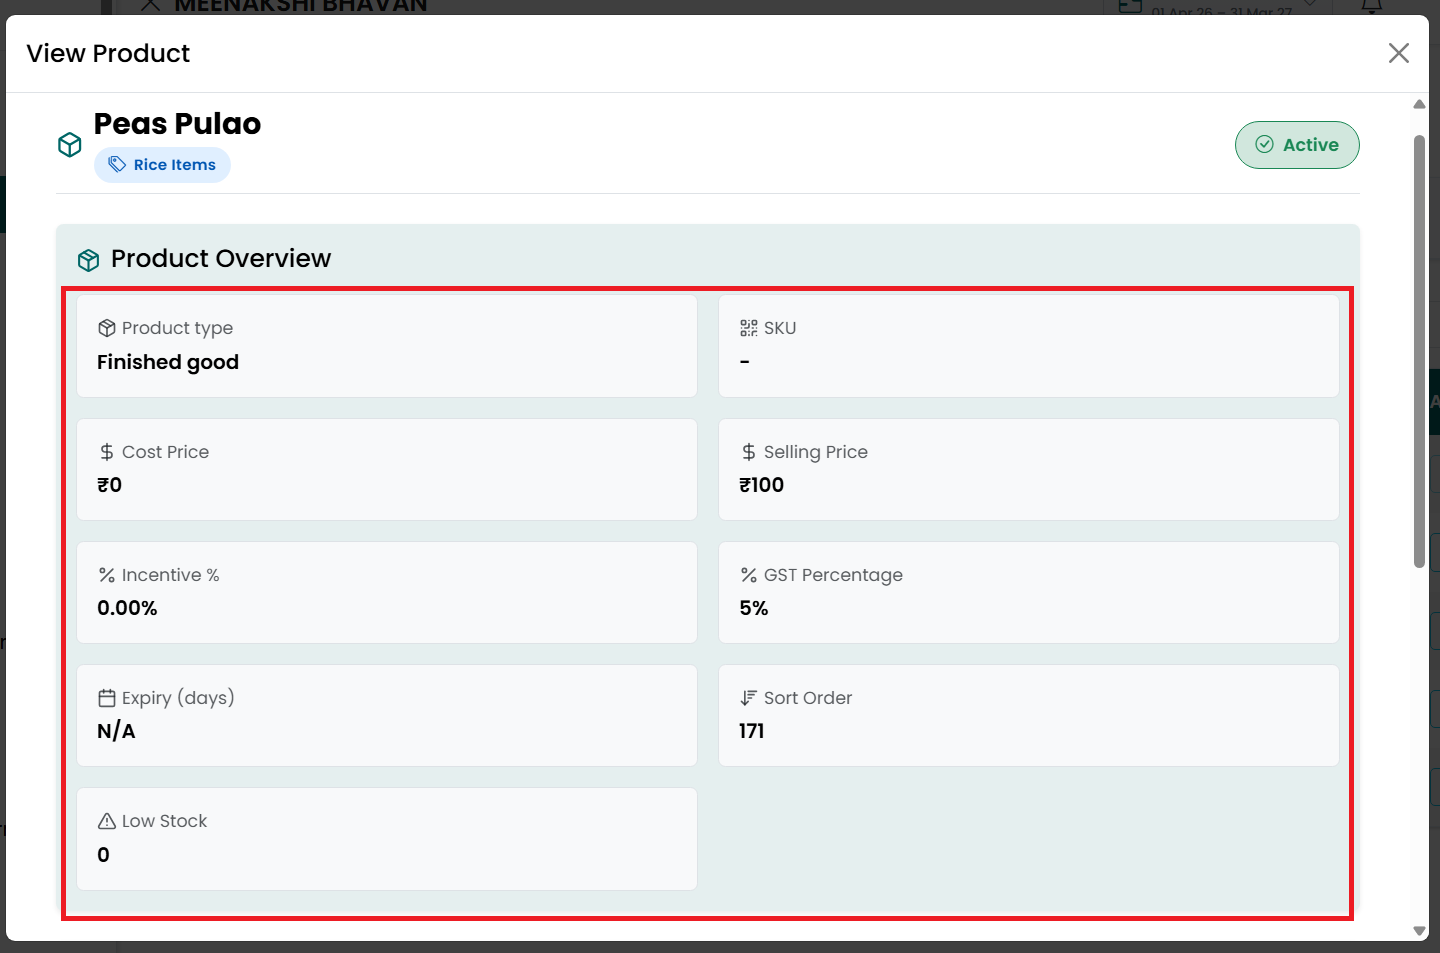
• Units & Category
■ Unit Type
■ Tracking Type
■ Racks
■ Category
Description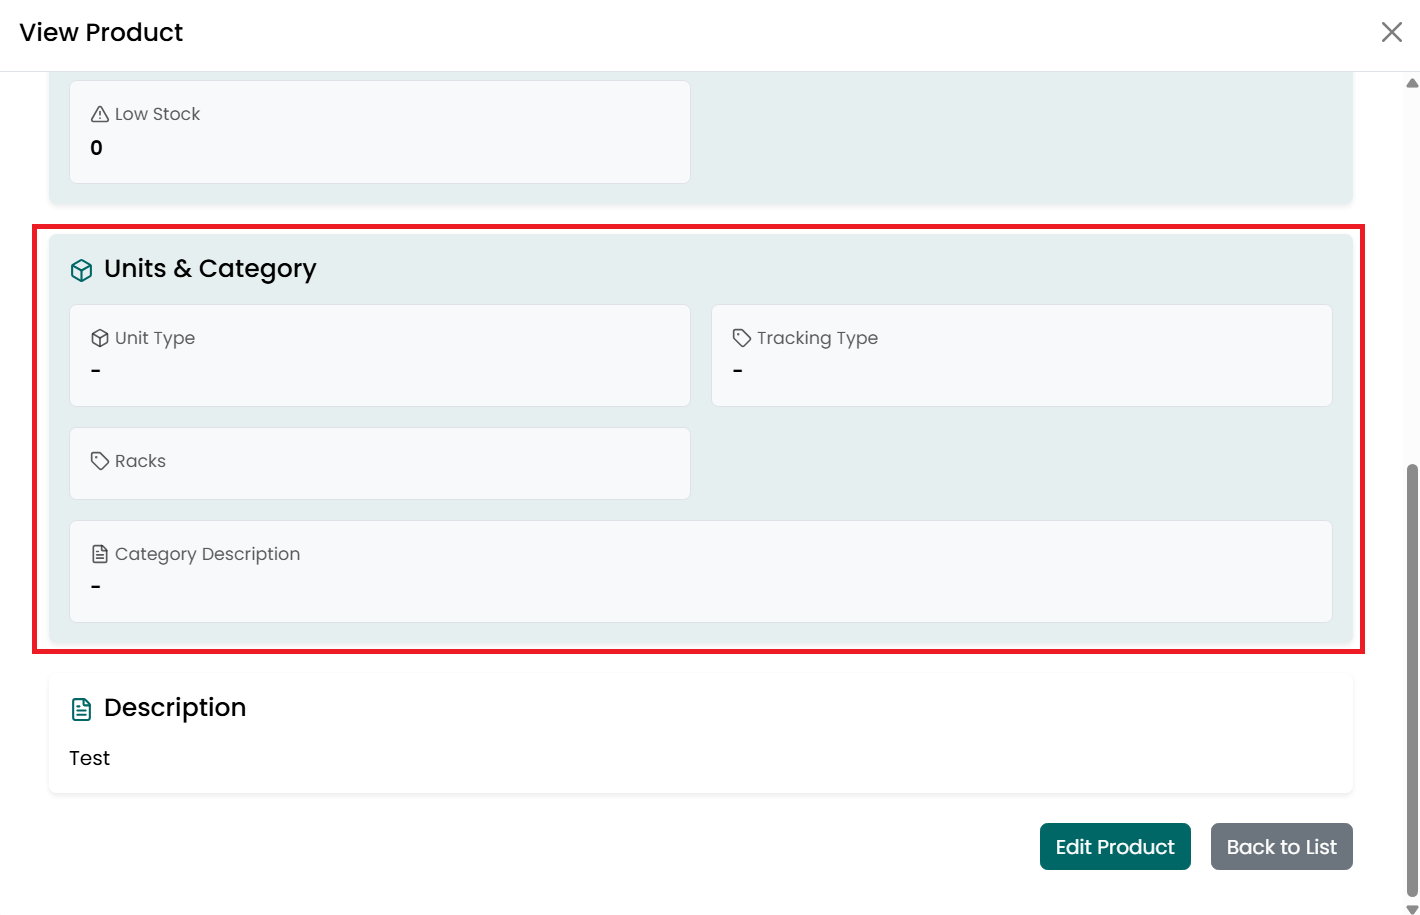
• Description
■ Displays
the description added for the product, if available.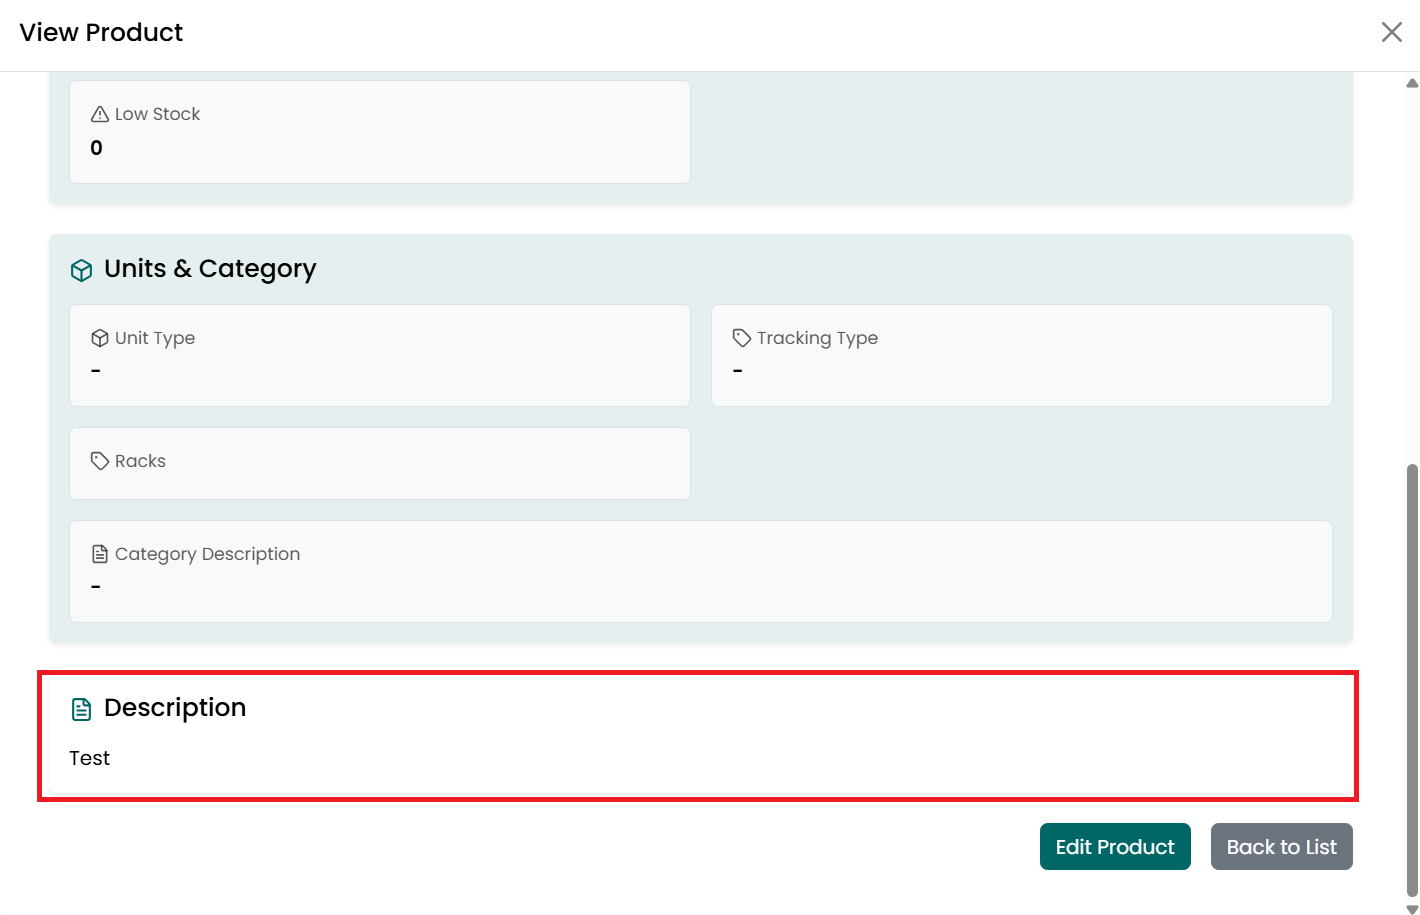
- Click Edit Product to update the
product details.
- Click
Back to List or the X icon to return to the Product Listing page.
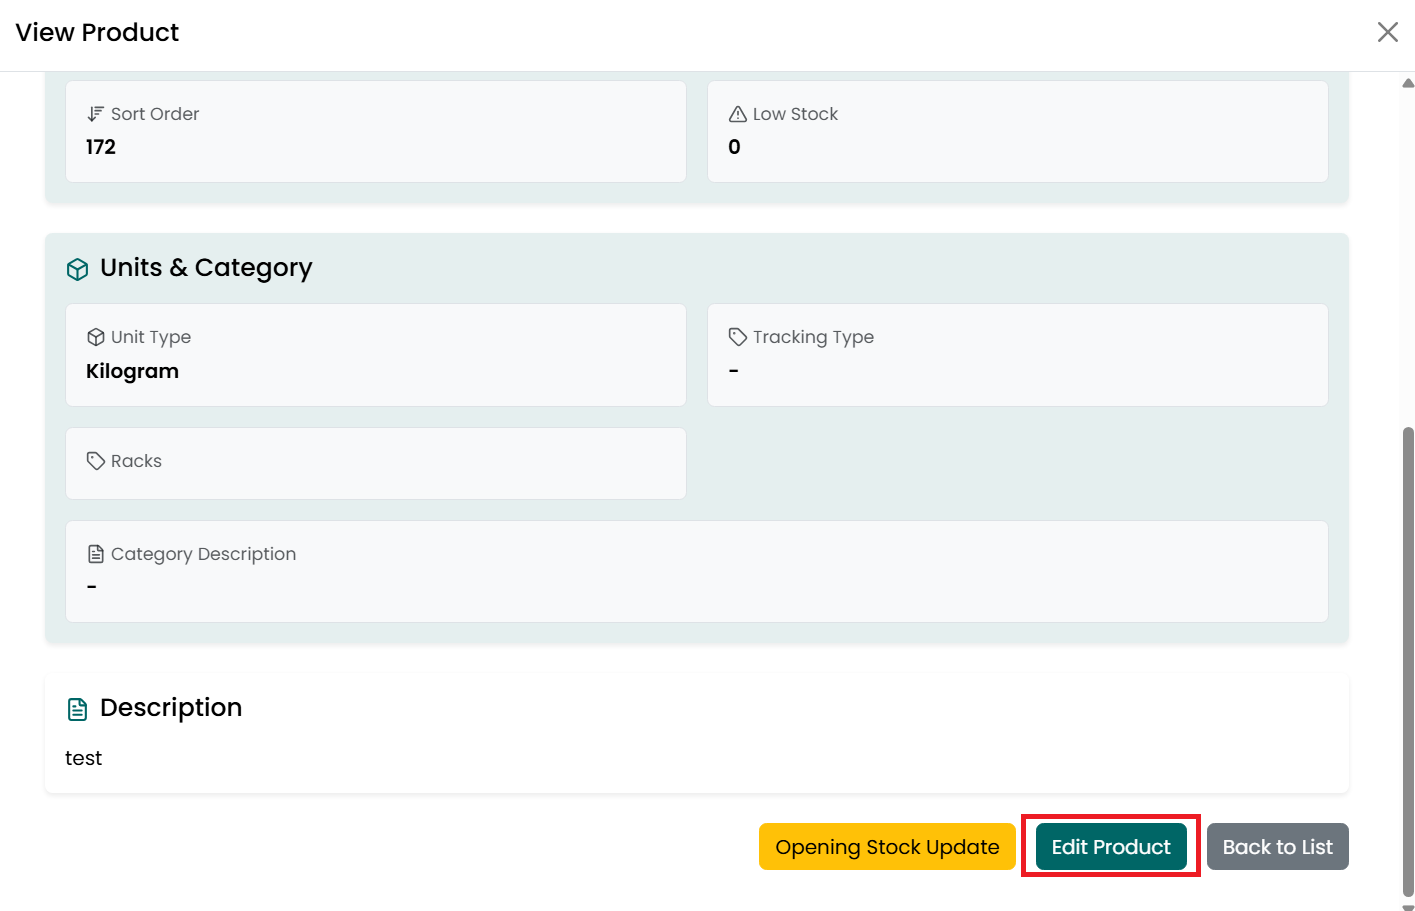
View Product (Raw Material)
To view the details of a Raw Material product, follow the steps below.
- Go
to the Main Menu and click Products. The Product Listing page is
displayed.
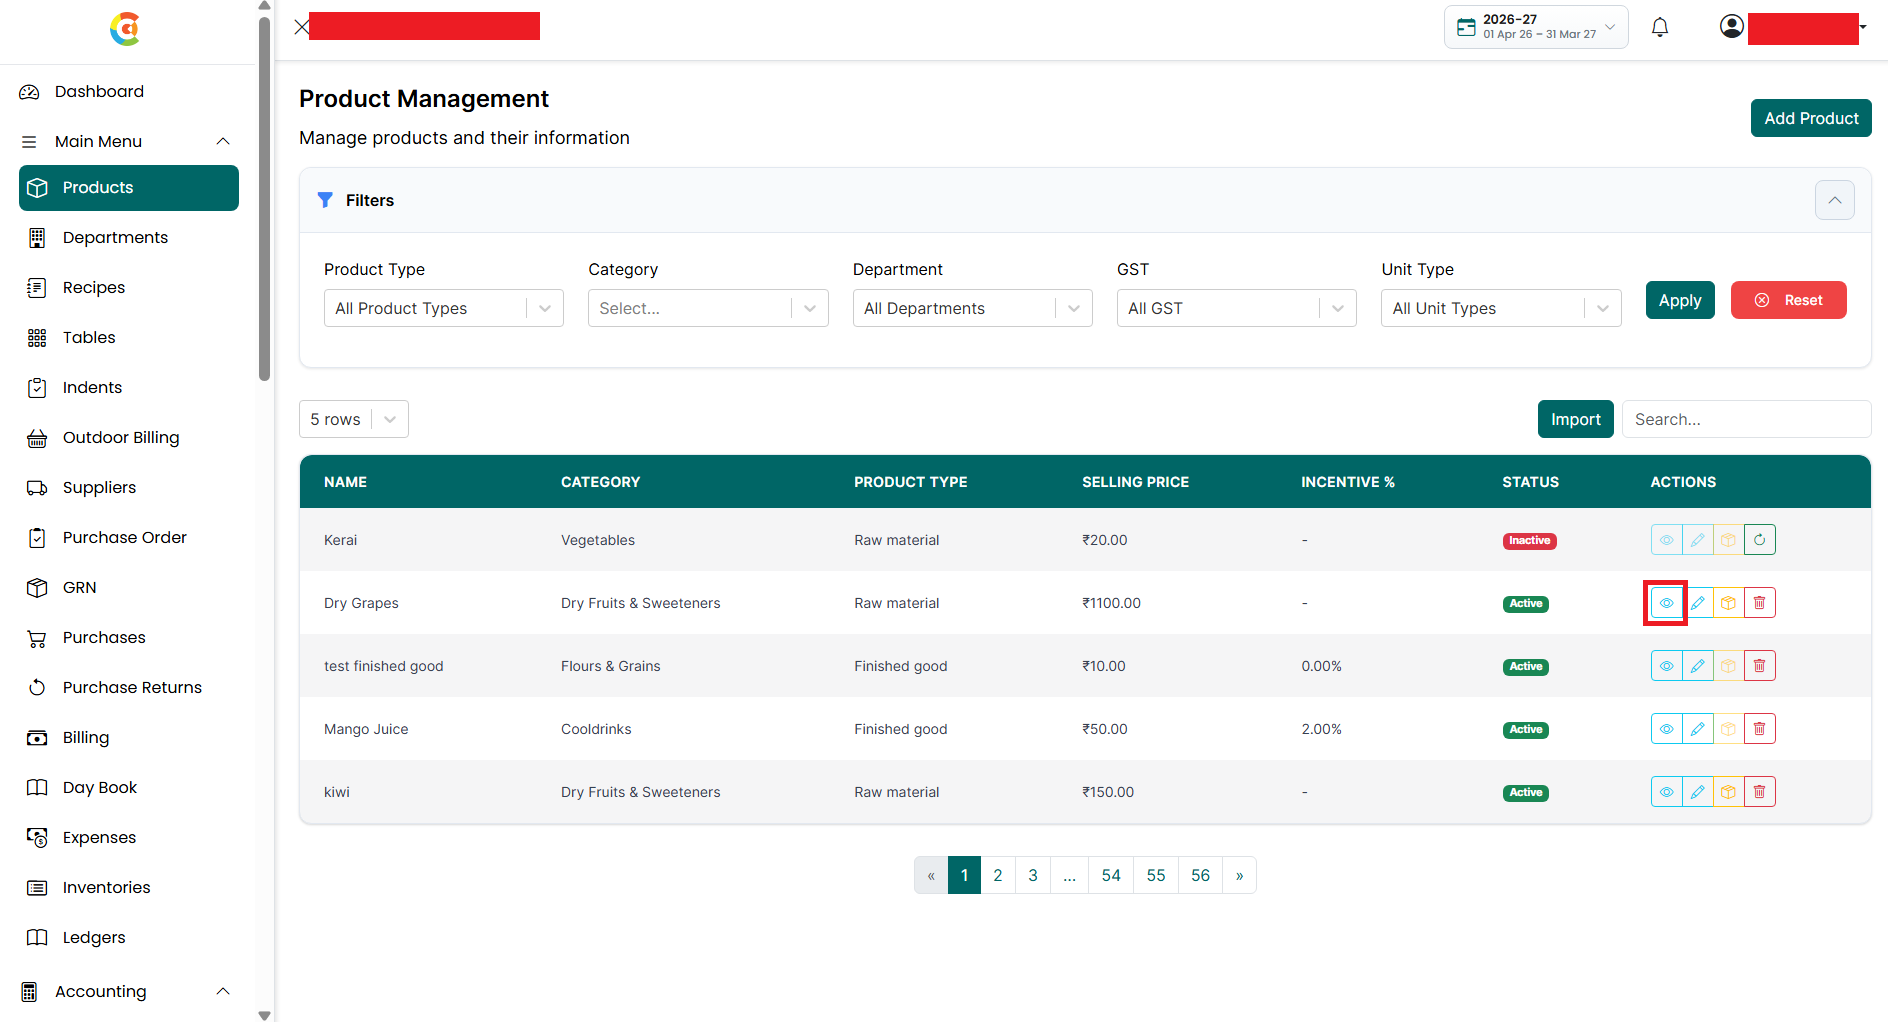
- Find the product you want to view.
Click the View icon.
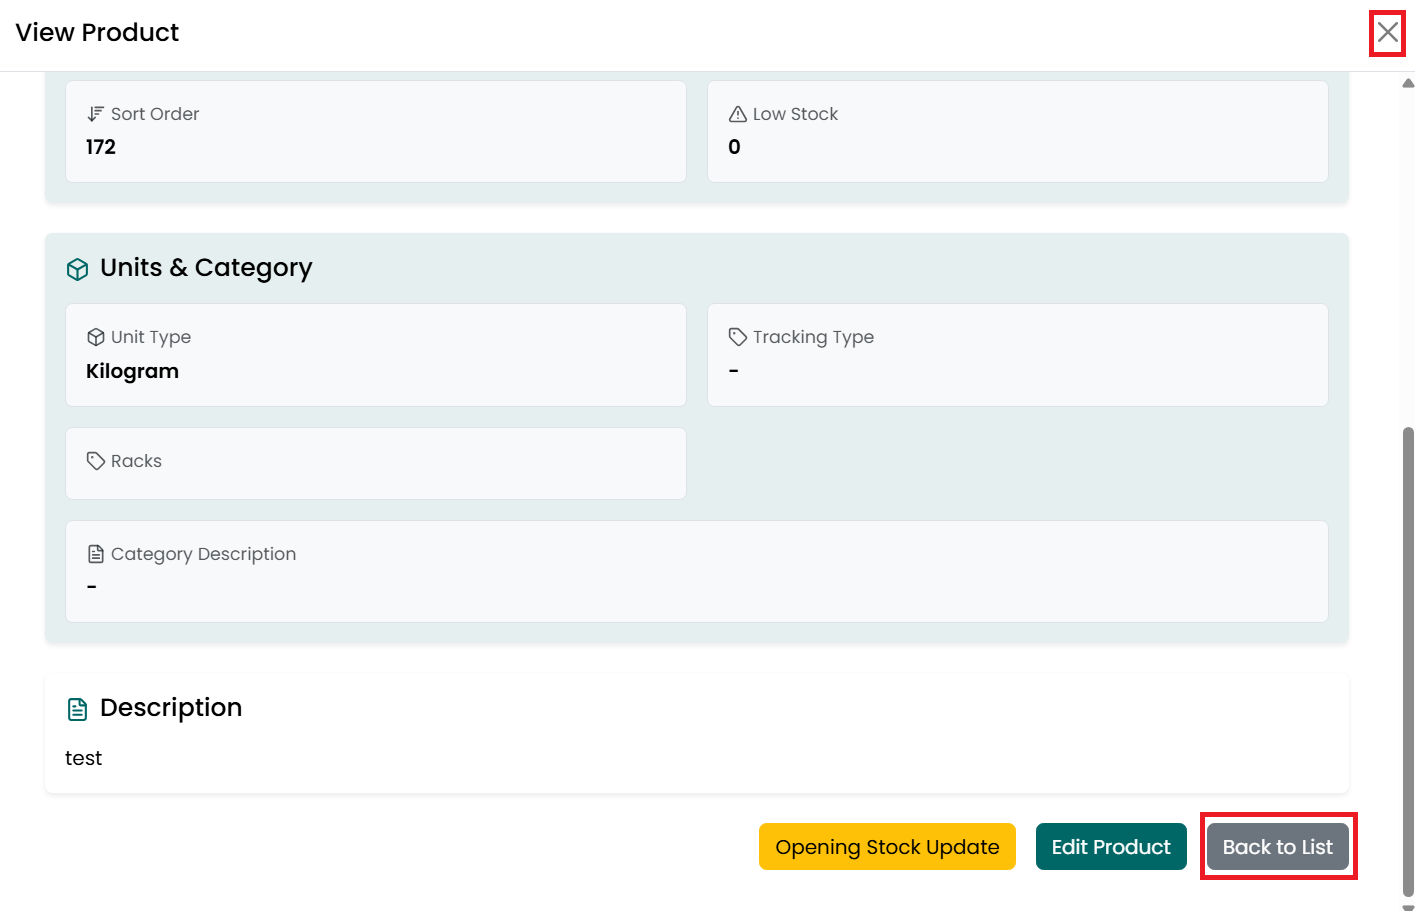
- The View Product window is displayed.
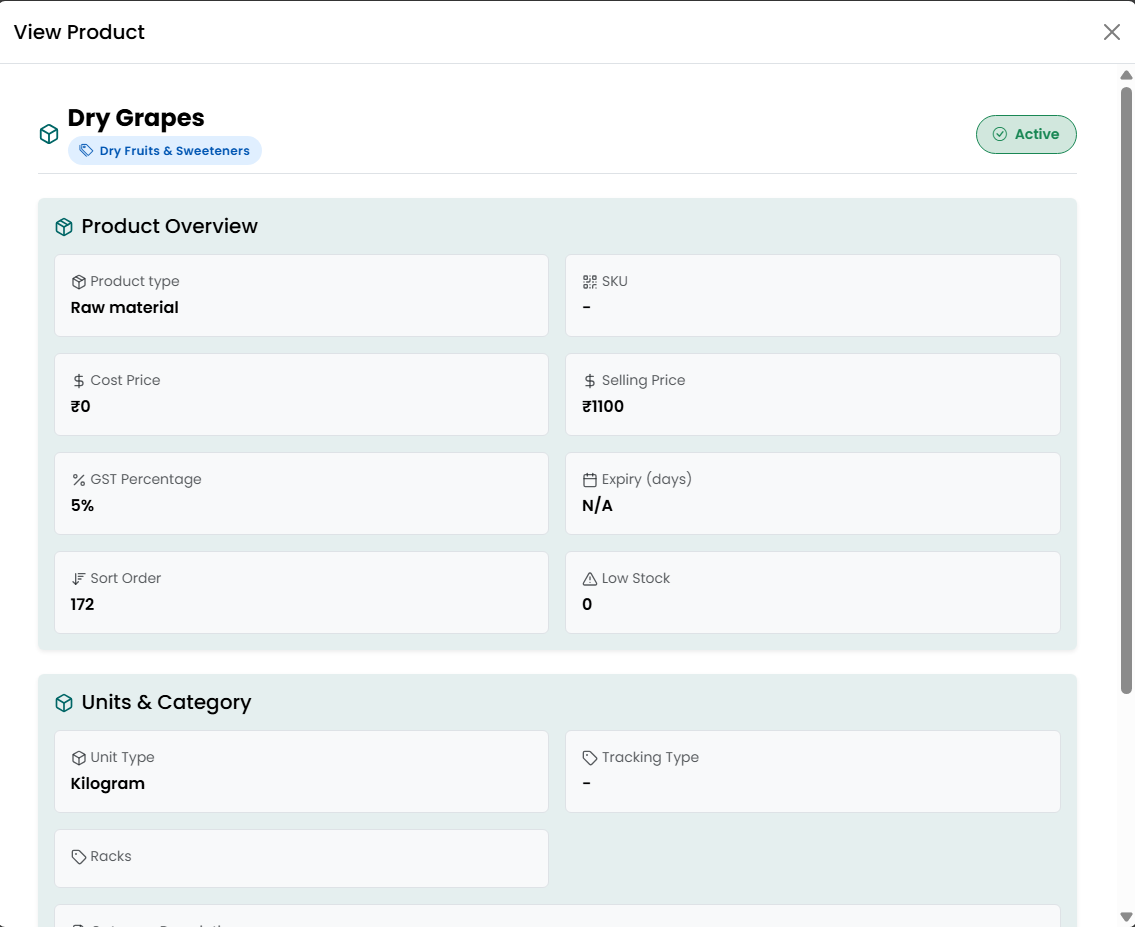
- The following information is available:
• Product Information
■ Product Name
■ Category
■ Product
Status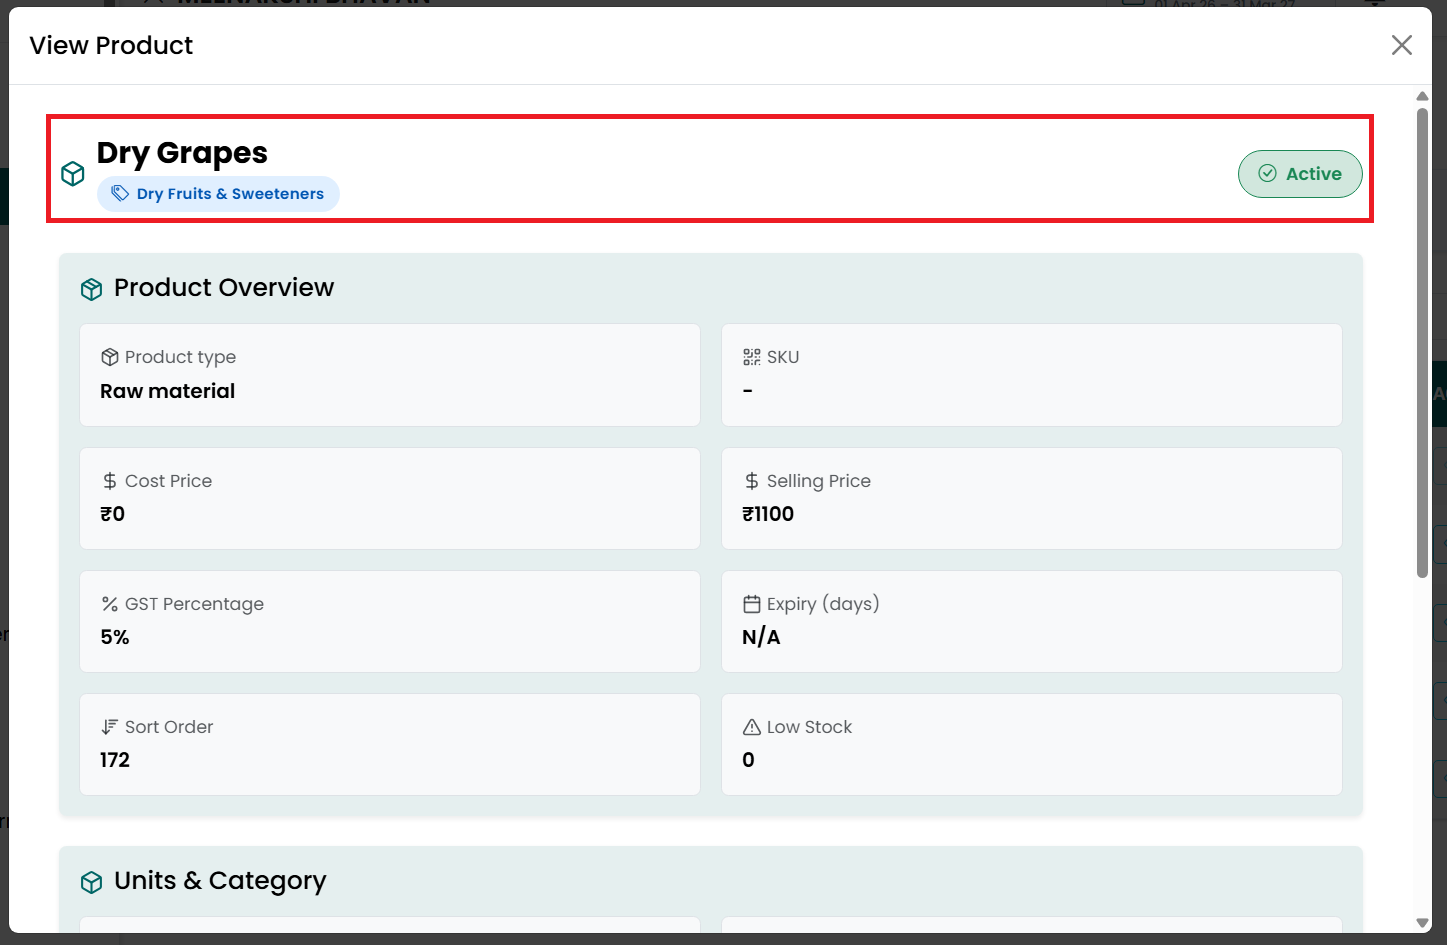
• Product Overview
■ Product Type
■ SKU / Item Code
■ Cost Price
■ Selling Price
■ GST Percentage
■ Expiry (Days)
■ Sort Order
■ Low
Stock Quantity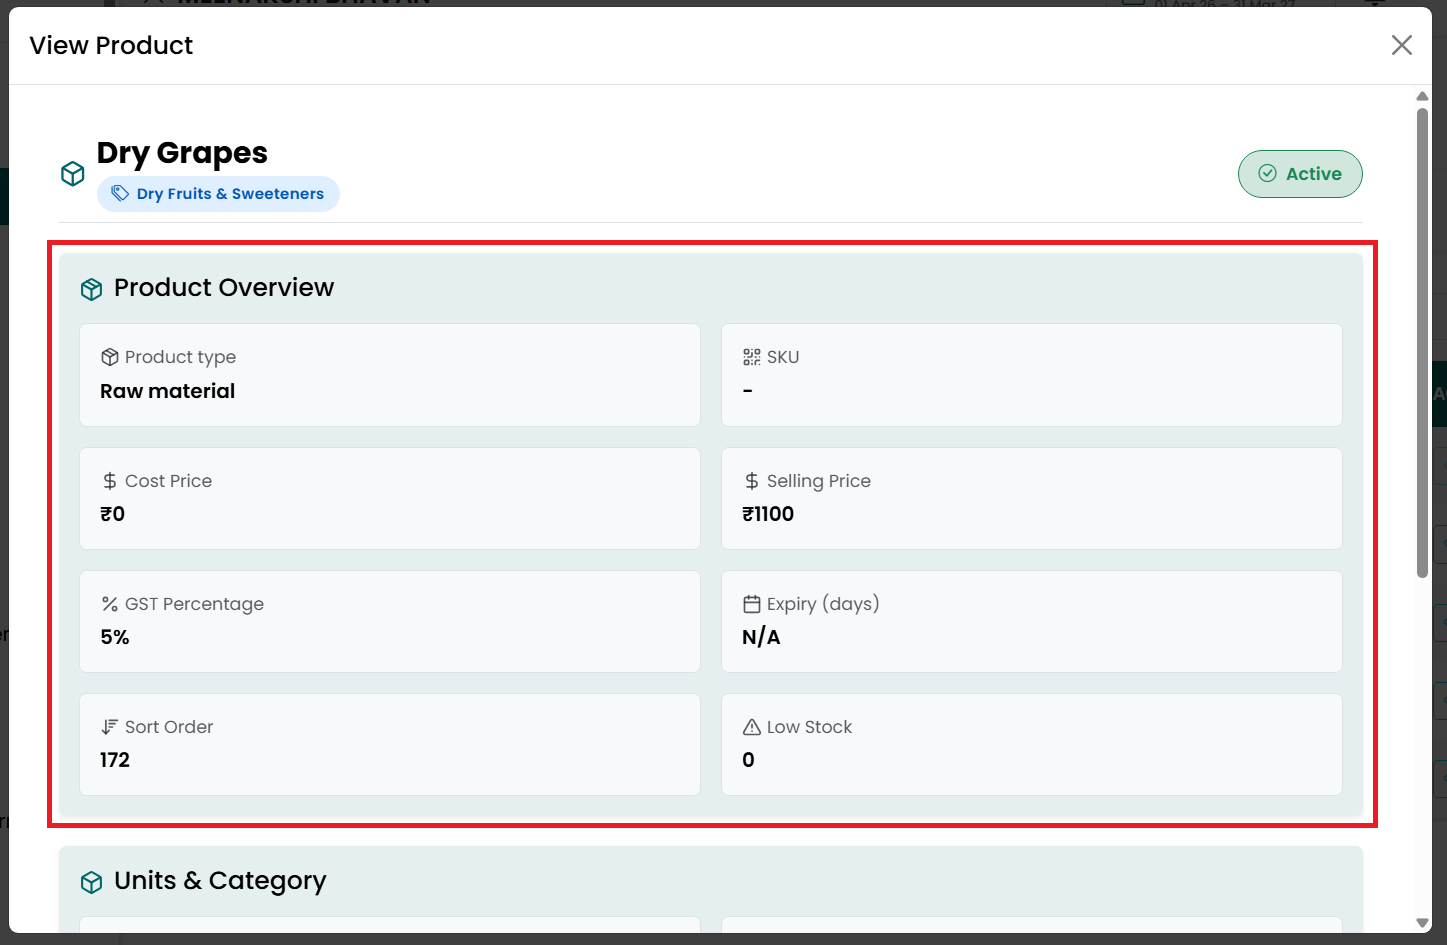
• Units & Category
■ Unit Type
■ Tracking Type
■ Racks
■ Category
Description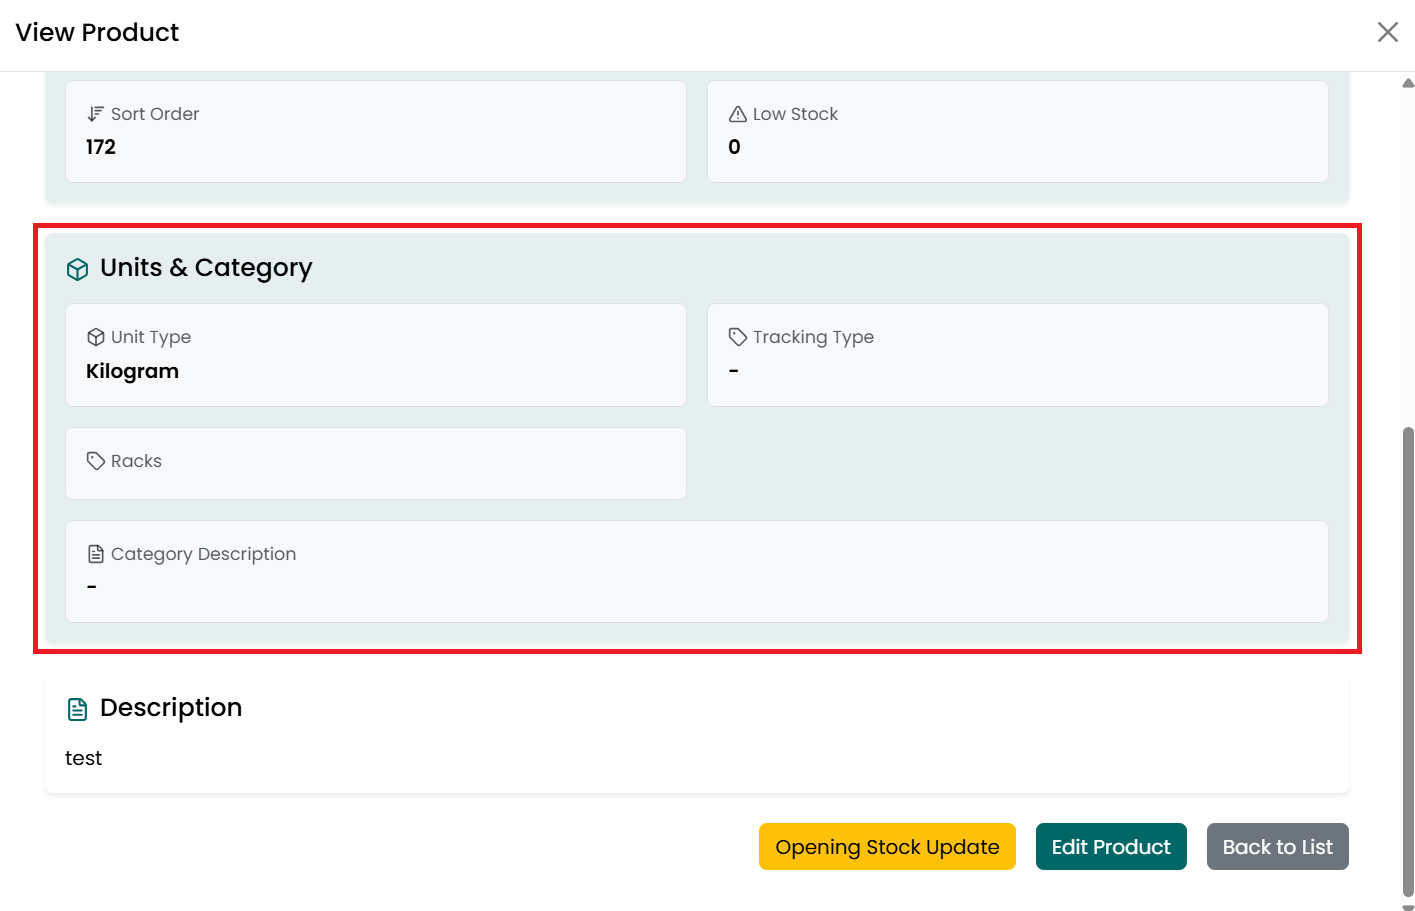
• Description
■ Displays
the description added for the product, if available.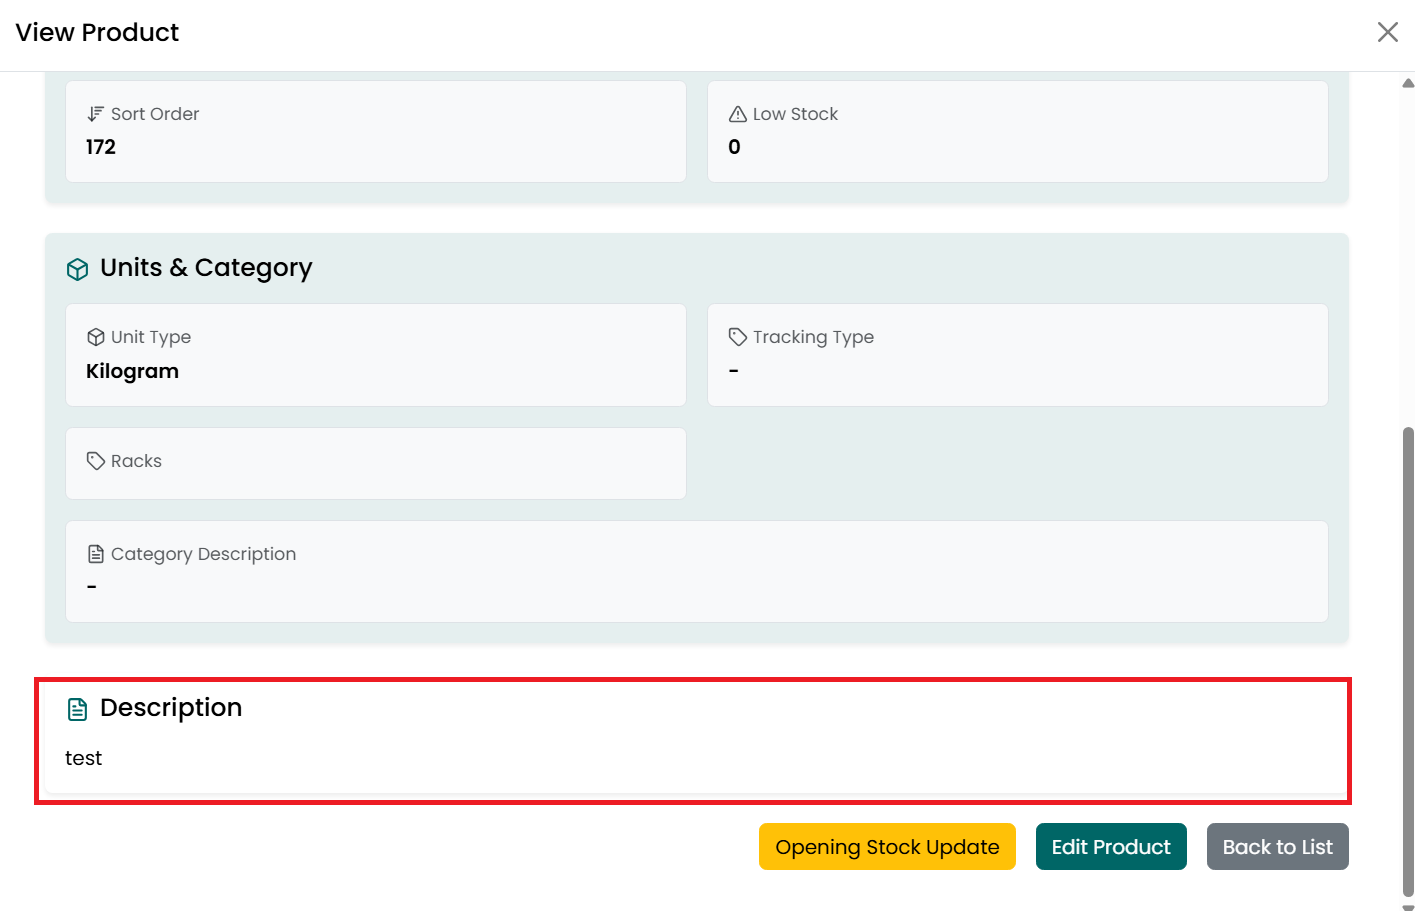
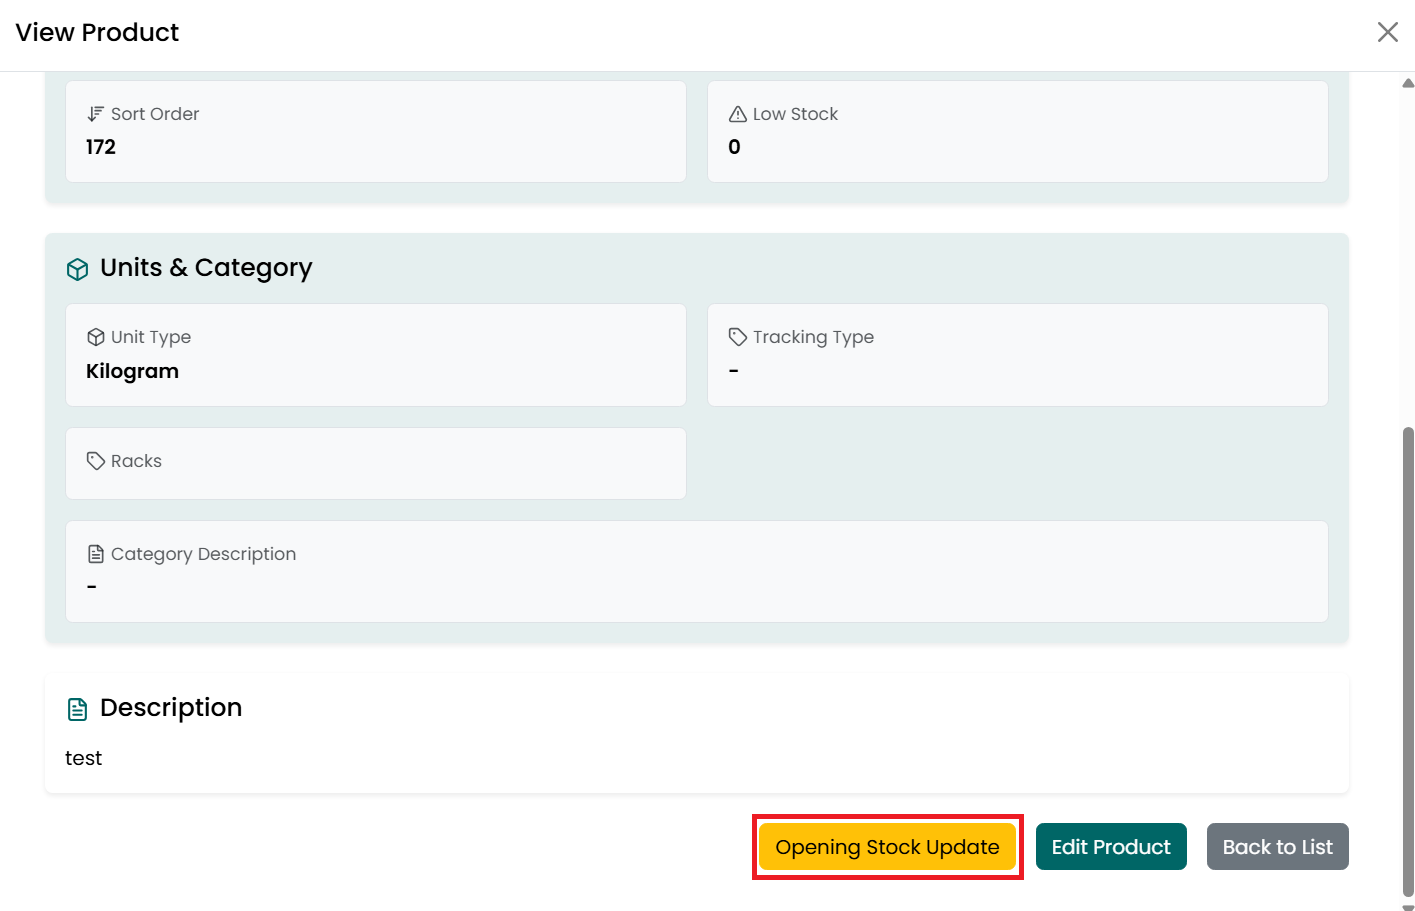
- Click Opening Stock Update to add or
update the opening stock details for the product.
- Click Edit Product to update the
product details.
- Click
Back to List or the X icon to return to the Product Listing page.
Delete Product
To delete a product, follow the steps below.
- Go
to the Main Menu and click Products. The Product Listing page is
displayed.
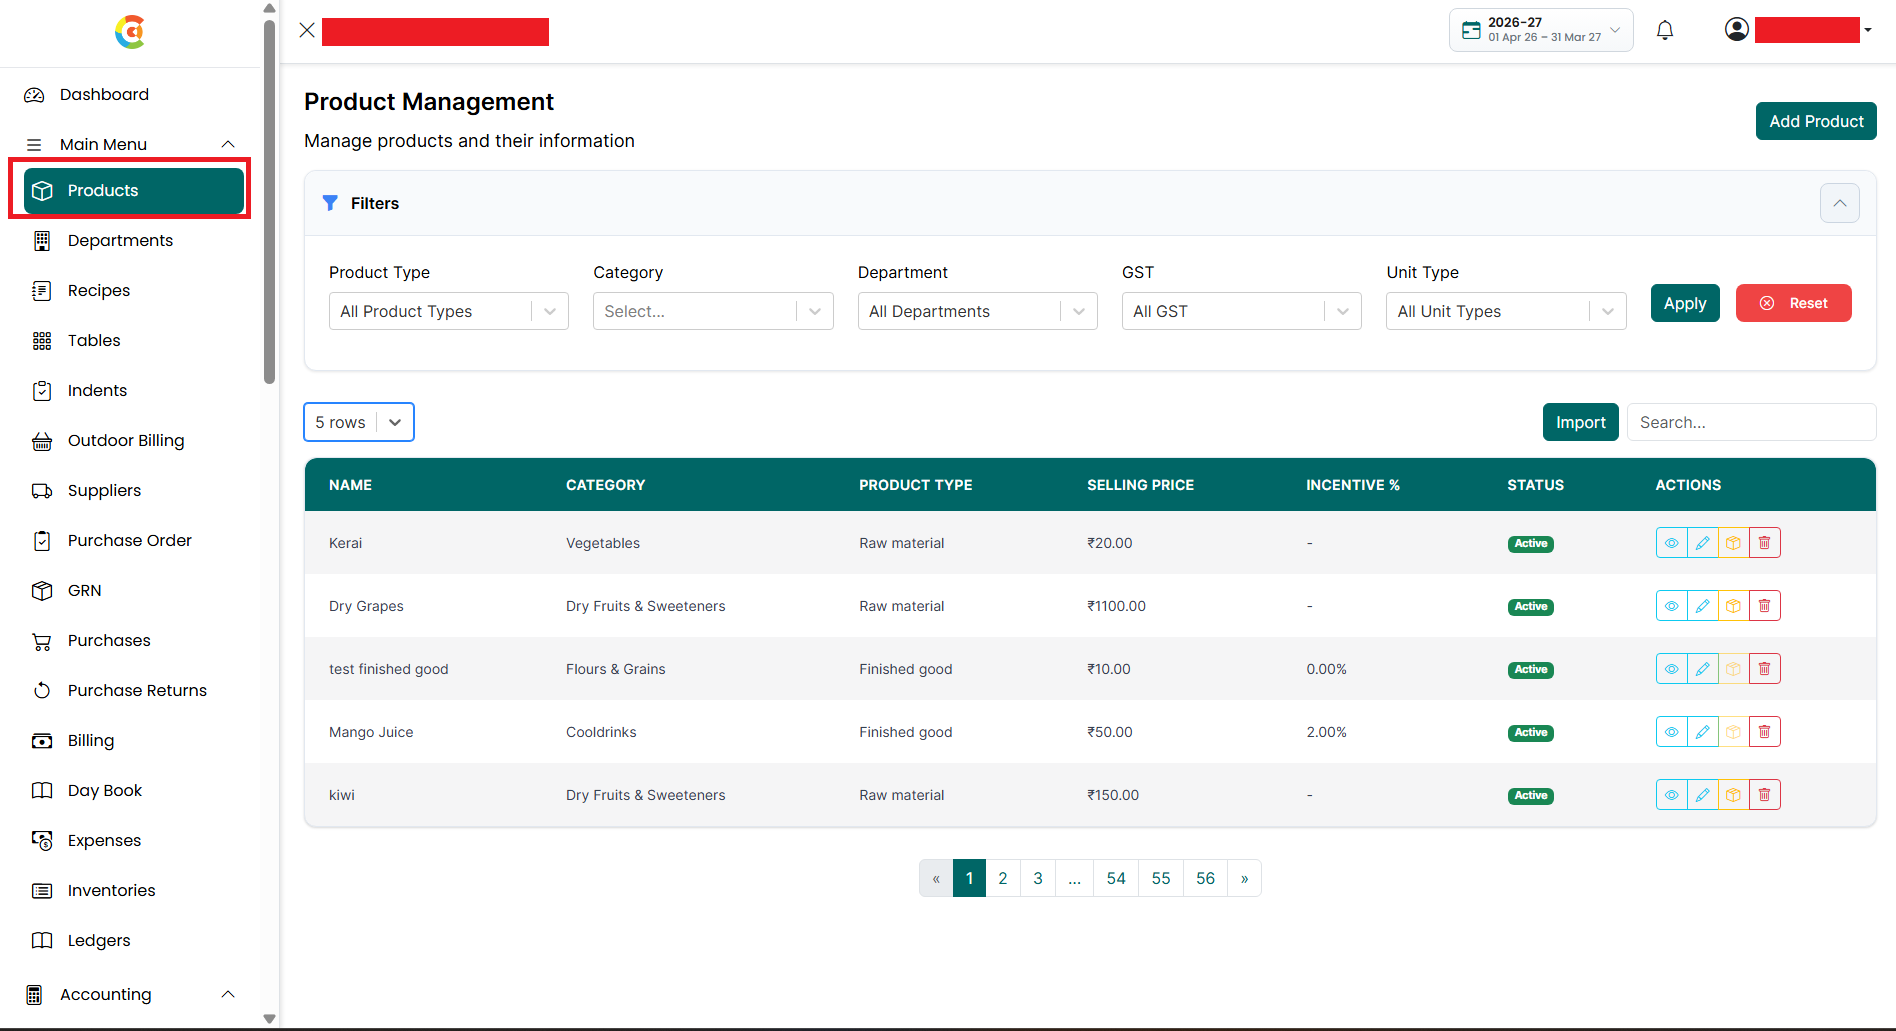
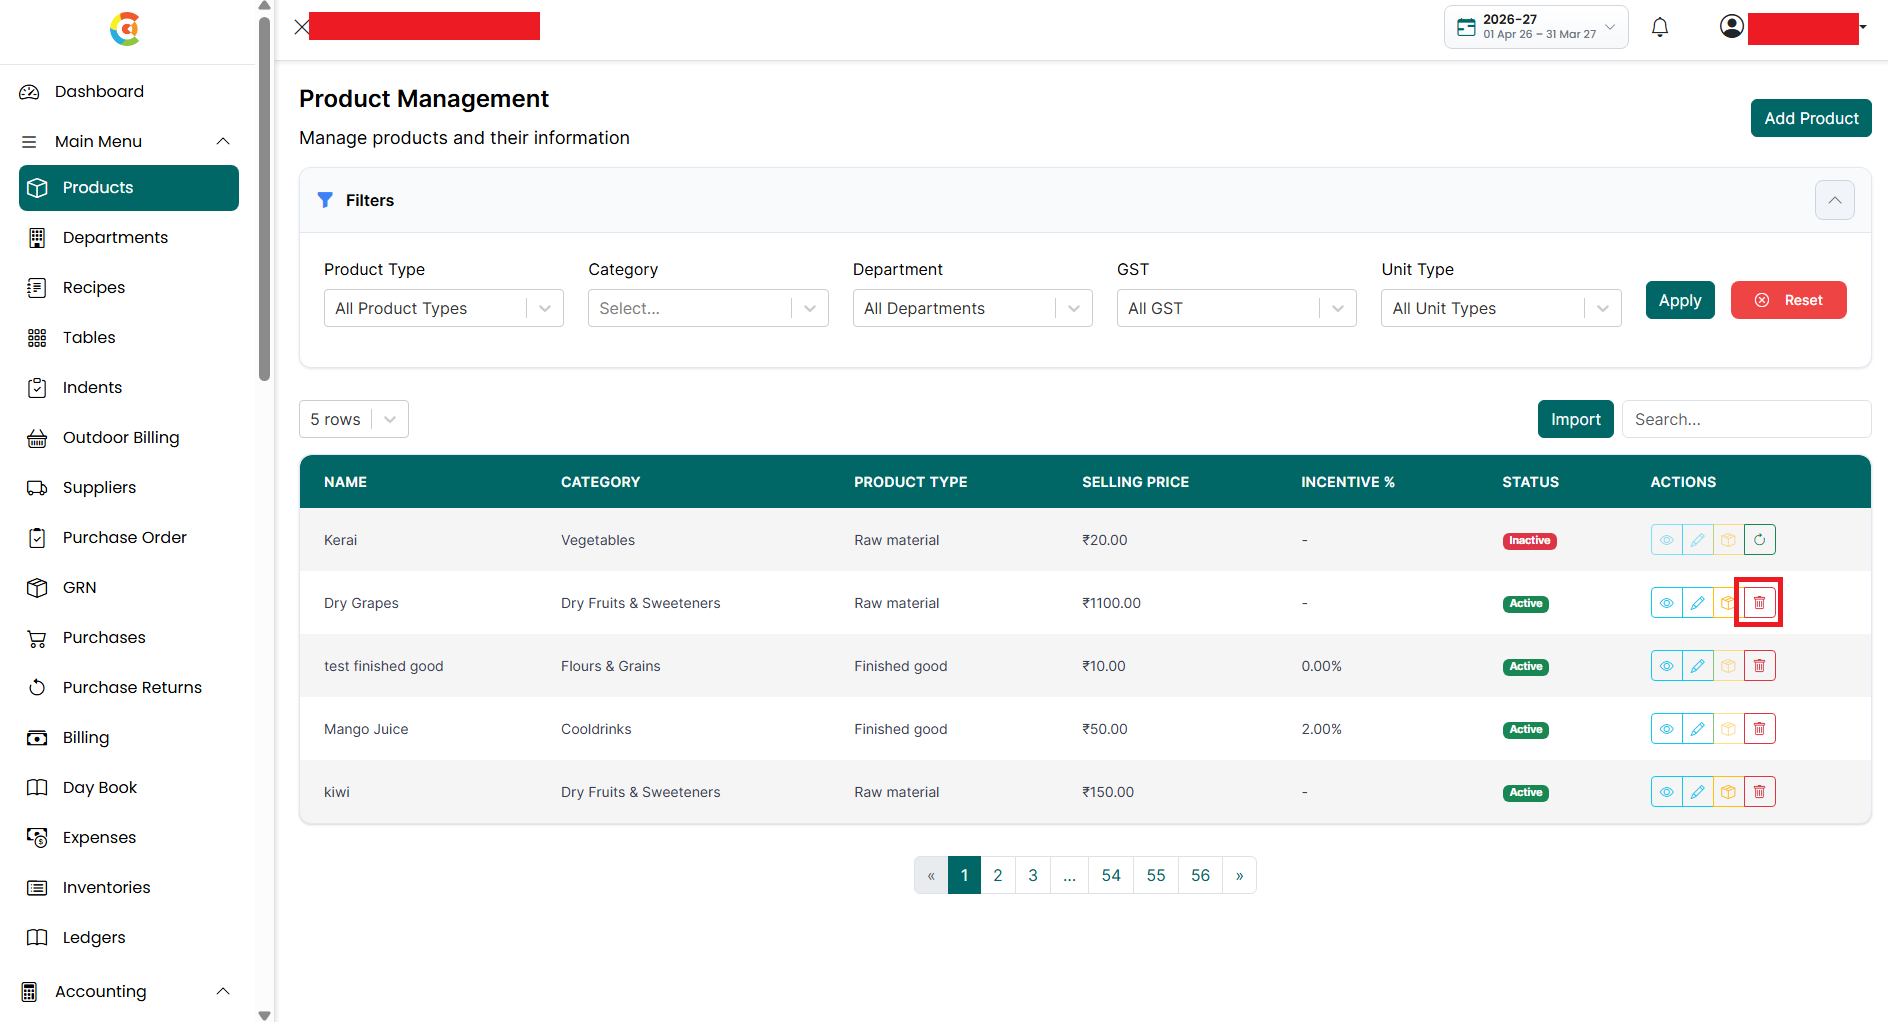
- Find the product you want to delete.
Click the Delete icon.
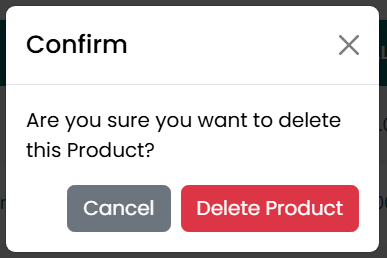
- A confirmation message is displayed
asking if you want to delete the product.
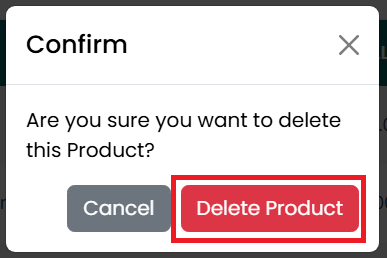
- Click Delete Product to confirm the
deletion.
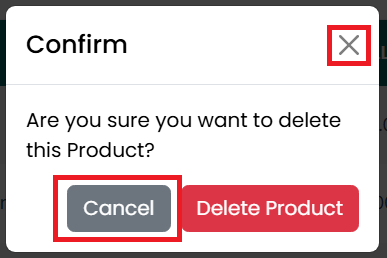
- Click Cancel or the X icon to close
the confirmation window without deleting the product.
- After the product is deleted successfully, a confirmation message is displayed. The product remains visible in the Product Listing page with a Retrieve option. A deleted product cannot be edited, selected, or used in other parts of the application until it is restored.
Retrieve Product
To restore a deleted product, follow the steps below.
- Go
to the Main Menu and click Products. The Product Listing page is
displayed.
- Find the deleted product. Click the
Retrieve icon.
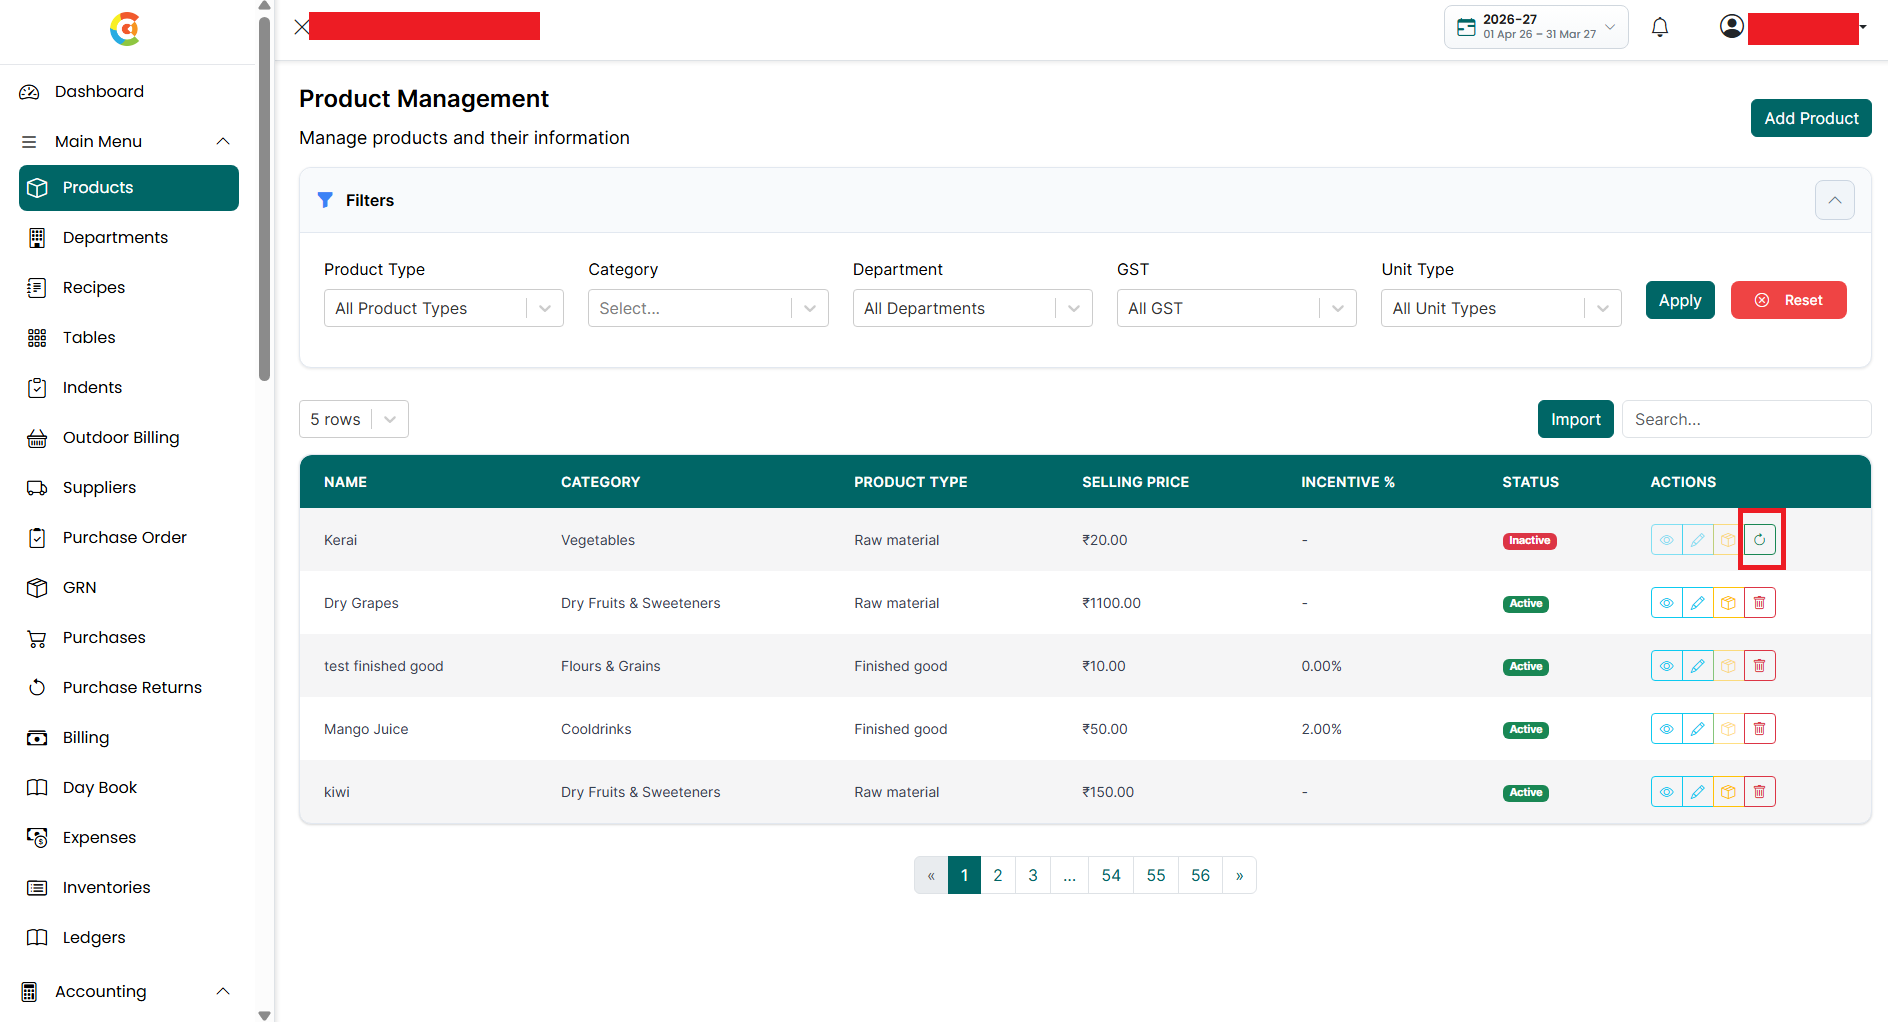
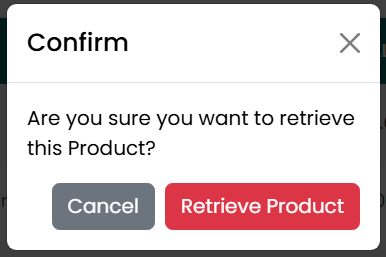
- A confirmation message is displayed
asking if you want to restore the product.
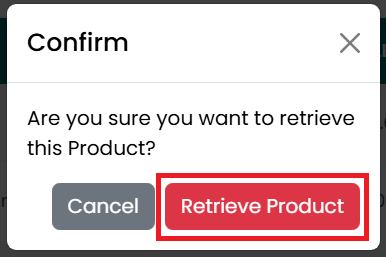
- Click Retrieve Product to restore the
product.
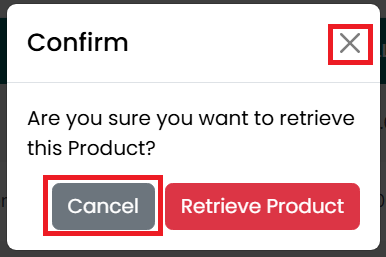
- Click Cancel or the X icon to close
the confirmation window without restoring the product.
- After the product is restored successfully, a confirmation message is displayed. The product becomes active again and can be selected and used throughout the application.